Purchasing Potted Vegetables For Your Garden

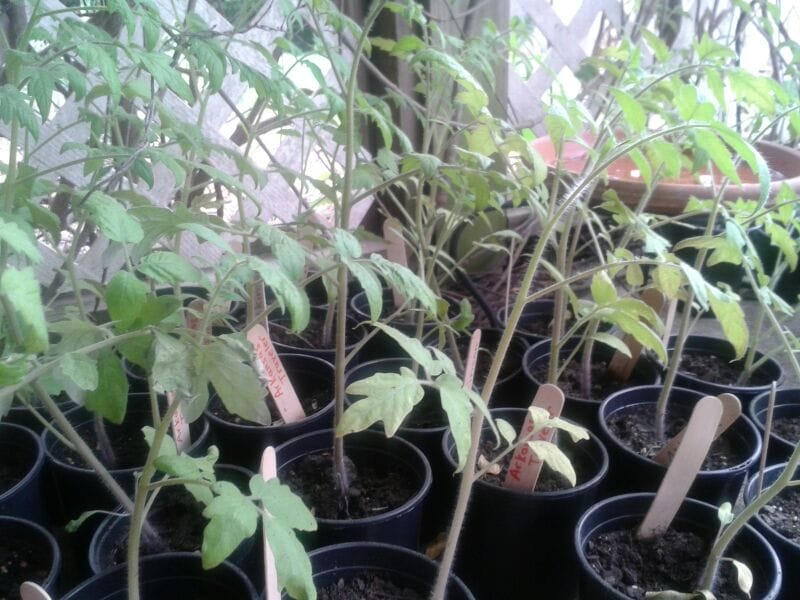
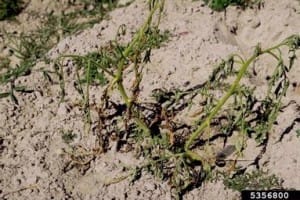
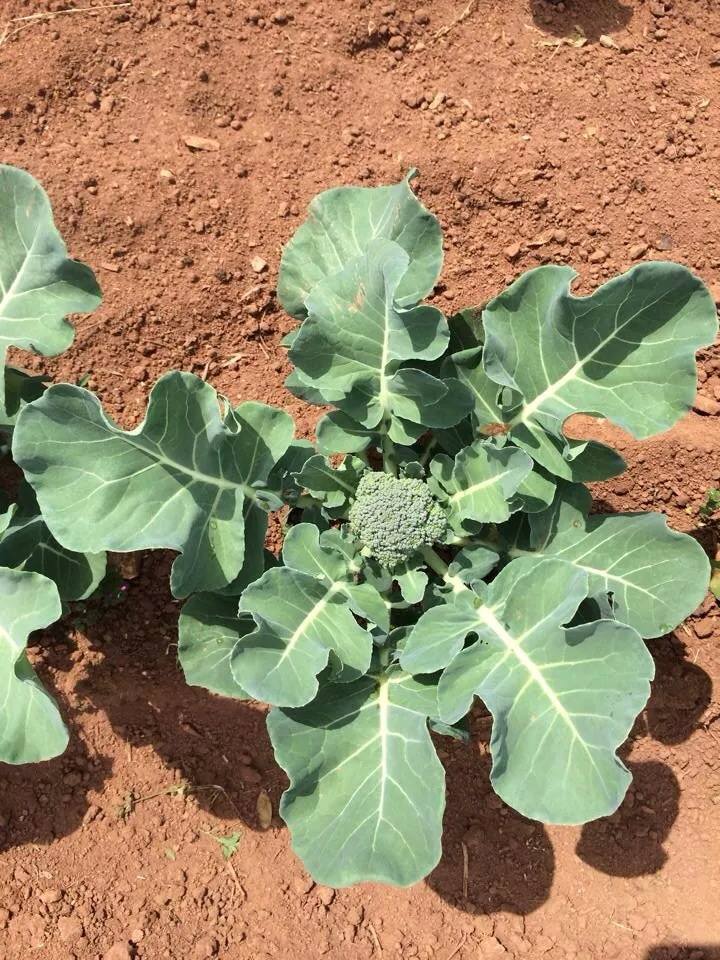
When using potted plants in your Georgia community vegetable garden, start with healthy ones.  Visit quality nurseries or plant stores and choose plants free from diseases and insects.  You don’t want to bring home any problems.  Check where the stem meets the soil for soft spots.  Don’t choose plants that look wilted but have obviously been watered.  That could be a sign of a soil borne disease.

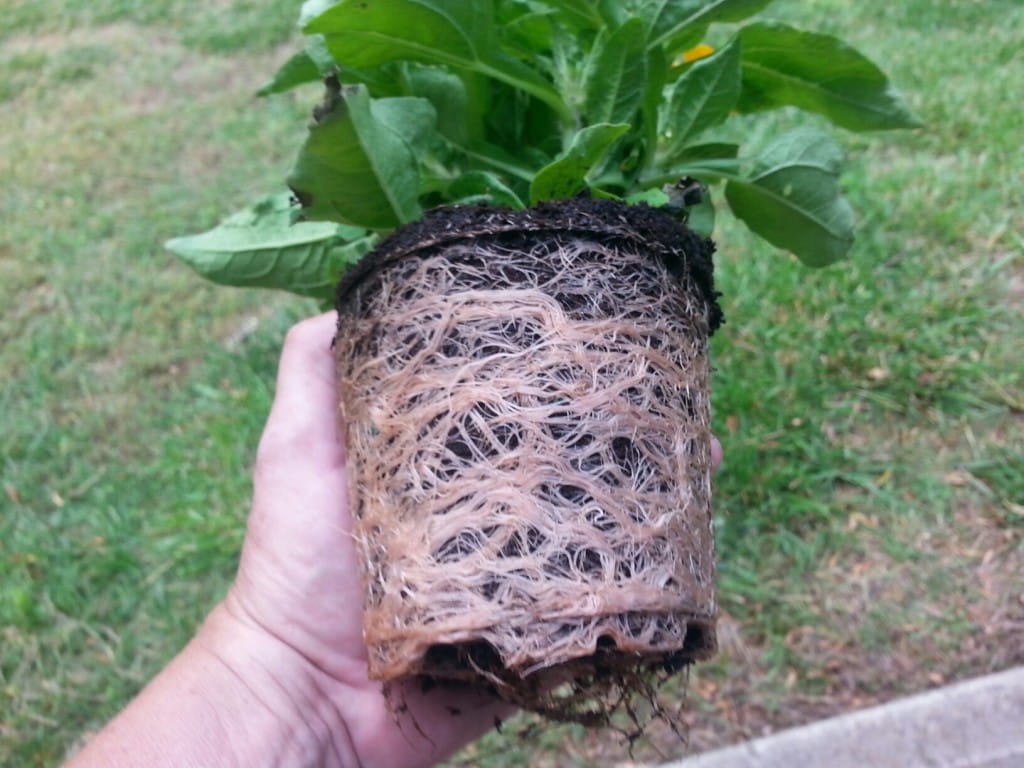
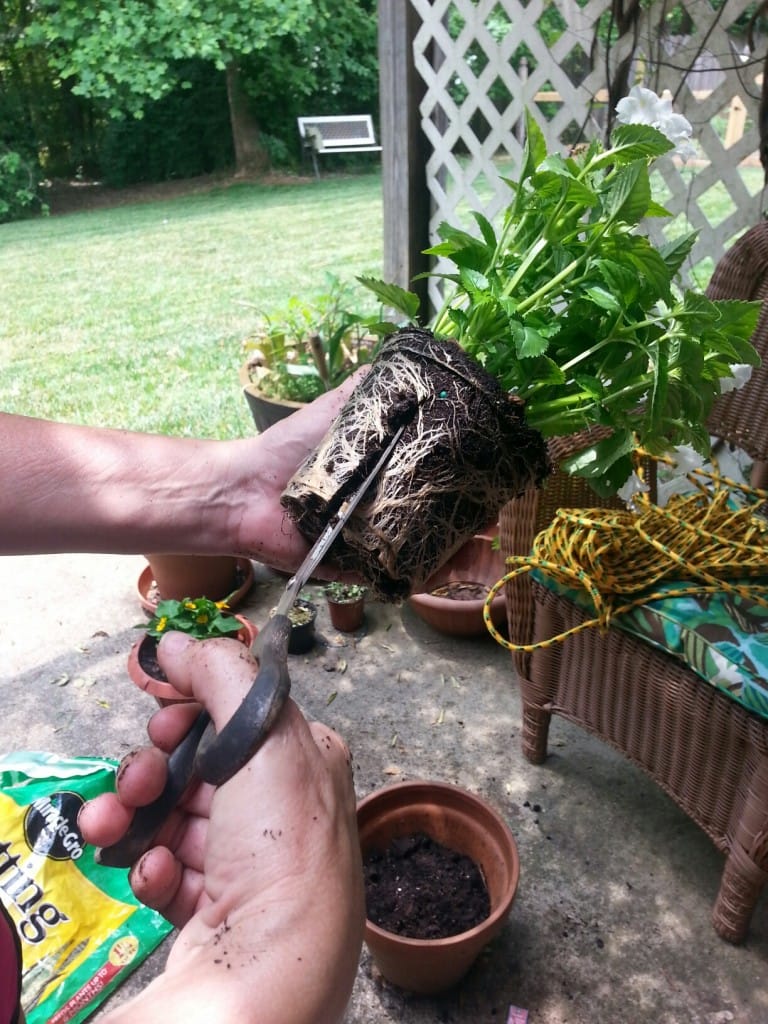
Before planting your new vegetable plants, check the roots.  Sometimes the plants can be root-bound or pot-bound.  The plant was outgrowing the current container and the roots had no where to go in the pot but around the perimeter of the soil.

The roots of this plant need to be disturbed so they will easily grow in the new soil.

Before going into the ground these roots need to be broken apart so that they will venture out into the new soil.  Otherwise, they may keep growing around the soil ball and the plants won’t thrive.   Even after weeks of being in the ground, the plant will easily pull out of the planting hole.  This is an unhealthy plant!

You can break apart roots with your hands or use scissors or a sharp knife (carefully!) to cut an incision into the root ball.  You will need to go about 1 inch deep and about 3/4ths the way up on the root ball.   After cutting gently pull the roots apart.

Cut about a 1 inch slit into opposite sides of the root ball.


Gently separate the roots using your hands.


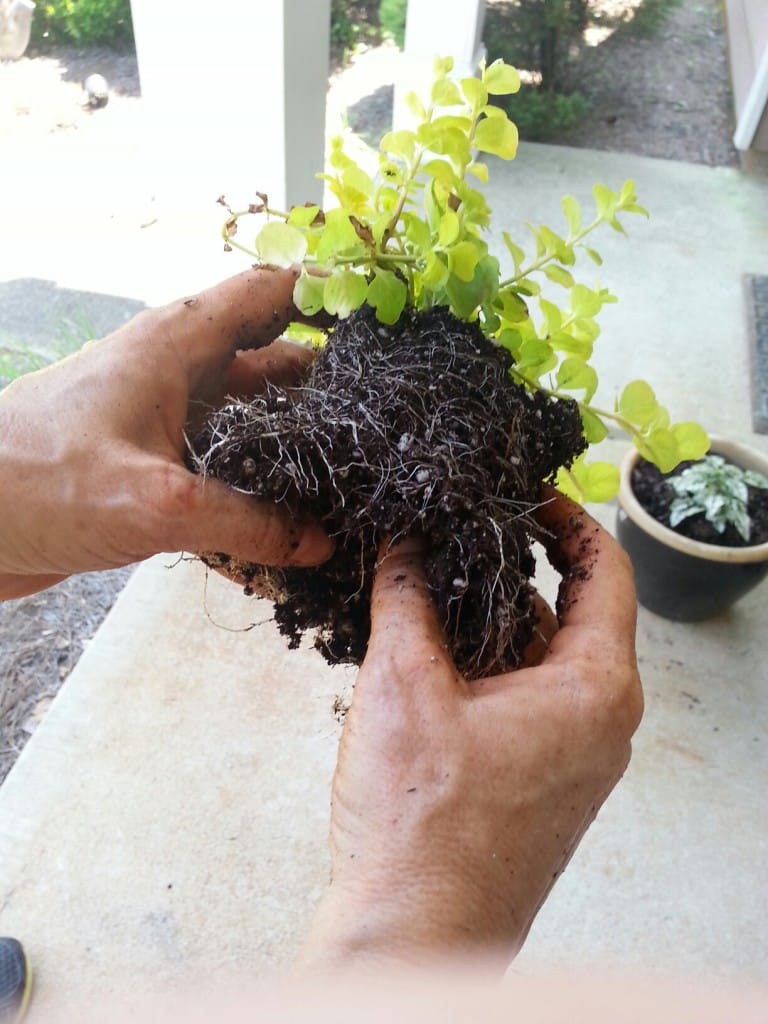
Put the plant in the ground spreading the roots into the soil as much as possible.  This may seem like tough love for an already developed root system but, your plants will be healthier and more productive in the long run.  Remember, your local extension agent has all sorts of information on the correct way to plant just about anything!

Happy Gardening!

Hybrid vs. Open Pollinated vs. Heirloom

As we think about purchasing plants for our Georgia community gardens, especially tomatoes, there are choices to be made.  Is a hybrid the best choice?  What exactly is a hybrid?  What about heirlooms?

Today we are going to think back to our high school genetics class and discuss a bit about plant breeding.  Pollen is located on the anther part of the stamen (male part).  It is transferred by insect, wind, human hands, or other means to the stigma part of the flower (female part).   This is pollination.  There the pollen grows down the style to the ovary. That is fertilization.  Any of that sound familiar?


9.4.2

A hybrid vegetable is created when a plant breeder deliberately controls pollination by cross-pollinating two different varieties of a plant.  The parent plants are chosen for characteristics like fruit size, plant vigor, or disease resistance.  The hope is that the resulting offspring will have the positive characteristics.

Millionaire Eggplant Hybrid

The parent designated as the female has the pollen-bearing anthers removed from the flowers.  Pollen from a carefully chosen partner is moved to the female plant’s stigma by human hands.  The chosen pollen is the only pollen that female receives.  This is all very time consuming and carefully monitored.  Scientifically it looks like this:

Parent 1 (P1) + Parent 2 (P2)  —-> Hybrid (F1)

The resulting hybrid (hopefully) has wonderful characteristics like disease resistance, early maturing fruit, larger fruit, or whatever the plant breeder was trying to achieve.  Before a hybrid is available to the consumer, it has gone through many field tests and trials.  All this is why hybrids are more expensive plants.

One negative to hybrids is that you can’t save the seed.  Seeds grown from hybrid plants do not provide plant types true-to-type.   You need to purchase new hybrids year after year.  Big Boy and Early Girl are examples of hybrid tomatoes.  Millionaire and Early Midnight are popular hybrid eggplants.

Arkansas Traveler tomatoes ready to go in the ground.

Open pollinated vegetables are pollinated in the field by wind or natural pollinators to self or cross-pollinate.  Plants that cross-pollinate need to be isolated from other varieties to produce seed that is true-to-type.  Crops like tomatoes and beans tend to self-pollinate so saving useful seed is not difficult.  Arkansas Traveler, Abraham Lincoln, and Cherokee Purple are popular open pollinated tomato varieties.  Black Beauty is a popular open pollinated eggplant variety.

Heirlooms are generally open pollinated plant varieties that are over 50 years old.  Traditionally the seed has been carefully saved and handed down from gardener to gardener.  These are the plants most treasured.

So whether you choose hybrids, open pollinated plants, heirlooms, or a combination of these…

Happy Gardening! 


Crop Rotation in the Georgia Community Garden

manageing-crop-diseases-in-high-tunnels-2015-23-638Crop rotation is a huge part of integrated pest management (IPM) in Georgia vegetable production.  It is an inexpensive tool in disease and nematode management.  Correctly using crop rotation can cut down on pesticide use and result in healthier plants.  Growing Vegetables Organically has some great information on this type of IPM.

As we are all planning our warm-season gardens crop rotation is something to consider.  However, it is a whole lot easier to rotate crops around a 3 acre farm than it is to move them around a 32 square foot garden plot.  How do we practice crop rotation in the community garden?  It is even necessary?

Crop rotation has been around for centuries.  Simply it is changing what is planted in a particular area each year.  Planting the same crop year after year in the same location causes disease pathogens to build up and become a real problem. Rotating crops helps break this disease cycle.  Also, since different crops use varying amounts of plant nutrients, crop rotation is a wise use of the nutrition in your soil.

Plants can be divided into families.  Learn those plant groupings because many pathogens infect crops in the same families.  The basic rule of crop rotation is:

Don’t plant crops from the same plant family in the same place every year. 

Crop families:

Onion family (Alliaceae):  chives, onions, garlic

Cole family (Brassicaceae):  lettuce, collards, cabbage, broccoli, spinach

Squash family (Cucurbitaceae):  pumpkins, watermelon, squash, cantaloupe

Bean family (Fabaceae):  beans, peas

Tomato family (Solanaceae):  tomatoes, peppers, eggplant

Since tomatoes and peppers are in the same family (Solanaceae),  don’t plant tomatoes where you have been growing peppers.  And, don’t follow squash with pumpkins (same Cucurbitaceae family).  Many farmers follow a four year or even longer rotation plan.  Their lettuce won’t see the same piece of soil for several years.  This helps lower disease pressure and cuts down on fungicide use.  Many Master Gardeners usually try for a three year rotation for a large garden area.

We know that crop rotation works to help create healthier plants but how does that translate in a Georgia community garden plot?

The best way is for the community gardener to choose plants from different families each year.  This isn’t always practical.  A gardener wants to grow what his/her family likes to eat.  That may mean beans every year.   The #1 vegetable grown in community gardens is tomatoes – year after year!

So, maybe you work with your fellow community gardeners and rotate who grows tomatoes and you all agree to share the tomato harvest.  This may not always work, either.  Some gardeners want lots of tomatoes every year.

Move your pole beans to the other side of the plot this year.  Buy your tomatoes from the farmers market this year and try growing squash.  Better yet, try growing and eating something entirely new.

An old fashion mattock may be your only tool for some modified rotation in your community garden plots.
An old fashioned mattock may be your only tool for some modified rotation in your community garden plots.

At the very least Bob Westerfield, UGA vegetable specialist, recommends turning your soil over.  Dig deeply bringing  up soil that hasn’t been exposed to the sun.  Go as deep as you are able.  In a small way you are not rotating your plants but rotating your soil.  Your UGA Extension agent can help you come up with a plan for crop rotation that will work for your situation.

Happy Gardening!


Cooking with Georgia Kale and Seth Freedman

Chef Seth Freedman at work.

Chef Seth Freedman is a Southern man with New York chef training.  That can be the best of both worlds!   He still cooks with his grandmother’s cast iron skillet but using advanced culinary techniques.

Owner of Forage and Flame, Seth specializes in catering for groups large and small.  He enjoys educating people about cooking locally grown food.  In addition to Forage and Flame, Seth is a partner at Peach Dish where you can order fresh ingredients with recipes and have them delivered to your home for preparation.  And, Seth loves his greens!

Recently he shared a kale recipe at the Georgia Organics conference.  For those of us who are not kale lovers, we were impressed.  I asked Seth if I could share the recipe and tips and he happily said “YES!”.

Kale and Apple Salad

1 bunch of kale

2 TBSP apple cider vinegar

1/4 cup olive oil

2 tsp honey

2 apples (crisp and sweet)

salt and pepper to taste

1.  Remove stalks from the kale and discard them.  Wash leaves and slice them thinly.

Massaging the kale is the most important step in the recipe.

2. Dice apples into 1/4 inch cubes.

3. In a large bowl, mix vinegar with honey and ground pepper.  Drizzle in the 1/4 cup of olive oil while whisking.  Pour dressing into another container.

4.  Add kale and a small sprinkle of salt to the large bowl.   Using your clean, bare hands massage the kale with the dressing left on the sides of the bowl. Seth says to squeeze them so that you are actually bruising or breaking the greens a bit.  Squeeze, mash, massage – really get in there.  This helps take some of the bitterness out of the greens and is the secret to this recipe!

5. Pour the rest of the dressing over the kale and add the apple dices.  Adjust seasoning, toss and serve.

Seth says that really any Georgia grown green will work in this recipe – mustard greens, collards – whatever you have growing in your garden plot.  Remember the squeezing, mashing, massaging is the key!

image copyLet us know if you prepare this recipe and what you think of it.  If you would like to contact Seth you can reach him at seth@peachdish.com.  Thanks again, Seth, for sharing your expertise!

Happy eating!


For the Love of Georgia Kale

Kale plants are loose leaves and do not form heads.  Photo courtesy of Purdue University.
Kale plants are loose leaves and do not form heads. Photo courtesy of Purdue University.

Kale seems to be the vegetable of the year.  The nutritive properties of kale are legendary.  It is high in vitamins A and C and loaded with fiber.  You can find it raw in salads, sautéed in stir-fries, fried into chips, steamed in to a side dish and pureed into smoothies.  The good news for community gardeners in Georgia is that kale is easy to grow.  It is a cool-season crop and March is the time to plant kale transplants outdoors.

March weather in Georgia can be tricky.  If you have grown your own transplants from seed indoors, it is imperative that you harden off your plants.  Give them a chance to acclimate to being outdoors by setting them out in a protected area, like on a porch, during a sunny day with no wind.  Leave them out only during the day at first.  Gradually expose them to a less protected area and then let them be out overnight.  Once they are in the garden, protect them from wind.  Wind can dry out the plant and damage the plant tissues.

Add compost to the kale bed before planting or add high nitrogen amendments such as blood meal or cottonseed meal.  Nitrogen is important since you are growing the plants for the leaves.  Space the transplants 18 to 24 inches apart since the plants will get large.  Mulch helps keep soil temperatures and moisture even.

Many gardeners say the key to tender kale is the watering.  Keep the transplants well watered.  As they grow make sure they get about 1 inch of water per week.  During the cool temperatures of spring, it is easy to forget to water.

When the plants are ready for harvesting, start with the outer and lower leaves.  Remember the smallerimage copy 2 leaves will be more tender and would probably be better in salads then the tougher, larger leaves.  As the soil temperatures warm up you will find the plant grows faster.  As it approaches really warm weather and longer days your established plants may bolt sending up a flower stalk.  This is your cue to replace the kale crop with a warm-season vegetable.

Varieties such as “Vates”, “Dwarf Siberian” or “Red Russian” are popular with Georgia gardeners.    If you don’t have room in your early spring garden for growing kale, consider putting it in your fall garden.

Next week we will have a kale recipe from a famous Georgia chef.  It is a good one!

Happy Gardening!


Compost in 2015-A Guest Post by Mary Carol Sheffield

Resolve to live more sustainably in 2015 by creating a compost pile or bin to help reduce waste.

Worms in Compost - photo by Sharon Dowdy
Worms in Compost – photo by Sharon Dowdy

Many items thrown into the trash can be sorted out and composted and benefits go well beyond waste reduction. Compost can be used to improve garden soil and make landscapes and vegetable gardens more productive. With a little organization and a designated space, gardeners can amend their own soil through composting.

Start by finding a space where the compost can “cook.” The location should be in full sun, at least 3 feet by 3 feet by 3 feet, out of the way and with good drainage.

A compost container can be bought or built with materials like welded wire, fencing, pallets or blocks. Open spaces should be left on the container’s sides to allow good air circulation through the pile, and the bottom should be open to the ground.

Just like cooking a meal, cooking compost involves following a recipe. Almost any organic plant material

Compost bins at the North Fulton Annex Community Garden

can be used for composting, including grass clippings, leaves, flowers, annual weeds, twigs, chopped brush, old vegetable plants, straw and sawdust.

Avoid composting diseased plants, weeds and seeds or invasive weeds, like morning glory. Vegetable peelings and coffee grounds can also be composted, but avoid adding meats, bones and fats that may attract animals.

For best decomposition, mix a variety of materials. Most compost piles are layered with whatever organic material is available at a given time. The smaller the pieces of organic matter, the faster they will decompose. Once a layer of organic matter is added, add a little garden soil or animal manure. This adds fungi, bacteria, insects and worms to the pile and helps speed up the decomposition process.

Keep the pile moist, but not too wet. To speed up the decomposition process and prevent odors, use a shovel to mix the pile once a month. Compost is completely “cooked” and ready when it looks like rich, crumbly earth and the original organic material is no longer recognizable.

With every mix of the pile, some ready-to-use compost should be available. This compost can be added to the soil before planting vegetables or trees, shrubs or flowers. It can also be used as mulch on the soil surface, or as a potting soil for container plants.

Completely cooked compost will slowly release nutrients into the soil, but don’t rely on it for fertilization. Your plants will still need to be fertilized appropriately.

For more on how to begin composting see University of Georgia Extension publication “Composting:  Recycling Landscape Trimmings.

Mary Carol Sheffield is the University of Georgia Cooperative Extension agricultural and natural resources agent in Paulding County.   Mary Carol’s vegetable garden is small to match her children! They love to help her there and have their own kid size tools and gloves.

Happy gardening!


Grow UP with Trellises

With the limited space of a community garden plot growing UP is a great option.  Not only will you produce more food crops per area, but you help keep the food out of the reach of rodents.  For many crops keeping them off the ground increases air circulation and lessens the chance of diseases and rots.  Cucumbers, runner beans, peas, and pumpkins are examples of crops that can grow up.  Going vertical means you will need support in the way of a trellis.

Woodstock Community Garden

These two trellises are simple – posts with wire or string between.  Adding a beam across the top will help stabilize the structure.  This is helpful for lightweight crops such as beans or peas.  Make sure the posts are deeply placed in the plot so they will be secure and not easily blown over.  Also, make sure your wire or string is strong enough to hold the weight of the food crop.

Woodstock Community Garden


This teepee shape is popular for trellising runner beans.  In most cases string or wire is woven between the posts. If the tee-pee is large enough it can even be a nice hideout area for a young child.  Just trellis the beans on two of the three sides leaving one open.

Trellis 2


Stone Mountain Community Garden


The trellises in this picture are a bit more complicated.   They are engineered for the posts to lean on each other for partial support.  Posts across the top help with stablization.


Here the chain link fence around the community garden is used to support pumpkins which appreciate the air circulation of growing UP.

Huntsville Botanical Garden


Notice how this larger pumpkin has the support of a mesh sling.  Heavier food crops will need support so gravity doesn’t separate them from the vines.

Huntsville Botanical Garden


Gardening in a small space often requires creativity.  Growing UP is one way to be creative!  Visit other gardens of your local UGA Extension office for more ideas.  After all, these aren’t your grandfather’s row crops.

Happy Gardening!

Georgia Peas, Please

Even though we are all in frozen shock with frigid winter temperatures, we are happy to report that there is garden work to do.  Peas are a cool-season crop and it is almost time to plant them.  Garden peas, snap peas, and snow peas all go in to the ground about the same time.  Garden peas are also called English peas and require shelling as only the pea seeds are eaten.  Snap peas are relatively new to the vegetable garden and the entire pea pod with seeds is eaten.  Snow peas do not develop large pea seeds and the pods are often used in stir-fry dishes.

Photo courtesy of Colonial Williamsburg - Twig Trellis
Photo courtesy of Colonial Williamsburg – Twig Trellis

Peas require full sun and most of them require some type of trellis.  The trellis is helpful to support the pea vines and to keep the pods off the ground to help prevent rot.   Some pea varieties are short, only 2-3 feet tall, while others can have vines as long as six feet.   Read your seed package well to know what to expect.  For a community garden plot, the easiest way to manage this crop is to put the trellis at one plot end and use the other space for additional cool-season vegetables.  (See UGA’s Vegetable Planting Chart for some ideas.)  Some gardeners use tomato cages they already have on hand.  In colonial times, tree branches were put in the ground as small twig trellises.  Some people prefer to just have a pea patch.

Start with well drained soil having a pH of  6.0-6.8.  Forward thinking gardeners get their pea beds ready in the Fall so that all that is needed is the planting.  The seeds should be planted 1 inch deep and 1-2 inches apart.  Peas work with bacteria in the soil to “fix” nitrogen.  This process take a while and it could be advantageous to use nitrogen-fixing soil inoculant just before planting.  You may want to split this purchase with other gardeners as the inoculants usually have an annual expiration date.   The inoculants are available through many seed companies; check your seed catalogs.

Literature says to plant peas as soon as the soil can be worked.  For the Southern gardener this is misleading as our soil can often be worked all year long.  The trick is to plant the seeds when the soil is warm enough for germination and the plant will grow and produce the vegetable before the weather gets too warm.  If seeds sit in very cold, wet soil for long they may rot.  Pea vines are more resistant to freezing than the pods.  This is helpful as the vines will develop first.  Timing is everything!

Soil temperatures need to be at least 45 degrees F.  (Check out www.georgiaweather.net.)  The warmer the soil temperatures the faster the peas germinate.  You can use dark plastic mulch around the seeds to warm the soil a bit.  Pay attention to the days to maturity number on your seed package as this can help guide you in a planting date.  For Northern Georgia start checking the soil temperatures the last week of  January.  Have them planted before March 1st.

Peas are best eaten as soon as possible after they are picked so harvest often.  All types are delicious to snack on as you work in the garden!  Some recommended varieties of garden peas are Wando (which is somewhat heat tolerant) and Little Marvel, and Improved Maestro.  Wando and Little Marvel are favorites of many Master Gardeners.  Some gardeners choose not to trellis these types and just to have a pea patch.   If you are growing snap peas consider Sugar Snap or Sugar Daddy.  Snow pea gardeners enjoy growing the Norli variety.   Your UGA Extension Agent and Master Gardeners can give you information on other varieties of peas to try growing.

We close with a gardening wives’ tale – ” If a girl finds nine peas in a pod, the next bachelor she meets will become her husband.”

Happy Gardening!

Using IPM in the Georgia Community Garden

You may have heard about integrated pest management (IPM) and wondered if it is something only farmers use.  Actually IPM has a real place in any type of gardening, including your community garden plot.  According to the UGA Integrated Pest Management website this is the definition of IPM:

It is a science-based decision making process that employs biological, mechanical, cultural, and chemical control methods in such a way as to minimize economic, environmental, and public health risks associated with pests and pest management practices.

Notice it is science-based decision making.  This is important.

In practice, the gardener employs many different strategies to combat an insect pest or disease instead of just reaching for the chemical spray.  For a very basic example a gardener wants to grow tomatoes knowing that Fusarium wilt can be a problem.  (Fusarium wilt is a fungus that lives in the soil and infects plants through their root systems.)  This gardener will employ IPM by:

  • Fusarium wilt on tomatoes. Photo from bugwood by William M. Brown, Jr.
    Fusarium wilt on tomatoes. Photo from bugwood by William M. Brown, Jr.

    making sure his/her soil is healthy

  • growing healthy plants using recommended fertilization and watering practices
  • learning about the Fusarium wilt fungus and its biology
  • choosing tomato cultivars that show resistance to Fusarium wilt – these will have the letter “F” after the cultivar name
  • caring for garden equipment by proper disinfection and not using equipment from another gardener that has not been disinfected
  • being aware of the hot, dry weather that favors Fusarium wilt and looking for wilting especially during these conditions
  • destroying any infected plants
  • practicing crop rotation

With IPM, actions are taken to prevent diseases and pests from becoming a problem.  Rather than simply eliminating the pests that are found right now,  using IPM means the gardener will look at environmental factors that affect the pest and its ability to do damage.  Armed with this information, the gardener can create conditions that are unfavorable for the pest.  Know your enemy!

Your local UGA Extension agent can help you make a positive disease or insect identification so that you can make a plan to deter the problem.

Aphids on tomatoes from bug wood. Photo by Brian Kunkel

Learning when and where an insect pest lays her eggs can help you find those eggs and remove them.  Determining what weather conditions favor a disease can help you adjust your planting date to avoid the peak of the disease.  Finding out how a disease is spread can also help you combat it.  Is it soil-borne or are fungal spores spread with wind?  Also, what beneficial insects prey on your insect pest and how can you attract those helpful insects?

Subscribing to this blog and other researched based information sources can help you know what diseases or pests are problematic in your area and what you can do about them.

If you haven’t visited the Upcoming Classes page of this blog, please do so.  There are many classes and workshops coming up.  Many are free and some are offered online.

Happy Gardening!


Making the Most of Your Georgia Grown Broccoli

broccoliOn this eve of Thanksgiving, are you thankful for planting broccoli in your community garden plot?  Are you planning broccoli casserole, broccoli cheese soup,  or buttered broccoli for your Thanksgiving table?  Did you know that broccoli is easily preserved in the freezer?

UGA’s book So Easy to Preserve gives clear cut instructions for freezing broccoli so that it stays tasty for later cooking.   Start with firm young, tender stalks with compact heads.  Remove all leaves and woody portions.  Separate the broccoli heads into conveniently sized sections.

Mix 4 teaspoons of salt into one gallon of water.  Soak the broccoli heads in the salt water for 30 minutes.  This tip helps remove insects.  You may be surprised at what is left behind in the brine.

Once soaking is complete, split the heads lengthwise so that flowerets are no more than1 1/2 inches across.  Water blanch 3 minutes in boiling water or steam blanch for 5 minutes.  Blanching is just exposing the vegetable to  boiling water or steam for a very specific period of time.  Blanching brightens the vegetable color, helps retain vitamins,  and makes the vegetable easier to Broccoli plantsfreeze.   Make sure you follow the blanch time exactly.  Overblanching can actually cook the broccoli and result in a loss of flavor, color, and nutrients.

Cool the broccoli in an ice water bath.  Drain and package leaving no headspace, meaning no space between the broccoli and the container closure.  Seal and freeze.  Enjoy your harvest in the months ahead!

Your UGA Extension office is staffed with a family and consumer science agent.  He/she has great information on preserving all the vegetables in your garden!  Take advantage of this great resource.

Happy Thanksgiving!