Creating Your Dish Garden

Source(s): Gary R Peiffer


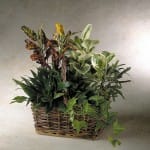
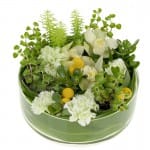
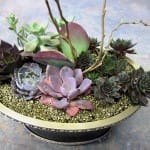
A dish garden is a collection of compatible plants growing and changing together over time in a small container. Using basic principles of design, you can create, in miniature, the feeling of a sumptuous full scale landscape. First select the location where the dish garden will grow; then select the plants suited to your location.

Careful location and plant selection is the key to successful dish gardening. For example, if you expect to grow your dish garden in the often dry and dark open atmosphere of the home or office, select plants suited to this environment.

What makes a Dish Garden?

A dish garden is composed of the

  • container
  • drainage materials
  • soil mix
  • plants and
  • decorations and trims.

Learn about each of these individual elements in the discussion below.

Unlike a traditional flower pot, there is usually no hole in the bottom of a dish garden container.Virtually any object that holds water and does not leak con contain a dish garden. Suitable containers include metal, china, glass, pottery, and plastic-lined wooden bowls, boxes, and baskets, and antique and reproduction items such as basin and pitcher sets.

Look at your surroundings. Cast-off and yard sale items often have interesting shapes and colors, including dishware, old gardening tools, outgrown toys, and bricks and concrete blocks.

A visually active container demands simple plantings. A container with simple lines and subtle colors permits the variety of exotic plants to catch the eye.

A rather wide and shallow vessel helps to create the illusion of a miniature landscape. Select a container deep enough to provide room for the roots, soil, and necessary drainage materials. Usually 3 inches deep is sufficient.

Drainage Materials

Loose materials, such as small rocks, pea gravel, marbles, and coarse sands, provide drainage for a container with no holes.

Coarse charcoal layered just above the rocks prevents sour soil, s common problem in dish gardens. Sourness results from too much water (H2O) and from a lack of air (Oxygen) between the soil particles. Roots need air too!

Soil Mix

Most foliage and dish garden plants thrive in a soil mix made of

  • sterilized soil
  • coarse sand and
  • peat moss or leaf mold.

You may either sterilize the soil in your oven or buy a commercial sterile soil mix.

For cacti or succulents, double the amount of coarse sand.

Remember: A container with no drainage hole in the bottom requires a well-drained soil mix and careful watering.

Plants

Plant selection depends on each plant’s compatibility with the others and its adaptability to the site conditions and the style of the container. Avoid mixing incompatible plants, such as cactus and coleus. Plants thriving under different conditions will not prosper together in a dish garden.

See the table at the end of this brochure for types of dish gardens, their plant selection, and special requirements.

Decorations and Trims

Miniature figures and ground objects, such as bits of wood, rocks, stones, and crystals make appropriate additions to a dish garden. Select shapes, colors, and sizes to create interest and contrast. Toe enhance your dish garden for gift presentation, attach a small ribbon duplicating a color already present in the container of the plants. As a rule, minimal decorations create the greatest charm and delight.

Planting your Dish Garden

The Day Before You Plant

On the day before you plant your dish garden, thoroughly water all the plants you expect to transplant.

Layering Your Container

Follow these steps to layer your container.

  1. Line the bottom of the container with loose drainage material to prevent the soil and roots from standing in water.
  2. Add a thin layer of coarse charcoal to prevent sour soil.
  3. Fill the container about 1/2 full of damp, but not wet soil mix.

Note: To test for proper soil moisture, squeeze a handful of soil. The moisture content is satisfactory if no water oozes out but the soil retains its shape when released.

Planning Your Design

Follow these steps to plan your design.

  1. Temporarily place and view the plants in the container.
  2. Look at your work from all sides and angles and from several distances.
  3. Try your decorations. A figurine can turn a few plants into a miniature landscape. To see this effect, place the figurine in among the plants.
    Viewed from eye level, the plants swell to the size of trees.
  4. On a sheet of paper, sketch a quick plan of your chosen arrangement or make an instant photo.
  5. Gently remove the plants and set them aside.

Note: Consider where you plan to display your dish garden. If it will be seen from all sides, check the views all around it. If it will sit next to a wall, you need only consider the view from the front or at most, three sides. If it will sit in front of a mirror, use this to your advantage. A dish garden viewed from table level benefits from a different plant arrangement than one seen from eye level. Carefully move the plants until you discover a pleasing composition.

Planting Your Dish Garden

Follow these steps to plant your dish garden.

  1. Begin to permanently plant your dish garden. Follow your sketch.
  2. Build a small mound in the dish for each plant and spread its roots over the mound. If a plant has an extremely large root root system, prune its roots a little. Place a little more soil over the roots to hold the plant in place.
  3. Following your sketch or photo, plant the remaining plants in this same way.
  4. Finish filling the container with soil.
  5. Water the soil and mist the leaves.
  6. Place your new dish garden in a warm, shaded location for two weeks to allow the fresh transplants to become established.

Maintaining Your Dish Garden

Follow these steps to maintain your dish garden.

  1. Test the soil moisture with your finger several times each week. Water slowly with lukewarm water.
  2. Turn the container every few days so the plants grow upright.
  3. Fertilize infrequently. Over fertilizing causes plants to outgrow the container.
  4. Repot when the plants grow too large for the container or after a year or so when the soil nutrients deplete.

Remember: Drainage does not exist in most dish gardens. Dish garden success depends on proper watering.

Types of Dish Gardens

Use this table to design and select plants for your dish garden.

Type of Dish Garden Plant Selection Ideas Sunlight Requirement Other Special Needs
Bog Ground & club mosses, small ferns Full to part sun
Desert Agave, aloe, cactus, crown of thorns,
echeveria, haworthia, house leek, jade, sun, kalanchoe, opuntia, panda plant, sedum, snake plant
Full to part sun, Sandy soil
Field and Meadow Ferns, fungi, grasses, hawkweed, juniper seedling, lichens, mosses, pussytoes, wild strawberry Full to part sun
Herbs Chives, creeping thyme, rosemary, other small herbs Full to part sun, Sandy rocky soil
Mediterranean Euphorbias, succulents, small cacti Full to part sun, Sandy soil
Tropical Aspidistra, birdsnest fern, bromelia, Chinese evergreen, croton, dracaena, English and grape ivy, neantha bella Tropical palm, peperomia, philodendron, pittosporum, podocarpus, pothos, pteris fern, sansevieria, snake plant, ti plant, wandering Jew Shade, indirect light
Violet Wild violets, small herbs Full to part sun
Woodland Ferns, grasses, club, hair-cap, & minum
mosses, hepatica, mountain laurel, Woodland partridgeberry, pipsissewa, rattlesnake plantain, rock polypody, wintergreen seedling yew, fir, pine, & hemlock

Center Publication Number: 4
Create Bird Habitats in Your Landscape

Source(s): Stephen D Pettis


Create suitable habitats for birds through landscaping. Gardeners can provide birds with the things they need to survive and birds can provide gardeners with hours of enjoyment in the backyard.

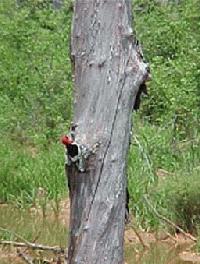
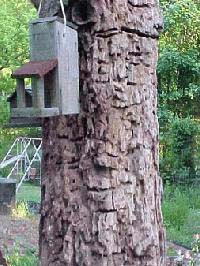
Woodpecker on Snag
Woodpecker on Snag
Make the environment inviting

Planning a landscape that is suitable for birds is easy. Sketch the existing landscape, making note of all structures, plantings and topographical features. Choose areas to plant trees and shrubs that birds can utilize. Annuals and perennials that flower throughout the season attract insects that birds may feed on. Standing dead trees will provide habitats for birds such as woodpeckers.

After making plant choices that provide food, shelter and cover for birds, artificial features should be considered. Water sources such as birdbaths, fountains and ponds may be added to landscapes to attract birds. The features should be in the open away from any place cats and other predators can hide. Rocks and water plants add to a water feature’s attractiveness to birds as well as keeping the water fresh. Man made birdhouses can be installed. These should be placed in sheltered spots near a shrub or tree. Finally, birdfeeders can be added. All bird feeders should be placed in the open near some sort of cover. Baffles and guards should be placed on mounting poles of both birdfeeders and houses to prevent predation.

Trees and Shrubs for Birds

Plant

Plant type

Feature

Birds attracted

Oak

Tree

Excellent nesting

Blue jays, sparrows, acorn woodpeckers

Pine

Tree

Excellent nesting

Robins, purple finches, mourning doves, warblers, sparrows

Holly

Large shrub

Shelter

Towhees, thrashers, mockingbirds

Elderberry

Large shrub

Summer fruit

Warblers, grosbeaks, goldfinches

Dogwood

Small tree

Nesting, late summer fruit

Bell’s vireos, summer tanagers

American Beautyberry

Shrub

Late summer fruit

Many birds

Native roses

Shrub

Nesting, cover

Many birds

Eastern Red Cedar

Tree

Nesting, winter fruit

Sparrows, robins, mock-ingbirds, many others

Winterberry Dec. Holly

Small shrub

Late winter fruit

Robins, blackbirds, cedar waxwings

Attracting birds to one’s yard by birdscaping can be rewarding. Birds are not only beautiful and fun to watch, but also provide control of adult insects, grubs, and caterpillars. By improving suburban and urban landscapes, people can help replace bird habitat that has been reduced or destroyed by development. To learn more about attracting birds to your landscape, contact the Gwinnett County Extension Service at (678) 377-4010.

Feeders

Squirrel proof feeders Spinners, flippers, trapdoors prevent pesky squirrels from robbing feeders
Platform feeders Feeds many birds at once
Tube feeders Plastic tube with staggered holes
Hummingbird feeders Glass feeders filled with sugar water (1 part sugar, 4 parts water; no red dye needed; boil and cool before use)
Suet feeders Wire suspended suet cake. Birds often hang upside down to feed.
Thistle feeders Narrow tube feeders
Peanut feeders Attracts woodpeckers
Window feeders Suction cups attach feeder to window

.


Resource(s):

Reviewer(s):

  • K. Lynn Davis, CEA- Turner County. The University of Georgia College of Agricultural and Environmental Sciences.
  • Brandy Wilkes, CEA- Cook County. The University of Georgia College of Agricultural and Environmental Sciences.

Center Publication Number: 105

Crape Myrtles

Source(s): Jacob G Price

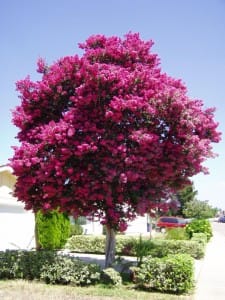
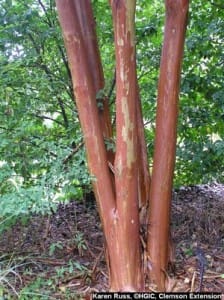
Crape myrtles are one of the most commonly planted small flowering trees in Georgia. There are numerous cultivars and flower colors available. These durable landscape plants are also known for having attractive bark, drought tolerance, and site adaptability.

crape1

Photographer: Karen Russ, Location: Athens, GA, UGA Botanical Garden

Flowering

Crape myrtles flower from late spring until late July, depending on the cultivar. Cultivars that flower from mid to late July are Sioux, Yuma, Cherokee, Carolina Beauty, Choctaw, and Powhatan. A second flush of flowers may be achieved during the growing season by pruning old flower heads. Crape myrtles should be planted in full sun and watered during drought for best flowering. Damage from insects and disease can cause plants not to flower.

Pruning

Crape myrtles should be pruned in late winter. Avoid pruning in early fall. Crapes are most commonly pruned for a tree form with a multiple or single trunk. If possible avoid pruning branches larger than your finger. Pruning large branches disfigures and weakens the trees. Suckers should be removed. Naphthalene acetic acid (NAA) applied to suckers after pruning prevents re-sprouting. Crape myrtles can be pruned back to 6 inches from the ground for a shrub effect.

Insects and Diseases

Powdery mildew is the most widespread and serious disease of crape myrtles and is most active in the spring and fall. Powdery mildew can cover leaves, shoots, and flower buds causing leaf distortion and lack of flowering. This disease should be controlled when first noticed. Products such as Banner Max, Bayleton, Heritage, and Systhane are systemic controls. FungAway, Funginex, and Immunox are available for homeowner use. Aphids are the most common insect problem of crape myrtles. These insects produce honeydew on which unsightly black sooty mold grows. Aphids can be controlled with products containing pyrethrins, imidacloprid, cyfluthrin or Insecticidal soaps.


Resource(s):

Center Publication Number: 60

Crabgrass

Source(s): Jacob G Price


There are several species of crabgrass that are common weeds in turfgrass. They include, Blanket Crabgrass, India Crabgrass, Smooth Crabgrass, Tropical Crabgrass, Large Crabgrass, and Hairy Crabgrass.

crabgrass

Description

All crabgrasses in this factsheet are summer annuals except India crabgrass which can sometimes be a perennial. Both India and Blanket crabgrass are mat forming with creeping stolons. Leaves are crowded on creeping stems. Leaf blades are about 1 inch long. Blanket crabgrass has hairy leaves and sheaths whereas India crabgrass has smooth leaves and sheaths. Both reproduce by stolons and seeds.

Preemergence Control

Preemergent control is the best way to control crabgrass. Examples of preemergent herbicides that can be used on Centipede, St. Augustine, Bermuda, and Zoysia grasses to control crabgrass are, Surflan (oryzalin), Balan and Crabgrass Preventer (benefin), Pendulum and Halts (pendimethalin). Team (benefin+trifluralin), and XL (benefin+oryzalin) can also be used. Do not use Pendulum or Halts on turf that has been severely thinned by winter injury. Apply these herbicides from February 15 to March 5 for best control.

Postemergence Control

In Centipede, use Vantage (sethoxydim). In St. Augustine, the only option is Atrazine for fair control on young weeds. Crabgrass killer (MSMA) can be used in Bermuda and Zoysia turf for good control.
Refer to and follow label instructions before using any of the above herbicides.


Resource(s):

Center Publication Number: 68

Copperheads

Source(s): Michael T. Mengak


Copperheads are venomous snakes and members of the pit viper family. Pit vipers have a heat-sensing organ located between the eye and the nostril. This organ is useful in locating food by detecting the body heat of prey species. Copperheads are not generally aggressive and rarely injure people. They are secretive but valuable members of the wildlife community. Copperheads range throughout most of Georgia and occupy a variety of habitats.

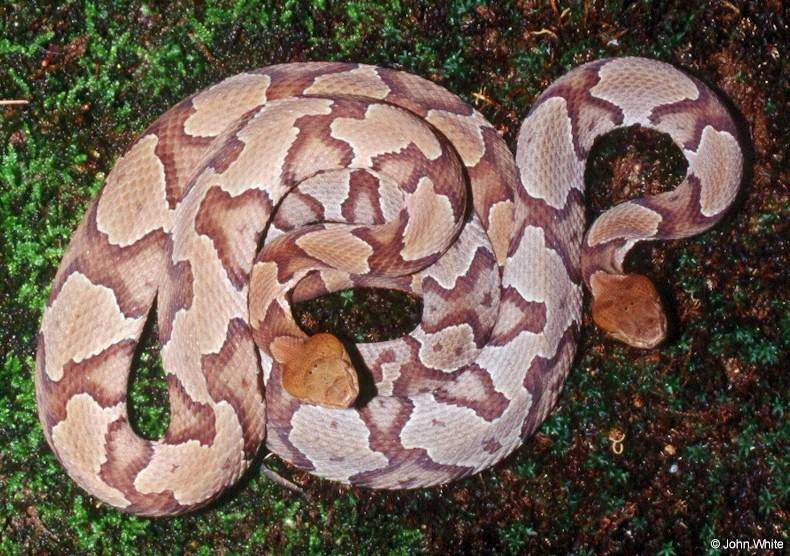
Two Copperhead snakes

Taxonomy

  • Vipers(Family Viperidae)
    • Pit Vipers(Subfamily Crotalinae)
      • Copperheads and Cottonmouths(Genus Agkistrodon)

There are two species in the genus Agkistrodon — the copperhead (Agkistrodon contortrix, with five subspecies) and the cottonmouth (Agkistrodon piscivorus, with three subspecies). Two subspecies of copperhead — the northern copperhead, A. c. mokasen, and the southern copperhead, A. c. contortrix — are found in the state with a wide area of overlap in central Georgia. The other three subspecies occur generally west of the Mississippi River.

Status

Both northern and southern copperheads are common in suitable habitat. The copperhead is not listed as protected by the State of Georgia Natural Heritage Program. A significant threat to the copperhead is malicious killing by humans. Perhaps the most significant threat to the copperhead is the loss of habitat caused by various human activities.

Description

Southern Copperhead: The southern copperhead has pale beige to almost pink background color (called the “ground color”). It has 13 to 20 wide, dark bands along its length in the shape of an hourglass. The two halves of the hourglass often do not meet along the spine. The head is a copper color. The young look similar but have a sulfur yellow tail. Southern copperheads are stout-bodied snakes, usually 24 to 36 inches long as adults. The longest specimen ever reported is 52 inches long (4 feet, 4 inches). The southern subspecies is generally larger than the northern subspecies. Northern Copperhead: The northern copperhead’s ground color is darker than the southern subspecies. The color varies from brown to tan but has the familiar hourglass bands, which generally do meet along the spine. It also has the copper-colored head, and young specimens have the yellow tail. Most adult northern copperheads are 26 to 34 inches long, and the record is 53 inches (4 feet, 5 inches).

Distribution

In Georgia, the northern copperhead is found in the mountainous counties of north Georgia. The southern copperhead is found below the fall line but not in the most southeastern counties along the Florida line. In southwest Georgia, it is found along the Alabama-Georgia border extending into two counties in north Florida. In the Piedmont, the two subspecies overlap in distribution, and specimens take on a range of appearances falling between the typical patterns for each subspecies.

Form and Function

Both the northern and southern copperhead has 23 to 25 rows of dorsal scales that are weakly keeled. The anal plate is not divided. There is a single row of caudal scales. Both possess hollow fangs that are retractable and located in the front of the mouth. The fangs are up to ½ inch long and probably not capable of penetrating the average boot. Average adult weight in a Kansas study was 10.5 ounces. Their preferred body temperature ranges from 78.8 degrees to 84.2 degrees F.

All North American snakes use the environment to warm their bodies. Snakes are called “cold-blooded,” but a better term to describe this characteristic is “exothermic,” meaning they use external rather than metabolic heat for warmth. A copperhead’s core body temperature can vary throughout the year from 39.2 degrees to 105.8 degrees F. Body temperature also varies daily. The snake cools overnight and must use the sun’s heat to warm itself during the day. The venom attacks muscle and blood systems. Bites are painful, but this snake has the least toxic venom of all venomous snakes in the United States. Fatalities are extremely rare.

Ecology

Reproduction: Copperheads can mate in both fall and spring. They are capable of breeding every year, and give birth to live young between July and August. As few as 2 or as many as 17 young are produced, but the typical litter size is 6 to 9 young. The young are 8 to 10 inches long at birth and receive no parental care. Up to 60 percent of the females in a population may carry young in a year. Generally, females begin breeding at 3 years old. Larger and presumably older females are more likely to breed, but good health and high-energy reserves or body fat may be important in determining which females breed. Larger individuals do most of the breeding. Clutch size is larger in years with higher than average precipitation.

Female copperheads may gather in specific areas prior to giving birth. These areas are called “birthing rookeries.” We do not know how many females gather together in this manner. Gravid females do not feed while carrying young. Males usually outnumber females in both the general population and in the litter, but we don’t understand why this occurs. Feeding: Copperheads are predators near the top of their food chain. They are ambush predators, generally lying in wait for a meal. Copperheads typically feed on mice and often take the young while they are still in the nest. These predators are known to also eat frogs and toads, insects (like cicadas), caterpillars, salamanders, small birds and shrews. They can survive during the summer on just one meal every three weeks. Of course, they survive all winter without eating. Studies show that copperheads may consume twice their body weight in prey per year. They can survive on as few as eight meals during the active season. Generally, they consume 1.25 to 2 times their body weight per season. Prey items average 20 percent of body weight.

A study in Kansas found that prairie voles were the most commonly eaten prey and cicadas ranked second. Interesting prey items identified from copperhead stomachs included hawk moth larvae and a box turtle. Copperheads eat more than 30 different prey items. Young probably eat a different array of items than adults. For example, the young may eat insects, caterpillars and small frogs while the adults take more mice and birds. Young are known to use their yellow tails as lures to attract frogs and toads to within striking distance.

Behavior

Copperheads often lay motionless waiting for prey to wander within range. Copperheads are pit vipers and use their heat-sensing pit to locate prey and guide their strike. The pit helps them locate warm-blooded prey after it has been bitten. The snakes also find the envenomed prey using their sense of smell.

They are not aggressive snakes and are often described as lethargic. They rarely strike unless stepped on or handled. Copperheads are most active at dawn and dusk between March and October. During the winter, they den alone or with other copperheads and rattlesnakes. They will often use the same den site for many years. They are inactive in cold weather but are not true hibernators. Copperheads are almost entirely terrestrial but swim well and probably disperse across aquatic habitats.

Copperheads are nocturnal during the summer or warmest months and shift to a diurnal activity pattern during cooler months in spring and autumn. This reflects their need to bask in the sun on cooler days in spring and autumn and to avoid the hottest part of the day in summer. Fighting between males may occur during the breeding season. The general pattern for copperheads is for two males to approach one another, raise their upper bodies off the ground, and try to push the rival to the ground. The male that pins his rival’s head to the ground is the dominant individual. The whole process is like the children’s game of “thumb wrestling.” Biting has never been reported during these wrestling bouts.

Habitat

You might find a copperhead in almost any upland habitat. Northern copperheads are found in rocky areas and wooded hillsides. They are often found around sawdust piles, slab piles or rotting buildings. They are also found along wooded edges and brushy areas. Power line rights-of-way make excellent habitat if not mowed. Southern copperheads seem to prefer low-lying areas near streams and swamps, and are often confused with the cottonmouth water moccasin, which is larger (heavier-bodied) and readily swims. Copperheads prefer to avoid the water. Wooded areas with brush piles, fallen trees or logs are good habitat.

Enemies

Copperheads occasionally fall prey to kingsnakes. Hawks, owls or wild pigs may consume them occasionally, but they do not hunt for them. Humans are their greatest threat; we destroy their habitat and kill them outright.

General

One northern copperhead was documented to have survived 29 years and 10 months, but few attain this age. One study marked and released several adult copperheads and found them, one year later, within 100 yards of their release site. Their typical home range is unknown in Georgia but, in general, we assume they wander little except in search of mates. Copperheads are the upland ecological equivalent of cottonmouths. One researcher used the pattern of complete and incomplete hourglass markings to identify individuals.

Populations

Populations may average 2.5 to 4 copperheads per acre in suitable habitat with adequate prey.

Disease

Copperheads do not transmit diseases to humans. Venomous snakes, however, should never be handled by anyone other than an expert.

Economical Value

Copperheads have no direct economic value to humans. Their skins have been used to make leather for decorative belts and hatbands. They act as predator control for mice and rats, and are thus beneficial to humans, providing a net economic gain by their presence.

Damage

They cause no direct damage to human crops or livestock.

Medicinal Use

They have no direct medicinal value. Recently, however, there has been increased interest in the pharmacological benefits of snake venom. In a recent 10-year study, 308 copperhead bites were reported. Not a single person died from the copperhead bite.

Legal Aspects

Copperheads are unprotected in Georgia.

Control to Reduce

Populations can be reduced around human structures by removing preferred habitat such as rock piles, woodpiles, slab piles, sawdust piles and abandoned buildings. Keep grass and weeds trimmed or mowed near dwellings, barns and other buildings.

Management to Enhance

Generally reversing the methods of control would provide habitat for these beneficial predator.

Human Use

Native American use — none. Colonists’ view — none.


Center Publication Number: 192

Cool Season Lawns

Source(s): Gil Landry, PhD., Coordinator – UGA Center for Urban Agriculture, The University of Georgia.


Perhaps the most important factor in developing and maintaining an attractive and problem-free lawn is to choose a grass that is adapted to your area and has the qualities you desire. Cool-season species are better suited to northern areas of the state.

Cool-season grasses grow well during the cool months (60 degrees-75 degrees F) of the year. They may become dormant or injured during the hot months of summer.

Tall Fescue(Festuca arundinacea). Perhaps the most popular grass in the mountain and upper piedmont areas of Georgia is tall fescue. This is a perennial bunch-type grass that grows rapidly and requires frequent mowing in the spring and fall. Tall fescue needs more water than the warm-season grasses to stay green during the summer. It is quickly established from seed and grows well in full sun as well as moderate shade. Tall fescue will tolerate a wide range of soil conditions, but like most turfgrasses grows best with a soil pH between 5.5 and 6.5. Lawns planted in tall fescue tend to thin out and become “clumpy” thus requiring reseeding every three or more years.

Kentucky-31(K-31). Kentucky 31 is the old, common cultivar or variety of tall fescue grown in Georgia. Most of the new cultivars referred to as “turf-type” tall fescues have slightly narrower leaf blades, slower vertical growth rates, greater density and shade tolerance than K-31. As a result, if properly managed, most turf-types will produce a better turf than K-31. More information can be obtained from Cooperative Extension Service Leaflet No. 354, Tall Fescue Lawn Management.

Kentucky Bluegrass(Poa pratensis). Kentucky bluegrass has a medium leaf texture and a bright, pleasing color. There are many varieties which grow well in and north of the upper piedmont areas of Georgia. Kentucky bluegrass can become semi-dormant during hot weather, and grows best in a fertile soil with a pH of 6 to 7. While it does best in partial shade, it will grow in open sun if adequate moisture is present.

Ryegrasses. Perennial ryegrass (Lolium perenne) and annual ryegrass (Lolium multiflorum) are suited for temporary cool-season turfgrasses throughout Georgia. They can be used as a temporary winter cove on new lawns that have not been permanently established. Ryegrasses are also used for overseeding, that is, to provide a green cover on a warm-season grass during the winter. However, overseeding may damage the warm-season grass unless managed correctly in the spring because the ryegrass competes for moisture, sunlight and nutrients.

There are many varieties of perennial ryegrass, and depending upon the environmental conditions, they may behave as an annual or perennial. As its name suggests, annual ryegrass dies as summer approaches. It is also known as common, winter, domestic, Oregon, and Italian ryegrass.


Resource(s): Lawns in Georgia

Center Publication Number: 128

Controlling Red Tip Photinia Leaf Spot

Source(s): Willie O Chance


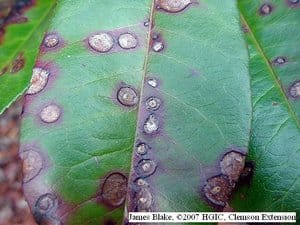
How do I control the leaf spot/blight on red tip photinias (red tips)?

entspotweb

The only control for this disease is to cut the bush down and plant something else. Sorry about that! Not all red tips get the disease, but all are susceptible to it.

Weather and the location and condition of the plant determine if the red tip gets the disease and how bad the disease is. Fungicides can slow the spread of the disease but you must spray regularly covering every leaf of the plant. This is not feasible. We do not generally recommend that you spray fungicides for this disease. There are some practical things that you can do that may help slow disease spread.

Rake up and burn, bury or destroy fallen leaves. This removes infected leaves that may reinfect leaves still on the tree.

Apply a two to three inch deep mulch around the plant.

Do not let the leaves get wet when you water. Water between 9 p.m. and 9 a.m.

With large red tips, prune off the lower branches and make them into small trees. This can make it more difficult for the disease to reinfect the plant once leaves fall off. Prune off heavily infected limbs.

The best control is to replace the red tips with a durable plant that does not get leaf spot diseases. Contact your local County Extension Office for suggestions or see these publications on the web:


Resource(s):

Center Publication Number: 84

Controlling Argentine Ants in the House

Source(s): Willie O Chance


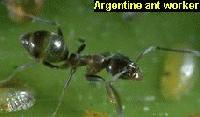
Argentine ants are busy, 1/8 inch long ants which are often found crawling in long, well-organized trails looking for food. They will go up tree trunks and into buildings. One Argentine ant colony can consist of hundreds of thousands of ants and one or more queens. They have few pests and are hard to kill. They are very good at finding food, so good in fact that they can keep fire ants from establishing themselves in an area.

ar1 ar2

Argentine ants do not bite or sting, but often come inside searching for moisture or food. They like sweet things like soft drinks and syrup.

Argentine ants like to make their nests in mulched beds or potted plants. Ants in mulched beds are harder to kill. They can live in walls in the winter. It is hard to get insecticides to these ants. Even pest control companies have trouble killing these ants. Is this too much bad news so far? Well, the good news is that there are some things you can do to try to control them.

A single Argentine ant looks for a food source. Once it finds it, the ant tells the other ants and the colony forms a trail to the food source. To control these ants, remove food sources and try to keep ants outside. Spraying ant trails inside will do little to control them and may even make them worse.

Thoroughly empty and rinse all containers (e.g., soda cans) before putting them in the trash or recycle can. Seal stored food in insect resistant containers. Thoroughly clean cabinets. Do not let garbage sit out for a long time. Seal it up well in plastic bags.

Control insects on ornamental plants that create honey dew that the ants eat. Honey dew is a sticky sweet substance put out by aphids, scales and whiteflies. Select plants that are not susceptible to these pests. Clean up all dead insects on window sills and on floors. Ants can use them as food.

Keep all vegetation (limbs, leaves and branches) from touching the outside of your home. Ants can come in this way. Seal any entry points you see. Check potted plants to make certain no ants are nesting in them.

Do not over-water mulched areas. Let them dry slightly between waterings. Water once a week with one inch of water or twice a week with three-quarter inches of water.

Do not use too much mulch. Keep it two to four inches deep. Try to avoid mulched beds around the house. Pull the mulch away from the house a foot or so. Treat this narrow strip with insecticide.

Once you have done these things, you can try spraying points of entry around the house. Treat window sills and door thresholds. With severe infestations, you may want to spray a perimeter around the house. Spray a couple of feet up on the house and four to six-foot of the ground next to the house. You can use Permethrin, Demon or others or have a pest control company do this for you. Treat any trails you see. Sprays will help to keep the ants out but will not kill the colony.

One of the best ways to kill the ants is to use baits. Look for ant baits containing slow acting toxins like fipronil, hydramethylnon, and sulfluramid. The ants will feed on them and take them back to the nest. This will take some time but should kill the colony. Some of these chemicals may be labeled as fire ant baits and these should work for Argentine ants outside the home. Apply baits when ants are out and actively looking for food.

A new chemical may be a great way to control the ants long- term. You can try treating mulched beds or the entire lawn with Over and Out. This product contains the active ingredient fipronil. It is labeled for fire ants but should also give control of Argentine ants. Over and Out controls fire ants for up to one growing season. I do not know exactly how long to expect this chemical to control Argentine ants, but I would expect similar control for Argentine ants as for fire ants.

Be patient and persistent. Read and follow all label directions on the pesticide package. If at first you do not succeed, try again. You cannot expect to kill all the ants in the yard, but you should be able to keep them out of your house.


Center Publication Number: 87

Control Garden Weeds by Controlling Weed Seeds

Source(s): Wayne McLaurin, Professor Emeritus of Horticulture, The University of Georgia, College of Agricultural and Environmental Sciences


Control of weed seed production and spread will provide effective control of weeds in the garden. A wise gardener once told me, “One year of seeds and you can count on seven years of weeds”. He was telling me that if I let the weeds in my garden mature and produce seeds, weeds would return and haunt me for the next seven years! (He was right!).

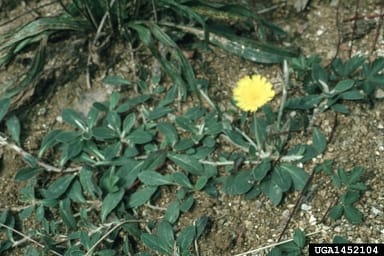
1452104

Weeds are your garden’s enemies. They rob precious water and nutrients from your garden plants. They harbor insects and diseases. They compete for light. And most of all, they cause you untold work trying to keep them under control.

Actually, the best method of garden weed control is the easiest – don’t let them grow! Garden weeds are going to seed, so now is a crucial time to remove weeds from your garden. Pull them, hoe them, mow them, or whatever; but just make sure weeds don’t remain in the garden area to produce seeds.

Three other controls of weed seed that might be helpful:

  • Weed seed can come in when you incorporate manure in the garden. Many weeds’ seeds pass through the animal without being digested and will be in the manure. Composting the manure will reduce the problem.
  • Mulch materials can harbor weed seed, too. Try to use sterile-free mulch materials, which don’t contain weed seeds.
  • Many of the books you read say to dig the garden deep. Well, this is good in one way – it buries the weed seed deep. But at the same time, deep digging brings up weed seeds that haven’t seen the light for many years. Many can live 10 to 12 years and then germinate when conditions are right.

The best thing, though, is to remove the weeds. Pull, hoe, chop, rototill, mulch, bury, burn, eat (yes, purslane is eaten by many groups) or destroy them in some manner.

And that same wise man also said, “Friends come and go, but enemies accumulate.” For the gardener, the enemies are the weeds. For that perfect garden next year, get the weeds out this year.


Resource(s): Mulching Vegetables

Center Publication Number: 252

Construction of Economical and Practical Compost Bins

Source(s): Gary R Peiffer


The most common materials used for compost bins are concrete blocks, 14-gauge wire fencing and wooden pallets. Concrete blocks and wire are readily available at hardware and building supply stores. Used, wooden pallets can often be picked up from manufacturing companies for free or a small fee. It takes 4-5 pallets wired together to make a suitable compost bin.

Wire bins

Wire fencing for compost bins comes in rolls 3 feet wide by 50 or 100 feet in length and are made of 14-gauge steel wire which is usually referred to as welded wire or fence wire. Because you will only need a about a ten (10) foot long piece of wire, inquire if the dealer is willing to cut fencing to size. This length of wire should provide you with enough wire to overlap the ends and fasten them with cord or twine. Once fastened, you have produced a wire compost cylinder, 3 feet high by 3 feet wide.

Residents should contact their local sanitation departments to inquire about the availability of wire bins that may be available for homeowner composting. In addition, many service-oriented hardware stores are willing to cut wire bins to size (10 foot lengths) for homeowners interested in establishing small backyard or community compost areas (cost $5-$6).

Commercial bins

Commercial bins of various shapes and sizes are available everywhere including: hardware stores, garden centers, garden catalogs and mail order, Costco Department Stores and many others. These bins are often more attractive but are also more costly usually starting at a minimum of $50.

For demonstrations of various bin types and composting methods, visit compost demonstration sites in your area. In many counties, Master Gardeners have constructed various types of compost bins and offer free classes on composting. Call your local County Extension Service for more information. Also, County Extension Agents and staff are available via telephone and email to assist you with composting, gardening, and landscaping questions and information. Please call for more information.


Resource(s): Composting and Mulching

Center Publication Number: 16