Source(s): Gary R Peiffer
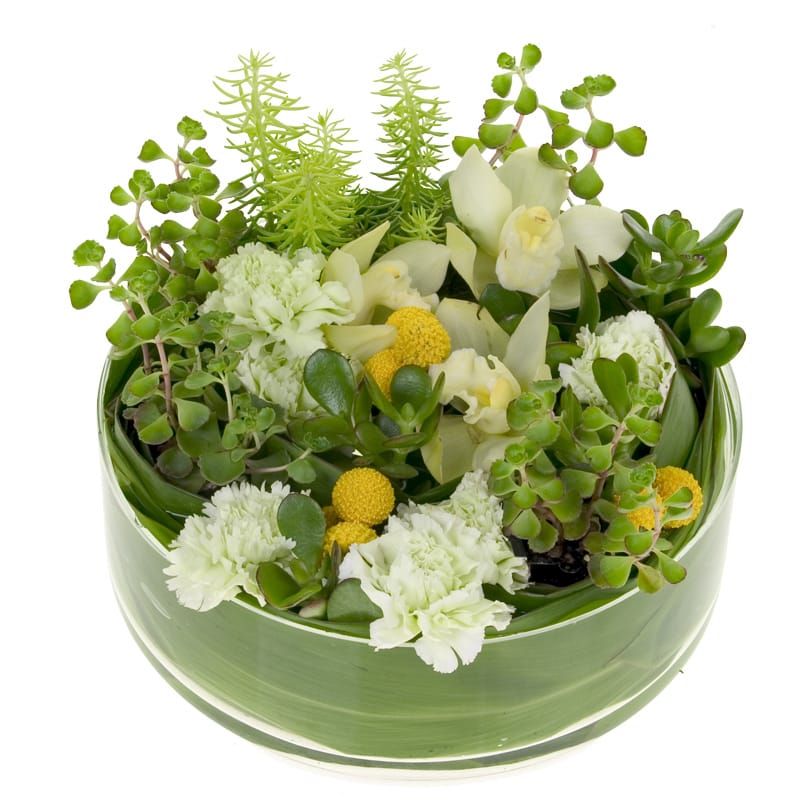
A dish garden is a collection of compatible plants growing and changing together over time in a small container. Using basic principles of design, you can create, in miniature, the feeling of a sumptuous full scale landscape. First select the location where the dish garden will grow; then select the plants suited to your location.
Careful location and plant selection is the key to successful dish gardening. For example, if you expect to grow your dish garden in the often dry and dark open atmosphere of the home or office, select plants suited to this environment.
What makes a Dish Garden?
A dish garden is composed of the
- container
- drainage materials
- soil mix
- plants and
- decorations and trims.
Learn about each of these individual elements in the discussion below.
Unlike a traditional flower pot, there is usually no hole in the bottom of a dish garden container.Virtually any object that holds water and does not leak con contain a dish garden. Suitable containers include metal, china, glass, pottery, and plastic-lined wooden bowls, boxes, and baskets, and antique and reproduction items such as basin and pitcher sets.
Look at your surroundings. Cast-off and yard sale items often have interesting shapes and colors, including dishware, old gardening tools, outgrown toys, and bricks and concrete blocks.
A visually active container demands simple plantings. A container with simple lines and subtle colors permits the variety of exotic plants to catch the eye.
A rather wide and shallow vessel helps to create the illusion of a miniature landscape. Select a container deep enough to provide room for the roots, soil, and necessary drainage materials. Usually 3 inches deep is sufficient.
Drainage Materials
Loose materials, such as small rocks, pea gravel, marbles, and coarse sands, provide drainage for a container with no holes.
Coarse charcoal layered just above the rocks prevents sour soil, s common problem in dish gardens. Sourness results from too much water (H2O) and from a lack of air (Oxygen) between the soil particles. Roots need air too!
Soil Mix
Most foliage and dish garden plants thrive in a soil mix made of
- sterilized soil
- coarse sand and
- peat moss or leaf mold.
You may either sterilize the soil in your oven or buy a commercial sterile soil mix.
For cacti or succulents, double the amount of coarse sand.
Remember: A container with no drainage hole in the bottom requires a well-drained soil mix and careful watering.
Plants
Plant selection depends on each plant’s compatibility with the others and its adaptability to the site conditions and the style of the container. Avoid mixing incompatible plants, such as cactus and coleus. Plants thriving under different conditions will not prosper together in a dish garden.
See the table at the end of this brochure for types of dish gardens, their plant selection, and special requirements.
Decorations and Trims
Miniature figures and ground objects, such as bits of wood, rocks, stones, and crystals make appropriate additions to a dish garden. Select shapes, colors, and sizes to create interest and contrast. Toe enhance your dish garden for gift presentation, attach a small ribbon duplicating a color already present in the container of the plants. As a rule, minimal decorations create the greatest charm and delight.
Planting your Dish Garden
The Day Before You Plant
On the day before you plant your dish garden, thoroughly water all the plants you expect to transplant.
Layering Your Container
Follow these steps to layer your container.
- Line the bottom of the container with loose drainage material to prevent the soil and roots from standing in water.
- Add a thin layer of coarse charcoal to prevent sour soil.
- Fill the container about 1/2 full of damp, but not wet soil mix.
Note: To test for proper soil moisture, squeeze a handful of soil. The moisture content is satisfactory if no water oozes out but the soil retains its shape when released.
Planning Your Design
Follow these steps to plan your design.
- Temporarily place and view the plants in the container.
- Look at your work from all sides and angles and from several distances.
- Try your decorations. A figurine can turn a few plants into a miniature landscape. To see this effect, place the figurine in among the plants.
Viewed from eye level, the plants swell to the size of trees.
- On a sheet of paper, sketch a quick plan of your chosen arrangement or make an instant photo.
- Gently remove the plants and set them aside.
Note: Consider where you plan to display your dish garden. If it will be seen from all sides, check the views all around it. If it will sit next to a wall, you need only consider the view from the front or at most, three sides. If it will sit in front of a mirror, use this to your advantage. A dish garden viewed from table level benefits from a different plant arrangement than one seen from eye level. Carefully move the plants until you discover a pleasing composition.
Planting Your Dish Garden
Follow these steps to plant your dish garden.
- Begin to permanently plant your dish garden. Follow your sketch.
- Build a small mound in the dish for each plant and spread its roots over the mound. If a plant has an extremely large root root system, prune its roots a little. Place a little more soil over the roots to hold the plant in place.
- Following your sketch or photo, plant the remaining plants in this same way.
- Finish filling the container with soil.
- Water the soil and mist the leaves.
- Place your new dish garden in a warm, shaded location for two weeks to allow the fresh transplants to become established.
Maintaining Your Dish Garden
Follow these steps to maintain your dish garden.
- Test the soil moisture with your finger several times each week. Water slowly with lukewarm water.
- Turn the container every few days so the plants grow upright.
- Fertilize infrequently. Over fertilizing causes plants to outgrow the container.
- Repot when the plants grow too large for the container or after a year or so when the soil nutrients deplete.
Remember: Drainage does not exist in most dish gardens. Dish garden success depends on proper watering.
Types of Dish Gardens
Use this table to design and select plants for your dish garden.
| Type of Dish Garden |
Plant Selection Ideas |
Sunlight Requirement Other Special Needs |
| Bog |
Ground & club mosses, small ferns |
Full to part sun |
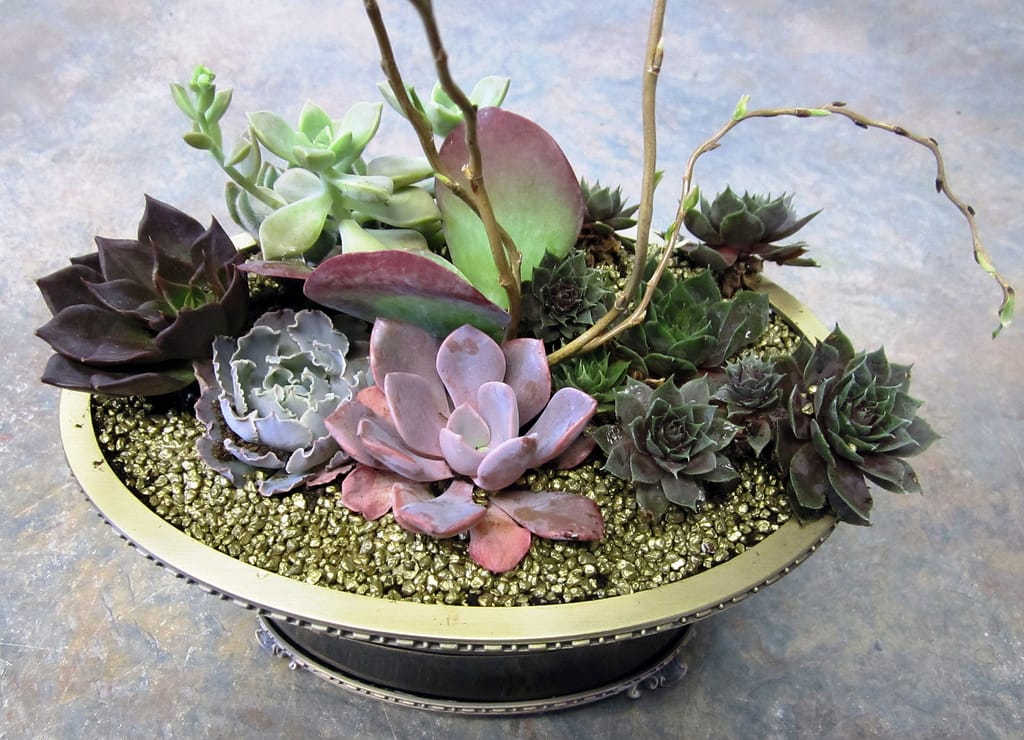
| Desert |
Agave, aloe, cactus, crown of thorns,
echeveria, haworthia, house leek, jade, sun, kalanchoe, opuntia, panda plant, sedum, snake plant |
Full to part sun, Sandy soil |
| Field and Meadow |
Ferns, fungi, grasses, hawkweed, juniper seedling, lichens, mosses, pussytoes, wild strawberry |
Full to part sun |
| Herbs |
Chives, creeping thyme, rosemary, other small herbs |
Full to part sun, Sandy rocky soil |
| Mediterranean |
Euphorbias, succulents, small cacti |
Full to part sun, Sandy soil |
| Tropical |
Aspidistra, birdsnest fern, bromelia, Chinese evergreen, croton, dracaena, English and grape ivy, neantha bella Tropical palm, peperomia, philodendron, pittosporum, podocarpus, pothos, pteris fern, sansevieria, snake plant, ti plant, wandering Jew |
Shade, indirect light |
| Violet |
Wild violets, small herbs |
Full to part sun |
| Woodland |
Ferns, grasses, club, hair-cap, & minum
mosses, hepatica, mountain laurel, Woodland partridgeberry, pipsissewa, rattlesnake plantain, rock polypody, wintergreen seedling yew, fir, pine, & hemlock |
Center Publication Number: 4