Safe Handling and Storage of Pesticides

Source(s): Paul E. Sumner, Extension Engineer


Whether you are a homeowner, farmer, grower, rancher or commercial applicator, proper transportation and storage are important aspects of safe pesticide use.

Transportation

Pesticides should never be transported inside the passenger compartment of an automobile or truck cab; put them in the trunk or in the back of the truck. Never transport them where they, could come in contact with groceries, livestock feed or other products which might become contaminated.

When transporting pesticides in a truck, see that they are secured to prevent spillage or loss due to sudden starts, stops, turns, etc. Should there be an accident or spill, immediately inform the local police and fire officials of the quantity and name of the pesticide involved. Large spills, particularly of ” Restricted Use Pesticides,” should be reported to the Georgia Department of Agriculture (404-655-4958), CHEMTREC (1-800-424-9300) and/or the manufacturer.

Applicators of pesticides, particularly in heavily populated areas, must take special precautions to secure products, transported to the application site. Allowing containers of pesticides to remain unattended on the back of an open truck is inviting an accident — and a costly lawsuit.

Commercial transporters of pesticides must meet special requirements: vehicles must carry placards, bills of lading, labels of the product, etc. Consult the Georgia Department of Transportation regarding these requirements.

Storage

Nearly three-fourths of all pesticide accidents occur to non-users of the materials. Many of these involve children. In addition, each year there are several cases of livestock and pet poisonings from contacts with improperly stored pesticides. These accidents not only cause human suffering and economic losses, but improper storage is contrary to federal regulations. READ THE LABEL: IT IS THE LAW.

Whether you are a homeowner, producer or applicator of pesticide, there are basic safe storage rules to follow:

  1. Keep pesticides, other poisons, and related materials locked in a cabinet, room or separate building designated solely for the storage of these materials. Metal storage cabinets, such as discarded school lockers, provide excellent storage for homeowners or other users of small amounts of pesticides.
  2. Post the facilities with a sign: “PESTICIDES – POISONS, KEEP OUT”, or similar signs.
  3. Control access to this facility to only one, two, or three highly trusted, responsible and informed individuals.
  4. Never store pesticides where food, feed, seed, fertilizers or other products can become contaminated.
  5. Store pesticides in their original containers. It is the law.
  6. The facility should be reasonably fireproof and well-ventilated. Temperatures should be kept between freezing and 100 degrees F.
  7. Sealed concrete floors, concrete block walls and metal shelves are recommended over wooden structures.
  8. With shelf storage, store dry pesticides on the top shelves, liquids on the lower shelves.
  9. Electrical fixtures should be of the dust-and explosion-proof type.
  10. Provide adequate space for the secure storage of empty pesticide containers until proper disposal of them is possible.

Those businesses with large quantities of pesticides to store should have a separate building for this purpose. In addition to the above features, this building should also include the following characteristics.

  • When feasible, the building should be downwind and downhill from sensitive areas, such as homes, play areas, feedlots, animal shelters, gardens and ground water sources.
  • The building should be located in an area not subject to flooding.
  • A drainage system should be built to collect any tank rinsing water or spoils. This material should be treated as surplus pesticide and must be disposed of properly, according to label instructions.
  • A water supply should be furnished, not only for mixing, loading, tank rinsing and cleanup, but for showers and cleanup for the persons who mix, load and apply the pesticides.
  • Fire detectors and fire fighting equipment should be available.
  • A telephone should be convenient, with all emergency numbers posted.
  • A current inventory of all materials in storage, along with a label of all materials, should be maintained in a secure area away from the storage area. The local fire department should be provided with an updated copy of this inventory.
  • Equip the storage area with all personal protective equipment and materials to prevent accidents and to handle accidents and spills. Activated charcoal, absorptive clay, vermiculite, clay-granule type cat litter or sawdust are good materials to absorb liquid spills.
  • Date and identify all pesticides when they are placed into storage, and store no more than will be needed for one season. Establish a policy of first-in, first-used, so that pesticides do not become outdated.
  • Have your fire insurance carrier inspect your pesticide storage facility periodically — it is intelligent management and may reduce your insurance premium.

Many pesticide storage facilities are inadequate, dangerous and lack security. Plans are available for constructing a safe pesticide storage building. If drains are installed in the building or in the mixing/loading platform out-of-doors this drain water must be captured and not allowed to enter ground or surface water. Copies of this plan are available from the Cooperative Extension Service.

Mixing and Loading

Mixing and loading of pesticides are among the most dangerous tasks involving work with these products, because it is at these times that people are working with open containers of concentrated pesticides.

For this reason, individuals employed to perform these activities should be well-informed of the dangers involved and work under the supervision of a properly certified, licensed applicator whenever handling “Restricted-Use Pesticides.”

Mixing and loading should never be done without a full understanding of the pesticide label or without the use of all recommended personal protective equipment. The label will identify the dangers involved and the precautions to follow. It will also indicate the signs and symptoms of poisoning and recommend first aid practices, should a person be exposed to the product.

Before you begin to mix, load and apply pesticides, and after you understand the label directions, make certain you have taken the following precautions:

  1. Have all the recommended protective clothing and equipment. Double-check that the respirator fits properly and has the correct canister cartridge.
  2. Do not work alone; be sure help is available if you get into trouble.
  3. Make certain that all equipment is functioning properly.
  4. Be certain that materials are available to handle spills.
  5. Know the first aid procedures and make certain that materials and supplies are available.
  6. Know the early symptoms of poisoning for the pesticide you are using.
  7. Have detergent or soap and an adequate supply of water available.
  8. Never eat, drink, smoke, or go the bathroom while working with pesticides, without first washing your hands.

You are now ready to begin mixing and loading. Follow these suggestions:

  1. Reread the label and follow the directions; pay special attention to the warnings and precautions.
  2. Make sure only authorized mixers, loaders and/or supervisors are in the mixing and loading area. No other people or animals should be there.
  3. Work only in a well-ventilated, well lighted area.
  4. Pesticide containers should be in a secure position when opening, to prevent any spillage. Be sure everyone is wearing the proper personal protective equipment (PPE).
  5. Mix and pour concentrated pesticides down low, preferably below waist level. Never pour pesticides at eye level. A spill or splash could be disastrous. Always remove clothing and wash yourself and your clothing thoroughly, immediately (within two minutes), if pesticides are spilled or splashed on you.
  6. Stand with your back to the wind — upwind — so that any fumes or dusts are blown away from you.
  7. Pour the pesticide into water, never water into the pesticide.
  8. If stirring is necessary, use a stir stick, never your hands. 7
  9. Mix and load on a concrete slab where spills can be contained. Avoid mixing or loading near surface water or near a well-head.
  10. Never pour pesticide directly into a spray tank. Always mix and dilute in a small container.
  11. When pouring, stand with your head well above the spray tank, to prevent pesticides from splashing in your face. Protect your eyes with splash-proof goggles.
  12. Never overflow a spray tank. The cleanup could be an all-day, all-night task, costly and dangerous.

After the mixing-loading task has been completed, your responsibility continues:

  1. Securely close pesticide containers immediately after use. Return unused pesticide to its proper storage.
  2. Clean up all spills, no matter how small the amount.
  3. Wash mixing and loading pails, measuring devices and stirring equipment or tools in strong detergent water, rinse in clear water store to air-dry.
  4. Wash your personal protective equipment in detergent, rinse and hang to air-dry.
  5. The wash and rinse water used in steps 3 and 4 can best be disposed of by pouring it into the spray tank. Do not overfill the spray tank, so that there will be room for the rinse water.
  6. Remove your clothing and launder separately with heavy-duty liquid detergent and hot water. DO NOT USE BLEACH as it could cause a dangerous chemical reaction. Line-dry the clothing where it is exposed to sunlight.
  7. Take a hot shower using a detergent-type soap. Do not forget to wash your hair. Put on clean clothing.

Application

When applying pesticides, you are not generally exposed to the same high concentration of pesticide as during the mixing and loading operation. However, the time-length of exposure is much longer, thus the cumulative exposure may be equal to or greater than during the mixing-loading operation.

Pesticide applications are made with everything from hand sprayers and dusters, to irrigation equipment, large airblast grove sprayers and aircraft. Whatever equipment is used, many of the safety precautions are the same. These include:

  1. Read and follow the label. Applications made which vary from label requirements are a violation of federal law.
  2. Use the correct equipment, and make sure it is properly maintained and adjusted. Screens, strainers and nozzles should be clean and functioning properly. Nozzles should be of the right type and properly adjusted and all lines, valves, seals should be checked for leaks.
  3. The application equipment should be accurately calibrated on a regular basis. Whenever you have any suspicion that the equipment is applying an inaccurate amount, recalibrate it. Your operator’s manual should provide information on calibration of the equipment. Additional information is available through your county’s Cooperative Extension Service.
  4. Wear the proper protective clothing and equipment as recommended by the pesticide label.
  5. Check the weather forecast frequently to determine if conditions will be favorable for the application and effectiveness of the pesticide. The National Weather Service provides a continuously updated weather forecast.
  6. Avoid spraying near sensitive areas where drift could damage neighboring crops or the environment. When spraying must I done in these areas, attempt to spray when the air is still, hum is high and any potential drift will be away from sensitive areas.
  7. Lower pressures, proper boom and nozzle adjustments, larger nozzle size and drift reducing additives (if the label permits) will reduce drift.
  8. Do not make field adjustments to the sprayer in a recently sprayed, still-wet area. Move to an unsprayed area.
  9. Never attempt to clean a nozzle, screen or hose by blowing or sucking on it with your mouth. Use small soft-bristle brushes and/or an air pressure bulb for these purposes.
  10. Always empty a tank by spraying the entire contents onto the vegetation or other area for which it was intended. Never drain a spray tank onto the ground. Important: Never mix more than you need!

Resource(s):

Georgia Pest Management Handbook

Center Publication Number: 49
Scary Scorpions

Source(s): Based on information from Dr. Rodney Coleman, Former Extension Entomologist, Cooperative Extension, The University of Georgia College of Agricultural and Environmental Sciences.


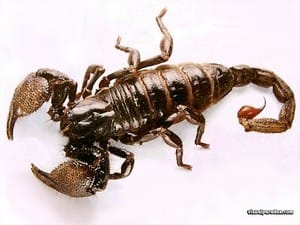
Scorpions are fairly common throughout the state. While they seldom sting, their presence around the home is objectionable to many people. Scorpion stings are usually no more poisonous than those of bees or wasps.

scorpion

Description

Scorpions are not insects. They are classified as arachnids and, therefore, are related to spiders and ticks. They use their large pincherlike front legs for defense, climbing, courtship and to capture prey. Their stinger is at the tip of a long, narrow tail and is used for defense and killing prey. Adult scorpions reach a length of exceeding 2 1/2 inches. Those found in Georgia are black, brown or gray in color.

Their habits

Scorpions feed on a wide variety of organisms, including insects, spiders, centipedes and millipedes, and even small reptiles. Their vision is very poor, so they often hide in ambush for their prey. They prefer a moist habitat as that is where their prey also resides. Scorpions are commonly found in rock and wood piles, stacks of rubble, in brick or rock walls, crawl spaces or in leaf litter or mulch materials.

Scorpions live from three to five years. The male and female go through a courtship similar to that of spiders, after which the female gives birth to live young. After birth, the young scorpions climb onto the back of the mother and remain fastened by their pincers until after the first molt. The young scorpions are nourished by yolk material stored in their bodies and, contrary to popular opinion, do not eat the body of the mother.

No real danger

Many fantastic superstitions have arisen concerning the scorpion. Probably no other related animal has been the subject of so many folk tales. However, scorpions are usually not aggressive and raise their pinchers and tail to merely scare away intruders.

Scorpions rarely sting man; but when they do, it’s only after provocation. Fortunately, only a few species are deadly. The venom apparently varies in its potency from season to season. Persons stung in the spring, when scorpions first emerge, have more severe reactions because of the larger amount of venon present in their bodies at this time. Also, susceptibility to scorpion poison is extremely variable, even among individuals of the same age. For most people, a scorpion sting produces a sharpe sensation like a bee-sting that lasts for 10-20 minutes. To be safe, all scorpion stings should be treated by a physician.

Control Measures

Remove old boards, cardboard, loose rocks, old mattresses and other debris from near occupied buildings, Use caulking to close small cracks where pests may enter.

For chemical control, apply a household spray labeled for crawling insects. Follow all label precautions Materials should be applied to places where scorpions are found hiding, Apply around baseboards, quarter rounds, and especially where small openings are present around water pipes and other fittings. If scorpions persist, the treatment should be repeated according to label directions.

Recommended Pesticides

carbaryl dust
cyfluthrin spray
cypermethrin spray
tralomethrin spray

Pesticide Precautions

If you use insecticides inside the home:

  • Do not contaminate food, water, utensils, etc. Be sure to keep the solution away from stoves or open flames.
  • Observe all restrictions and precautions on pesticide labels.
  • Store all pesticide in original containers with labels intact and behind locked doors.
  • Apply pesticides carefully to avoid drift.
  • Bury surplus pesticides and destroy used containers so that contamination of water and other hazards will not result

Center Publication Number: 50

Scent and Decorative Herbs

Source(s): Wayne McLaurin, Professor Emeritus of Horticulture, The University of Georgia, College of Agricultural and Environmental Sciences


Herbs that can be grown in the South provide numerous ways to decorate and scent homes, yards, and places of business. Some of the following herbs are also edible.

herb

Anise Hyssop (Agastache foeniculum)

A tall perennial with small purple flowers, anise hyssop (neither true anise nor hyssop) blooms in the South throughout the summer. An excellent bee plant, it grows best in a sunny area and may be propagated through seed or root division.

Artemisia (Artemisia abrotanum – Southernwood; Artemisia absinthium – Wormwood)

Artemisias are noted for their grey-green or silver foliage, either ferny or slightly cut leaves. Of the numerous species, southernwood and wormwood are most popularly grown in the Southern herb garden. Artemisias favor full sun, tolerate light shade and soil with some clay. As perennials, artemisias grow woody and leggy. They should be trimmed back in spring and divided every two to three years. Strong-scented artemisias are said to be useful for repelling moths and fleas. They are particularly decorative in the garden as a contrast plant among colors and greens of other plants.

Comfrey (Symphytum officinale)

Though once used as a wound dressing, comfrey in today’s herb garden or landscape is a striking, expansive plant with large leaves and pink flowers sent up on stalks in early summer. It is a perennial that reappears each spring. The plant should be watched for slug infestations. A light mulch will keep its leaves off the ground and create a less desirable habitat for pests. It is propagated primarily by division or root cuttings.
Costmary (Chrysanthemum balsamita). A midsummer bloomer with small yellow flowers, costmary produces large, oblong, fragrant leaves which tend to look scraggly as the season progresses. It is a hardy perennial and is related to

Chrysanthemum parthenium, daisy-like feverfew.

It will spread, though not invasively, through underground rhizomes and should be divided after two or three years.

Hyssop (Hyssopus officinalis)

An attractive perennial border plant with small, dark green leaves, hyssop bears pink, white, or blue flowers in the spring. Hyssop prefers a sandy soil or at least very well-drained soil and plenty of sun. It is propagated through division, cuttings, or seed. The spicy scent of both its flowers and its leaves contributes to potpourris.

Lavender (Lavandula spp.)

From the Latin lavare meaning to wash, lavender is still used today to perfume bath and cosmetic products. Grown from seed (slow to germinate) or cuttings, lavender is one of the most popular plants for the herb garden. The tallest species and probably the best known English lavender (L. angustifolia) is only one of many species including Spanish lavender (L. stoechas) and French lavender (L. dentata). Lavenders require full sun and very well-drained soil. Some herb growers recommend growing lavenders on mounds to ensure drainage. Winter hardy in milder climates, lavender produces white or pale purple to blue-purple flowers and strongly scented needle-like, grey-green leaves. Even the woody stems are fragrant.

Lemon Verbena (Aloysia triphylla)

As it is perhaps the strongest of the lemon-scented herbs, merely brushing by lemon verbena will release a delightful scent. All parts of the plant are scented lemon. Hardy in milder winters, lemon verbena is one of the last of the perennial herbs to leaf out in spring. It grows with abandon, up to 5 feet, and benefits from light pruning. Edible as well as decorative, lemon verbena is also an ideal potpourri plant. It is propagated through cuttings and prefers full sun.

Monarda (Monarda didyma)

Native to America, this tall-growing member of the mint family goes by many names including bergamot, Oswego tea, and bee balm, because it attracts bees. ‘Cambridge Scarlet’ is a cultivar offering bright red flowers in early summer that attract hummingbirds. Monarda leaves have an indefinable, almost lemon scent. Like other members of the mint family, it is a perennial that should be divided about every three years. It may be trimmed back to improve its appearance in late summer.

Mountain Mint (Pycnanthemum pilosum)

A perennial found in abundance in the Appalachian area, mountain mint is a fragrant plant that tolerates shade. About 2 to 3 feet tall, mountain mint develops grey-green leaves at the end of its branches with tiny greenish flowers at the very tip. The plant appears from a distance to have branches ending in white blooms. A popular bee plant, mountain mint needs pruning at least once per summer to control its tendency to grow leggy. Also, mountain mint attracts and provides food for beneficial wasps.

Patchouli (Pogostemon patchouli)

A tropical perennial, patchouli with its exotic Far Eastern fragrance is now available at nursery centers. Patchouli may be grown successfully outdoors in full sun, adequately watered, in fertile soil. When temperatures begin to drop regularly below 65 degrees, it must be brought indoors. An excellent fragrance plant, it may be propagated by seeds, though cuttings are generally used.

Perilla (Perilla frutescens)

This Asian herb, also known as Shisho, is a highly decorative annual garden plant. Direct seeded or transplanted, perilla adapts to full sun or partial shade. The green-leaved variety is a salad herb, but the tall, purple-leaved variety is a striking landscape plant as well. This herb tends to spread from dropped seeds.
Grown by seeding, cuttings, or division, rue has a rich historical tradition. Also known as “Herb of Grace” because it symbolized repentance, rue is today a beautiful ornamental addition to the herb garden. However, its blue-green leaves and yellow flowers in late summer may cause dermatitis in some people. The plant will grow woody with lanky stems if not pruned at least once per summer.

Santolina (Santolina chamaecyparissus)

Santolina is an excellent perennial border plant as it grows between 1 and 2 feet high and is often used in knot gardens. Both gray and green cultivars exist. Santolina produces a strong, perhaps spicy scent when its hard, narrow leaves are crushed. The herb will succumb to heat and overwatering and should be planted in very well drained soil. It is also known as “lavender cotton” and may be used in dried arrangements and in wreathmaking.

Scented Geranium (Pelargonium spp.)

Numerous cultivars are found within this genus, commonly named by their scents — coconut, rose, peppermint, nutmeg, apple, cinnamon, and combinations such as lemon-rose, and others. Most varieties produce small, attractive flowers and leaves that are fragrant when touched. While most are compact, some can grow 2 feet around. They are excellent container plants, and since they are not cold hardy, plants in containers can be moved easily indoors. They will grow in sun or partial shade and prefer sandy soil and minimal watering. Pinched to discourage legginess, they are generally propagated through cuttings.

Soapwort (Saponaria officinalis)

Soapwort, or “bouncing Bet,” is an easy perennial to grow and, unlike most herbs, tolerates moist or dry, poor soil and some shade. It produces white blooms in the summer. Its name comes from the use of its leaves as a mild, sudsing soap-like solution used even in these times for cleaning fine tapestries and other old fabrics (the term “wort” is from the Old English wyrt, meaning root, plant, or herb). It can be propagated from either divisions or seed, and will self-sow.

Stachys (Stachys byzantina)

Perennial stachys, commonly known as “lamb’s ears” for its large, velvety, silvery green leaves, is a beautiful low-growing garden plant producing purple flowers in the early summer. In the same genus as betony, stachys requires minimum water once established; overwatering will cause the plant to “melt” out with deterioration of the leaves, as will shading by other plants. The thick growth also encourages insects on the underside of the leaves. Stachys spreads, though not invasively.

Sweet Woodruff (Galium odoratum)

Sweet woodruff is a favorite herb for shade and makes an attractive ground cover. It may be readily recognized by its narrow, bright-green leaves growing in successive, star-like whorls. The plant is a perennial herb about 6 inches to 8 inches tall.

Tansy (Tanacetum vulgare)

A tall perennial with fern-like foliage, tansy produces yellow button flowers in summer. It grows in full sun and will spread by means of underground rhizomes. Because of its pungent scent, it is sometimes used as an insect repellent. Both leaves and flowers are useful in either fresh or dry arrangements. Formerly used medicinally, tansy is now known to be toxic if ingested.

Yarrow (Achillea millefolium)

Each of the several varieties of yarrow has special characteristics in the landscape, from the fern-like leaves and tall habit of filipendulina to argentea, a smaller, silver-leaved variety. Yarrows are hardy in almost any growing condition, but do best in full sun. They can be propagated by seeding or root division. Yarrows may need to be divided periodically. Remove flowerheads to promote reblooming. The flowers, which include reds, pinks, yellows, and whites, can be cut for their long stalks and dried in bundles for winter arrangements.

Literary Herbs

Poets have used plants to express their thoughts for centuries. Shakespeare wrote of rosemary for remembrance in Hamlet, and about rue, herb of grace, in The Winter’s Tale.

Milton spoke of “sweetest fennel” in Paradise Lost.

The Bible refers to cleansing with hyssop, words bitter as wormwood (artemisia), and fragrance of balm.

Costmary, while not a Biblical herb, was used as a marker in Bibles and as a fragrant herb in churches in colonial time; hence, its name, “Bible Leaf.”


Resource(s):

Herbs in Southern Gardens

Center Publication Number: 263

Seeding Tall Fescue Lawns

Source(s): Clint Waltz, Extension Turfgrass Specialist, The University of Georgia


Tall fescue (Festuca arundinacea) is a popular cool-season grass species that has a bunching to weakly rhizomatous growth habit. Tall fescue is best adapted to Georgia’s piedmont region and is used for home lawns, general areas and for soil stabilization. In general, the southern boundary for tall fescue growth would be Griffin, although, it can be found in shaded or protected microclimates further south.

lawnhouse


Because it can be seeded, tall fescue is very popular with do-it-yourself homeowners. Furthermore, its popularity relates to the genetically dark green color during the spring and fall. The use of tall fescue has increased since the introduction of “turf-type” cultivars in the early 1980’s. The turf-type cultivars have darker green color, finer leaf blades, lower growth habit, greater density, and improved shade tolerance compared to the more traditional ‘Kentucky 31’ (K-31) type tall fescues. Additionally, research has shown that some turf-type cultivars have deep extensive root systems and other genetic characteristics for improved drought tolerance.

Establishment

September and October are the ideal months to plant tall fescue. Grass seeded earlier is subject to heat stress and diseases, while planting later leaves the plant vulnerable to cold weather. Seeding in December and early spring is generally not recommended because the plant does not have adequate time to develop a deep root system needed to survive Georgia’s hot summers.

During the summer months, it is common for the canopy of tall fescue to thin and become more open. This is a heat-stress survival mechanism that allows the plant to conserve energy until climatic conditions are favorable for growth. However, a thinned and open canopy makes the tall fescue less competitive and more susceptible to summer annual grassy weeds, like crabgrass. Preemergence herbicides are needed to minimize weed pressure, but research has shown that these herbicides pose the least amount of risk to tall fescue that was seeded the previous September and October. Tall fescue seeded in November and then treated with preemergence herbicides the following February had lower turfgrass quality ratings and reduced stand density compared to tall fescue seeded in October.

Soil Preparation

Proper soil preparation is critical for an effective seed establishment. Ridding the lawn of debris, tilling, incorporating lime and fertilizer, and smoothing the surface are all necessary prior to seeding. Add any amendments such as organic matter or topsoil for soil improvement and till thoroughly into the existing soil. After initial preparation is completed and the area is properly leveled, collect a soil sample to obtain soil fertilizer recommendations. Then incorporate the starter fertilizer and lime 3 to 4 inches into the soil before planting. If equipment permits, tilling deeper is always better.

Seeding

To ensure varietal purity plant seed that is certified and identified by a blue tag. Such seed has been tested and the information on the label is assured by law. In the retail market most tall fescue seed is available as a blend, where several tall fescue cultivars are blended together. Single cultivars are also available but often at a higher price compared to blends. Orchardgrass is a common weed seed contaminate found in tall fescue seed and is easily seen in lawns because of its blue- green color and faster growth rate. Unfortunately, it cannot be selectively controlled with a herbicide.

The ideal seeding rate for tall fescue is 5 pounds per 1,000 square feet. To minimize skips and gaps, it is best to divide the seed into two equal portions and broadcast half in one direction and the remainder at a right angle to the first direction. This procedure is also recommended for fertilizer and granular pesticide applications. The seed can be lightly raked into the upper ¼ inch of soil or pressed into the seedbed with a roller. Applying a straw mulch to retain moisture for improved germination and prevent erosion can be beneficial.

Irrigation

After seeding, keeping the upper 1 to 2 inches of soil moist, not wet, is necessary for uniform germination. This usually means daily watering of about 1/8 to ¼ inch for the first three weeks. As the seedlings develop, irrigate less frequently but wet the soil profile deeper. Under good conditions tall fescue seed will germinate in 5 to 10 days and be ready for its first mowing between 2 and 3 weeks.

Mowing

Begin mowing at a height of 2 inches and as the seedlings mature, raise the cutting height to the 2 ½ to 3 inch range. Once mature, the lawn can be maintained between 2 to 2 ½ inches, but a height of 3 inches is suggested during the summer months. Use a mower with a sharp blade and mow often enough so no more than 1/3 of the leaf height is removed in a single mowing. Do not mow a grass when it is wet, especially young seedlings.

Reseeding

It is common for tall fescue lawns to thin and need periodic reseeding. Turf thinning is usually caused by environmental stresses, improper turf management like insufficient irrigation, too much nitrogen fertilizer, seeding with more than 5 pounds of seed per 1,000 square feet, mowing too low or too high, and seeding in late fall or spring. Additional problems include pests like crabgrass or white grub infestation, or disease problems like brown patch. Soil related problems like a hard compacted rootzone, and environmental conditions where tree shade and root competition compete for water and nutrients also contribute to canopy loss. All of these factors, however, can be mitigated with proper management.

If the lawn needs reseeding, estimate the percentage of tall fescue loss and multiply that number by the establishment seeding rate of 5 pounds per 1,000 square feet. For example, if 50 percent (0.5) of the stand is lost, reseed with 0.5 x 5 = 2.5 pounds per 1,000 square feet. Spring reseeding is less successful because of the shorter establishment time before summer heat and moisture stress.

Getting the seed in contact with the soil is necessary to assure successful reseeding. First, mow the lawn at a height of 1 to 1.5 inches. Disturb the soil preferably by coring or vertical mowing before and/or after seed distribution. This equipment is often available at rental or garden centers. Reseed thin areas at 2 to 5 pounds per 1,000 square feet. Getting the seed below the existing turfgrass canopy and to the soil surface improves germination. Apply a starter fertilizer at 1 pound of nitrogen per 1,000 square feet at this time. Finally, keep the soil moist as discussed for new lawn establishment.

In summary, successful seeding depends on proper soil preparation, good soil-to-seed contact and, proper water management. This and other fact sheets are available at www.gaurbanag.org and www.georgiaturf.com.


Resource(s):

Lawns in Georgia

Center Publication Number: 218

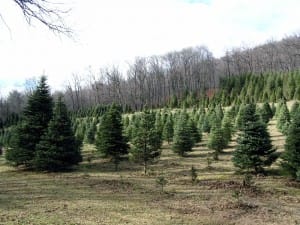
Selecting a Christmas Tree

Source(s): Gary R Peiffer


Determine where in your home you will display your tree so that you will know at the tree lot what size and shape you need.


Do a freshness test. Hold a branch about 6 inches from the tip. Pull your hand toward the tip, allowing the branch to slip through your fingers. Very few green needles should come off in your hand if the tree is fresh.

Another freshness test: lift the tree a couple of inches off the ground, then bring it down abruptly on the stump end. The outside, green needles should not fall off in substantial numbers. Remember, inside needles do turn brown and shed naturally every year.

A good fragrance and green color also indicate freshness.

CUT TREE CARE

Bring several plastic garbage bags or a large sheet of plastic when you go to purchase your tree. Wrap the tree with plastic if you plan to transport it on top of your car. Cold winter air at 60 mph will dry the tree further and can cause early needle drop.

The most important thing to remember is that real trees need water. Research has not shown much benefit from using “freshness extender” chemicals. They seem to work well for flowers but results are more uncertain for trees.

Make a fresh cut across the base of the trunk, 1/4″ up from the original cut.

When a tree is first cut, a seal of sap occurs naturally over its stump, which keeps moisture in the tree. It’s important to break that seal to allow the tree to take up the water needed to keep it fresh throughout the holidays.

Until you are ready to decorate, keep your tree outdoors, standing in a bucket of water and protected from the wind and sun. This will help the tree retain its moisture.

Keep plenty of water in your stand. A Christmas tree may absorb a gallon of water in the first 24 hours it’s up and two pints to a gallon of water a day thereafter. Check the stand daily and supply fresh water as needed. Never let your tree stand go dry. If the water supply runs out, a seal will form on the cut surface of the tree trunk and a new cut should be made.

Position your tree away from heat sources such as fireplaces, radiators and television sets.

Test your light cords and connections before hanging them on the tree to make sure they are in good working condition. Look for cracked insulation or broken sockets, and make sure all the sockets are filled. Don’t forget to unplug the lights when you go to bed or leave home.

LIVE CHRISTMAS TREES

Several kinds of evergreen trees can be bought as live Christmas trees and then planted after the holidays. It is important to remember that live trees take much more care than cut trees. Live trees should be kept inside no more than two weeks.

LIVE TREES FOR THE ATLANTA AREA

White pine
Leyland Cypress
Virginia pine
Canadian Hemlock

Note: Fir and spruce trees have difficulty surviving hot Atlanta summers. They are not recommended for planting in this area.

HOW TO CARE FOR LIVE TREES

Leave outdoors in a shady spot until mid December. Spray with an anti-transpirant such as Cloud Cover or Wilt Pruf.

Transport indoors on December 15. A child’s wagon, lined with plastic, makes a good cart. The tree can be left in the wagon or it can be set into a wide, shallow pan indoors.
Water the root ball every day. Use at least two quarts of water each time. Pour the water slowly on top of the root ball and allow it to soak in. Do not just pour water into the pan.
Close all hot air vents near the tree. Try to keep the room cool for most of each day. Close all hot air vents near the tree. Try to keep the room cool for most of each day.
Move tree outdoors by December 28. Dig a hole five feet wide and 12 inches deep. Plant the root ball in the center. Apply lots of water. Mulch with three inches of pine straw.
Water weekly until spring. Fertilize with liquid plant food (MiracleGro, Peters, etc.) in mid-summer.

The mention of brand names in this publication does not imply endorsement or exclusion by the Cooperative Extension Service.

RECYCLING TREES

Place your tree in a garden or backyard for use as a winter bird feeder and shelter. Orange slices, bread and suet will attract birds and brighten up the winter landscape.
Christmas trees are biodegradable. The branches and trunk may be removed and chipped to be used as mulch in your garden. Contact your local Clean and Beautiful office for recycling sites.

4 Branch tips and needles provide aromatic stuffing for sachet.

Sunk into private fish ponds or lakes, trees make excellent refuge and feeding areas for fish.
Living Christmas trees can be planted in the yard and enjoyed for years to come. If there is no room in the home landscape, trees can be planted at schools, churches or neighborhood beauty spots.

SOURCES OF TREES

All Local Nurseries
Send self-addressed, stamped envelope to:

Georgia Christmas Tree Association
Cut Tree Guide & Farm List
Route 2, Box 104
Midway, Georgia 31320

Farmers & Consumers Market Bulletin
Thanksgiving week issue
Call 404/656-3645 or 1-800-282-5852

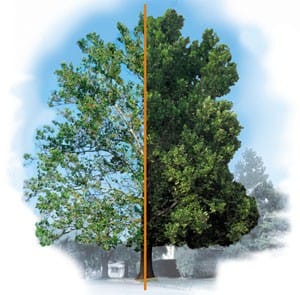
Shade Tree Decline

Source(s): Kim D. Coder, Professor of Community Forestry, Warnell School of Forestry and Natural Resources, The University of Georgia


Many trees in Georgia are showing dieback and decline symptoms. Twig or branch dieback is initiated in the tree as a response to poor growth conditions and/or pest attack. Usually a combination of physical, climatic and pest problems lead to the tree shutting off some of its outside portions.

shadetree

Tree decline is a general loss of vitality throughout the entire tree caused by a systemic disease or by a sequence of stressing events that cause the tree to burn too much food energy. Many cultural factors as well as past tree abuse predispose a tree to decline. Several factors contributing to this decline include, drought, mechanical injury, chemical injury and pests.

Drought

Drought is a main contributing factor to shade tree decline. Extended drought can influence the health of shade trees by the loss of absorbing roots which are found primarily in the top 8 to 12 inches of soil. Once this soil area dries, many of the tree’s absorbing roots dry out and die. Leaves and stems can also be damaged by drought conditions, especially when there is not enough water available for evaporative cooling and food production.

Some types of trees will be inherently more susceptible to drought damage that occurs in mid-spring as compared with a summer drought. A season-long drought period with high temperatures can adversely effect all trees even if supplemental water is added. Trees may not readily show initial symptoms because of stored carbohydrates and essential elements in the woody tissues. As soon as these stored foods are near depletion, the trees begin to prematurely defoliate. Other drought symptoms can be delayed two or more years making it hard for many to believe that drought was actually the problem.

Although irrigating trees during periods of drought is recommended, frequent and shallow watering contributes to shallow root development. This increases the chances for drought injury as well as the potential for winter injury during periods of extremely cold weather. When watering, be sure the moisture reaches depths of at least 5 to 7 inches. Water once every three to four days during periods of severe drought. Watering everyday may contribute to the decline of the tree because the activity of many parasitic and pathogenic organisms, like root rot, is stimulated by too much water. The amount of water to apply depends upon soil texture and potential size of the tree rooting area. Clay soils can be easily overwatered which destroys tree roots.

Mechanical Injury

In urban areas, mechanical injury is a major cause of shade tree decline. In subdivisions and new housing developments, shade trees are often abused; roots are torn out of the ground, bark is bruised and the soil around trees is disturbed. Losses from such damage could be minimized or even avoided if people realized that trees may not survive such treatment and took precautions to avoid abusing them. Many utilities and municipalities are also guilty of tree abuse. When putting in gas and water lines or paving streets, workers damage or destroy roots which disturbs food production, growth control and the tree’s top-root balance. Root loss contributes to the weakening and decline of a tree’s crown. As with drought, these symptoms can often be delayed in appearance by 1 to 2 growing seasons.

Some of the worst things you can do to a tree are: add fill around the trunk, cultivate or remove soil from around the trunk, compact the soil, especially when the soil is wet, or damage the bark on the trunk. Each of these events leads to a weaker tree that can lead to other stress factors or pests injuring the tree further.

Chemical Injury

Chemical damage (pollution/pesticides) of trees is very common. Injury to trees from pollution as well as chemical application by homeowners and commercial applicators, are common occurrences. Pollutants are now a part of our urban and rural environment and ecology. Pollutants, such as ozone, sulphur dioxide, fluorides, sunlight-induced nitrates (PAN), road and sea salts and particulate matter (flyash, dust, cinders), all disrupt the life processes of trees. Some pollutants will be concentrated near roadways and factories that are their source. Other pollutants, like ozone, can disrupt tree growth a hundred miles downwind from a city. Pollution acts as one factor in a tree decline problem.

Chemical injury can be much more severe when trees are already weakened by other factors. The “spray and pray” concept (spraying a chemical and hoping it will control whatever the problem is) should be avoided. Chemicals are not always the answer and may actually create more problems. Good tree management should be practiced first. Use chemicals only as helpers after other management practices have been performed.

Pests

All of the factors already mentioned, and others not mentioned, weaken trees and make them more susceptible to pest organisms. Disease organisms are especially likely to take advantage of a weak tree.

  • Tree Cankers: Many oak species are lost to Hypoxylon canker, a disease that is common in both urban and rural areas. This disease can be diagnosed by its grayish to brown felt appearance on the bark. Little can be done to control this disease since the fungus is actually growing into the wood of the tree. The removal of infected trees and pruning of infected branches will remove the fungus innoculum from the area. However, pruning will not solve the problem of low tree vigor. Careful management practices performed to increase tree vigor will encourage tree recovery.
  • Twig Cankers: There are a number of canker-causing fungi which cause twig dieback in many shade tree species. Most are diseases that take advantage of trees that are in a weakened or declined condition. Prune dead wood and initiate management practices to help the tree recover. Fungicide applications generally provide little protection since tree health is the key to canker disease control.
  • Leaf Spots: There are numerous leaf spot fungi which infect leaves and cause foliage loss from many urban shade trees. These diseases occur annually and may actually go unnoticed most of the time. During periods of stress, there may be an excessive amount of defoliation attributable to foliage diseases. Foliage diseases of large urban trees are not known to cause any permanent damage unless defoliation occurs several years in succession. Excessive defoliation often occurs when a tree is in a weakened condition.
  • Slime Flux: Slim flux, called wet wood, is considered a disease of unthrifty or old trees. Symptoms of slim flux include oozing of either a white or brown, smelly substance from wounds, pruning scars and trunk crotches. The slime is toxic to the bark and may kill large patches when it stays on the bark for a long time. Rinsing twice a year may minimize the damage, but determine what weakened the tree initially and provide best management practices to improve tree vigor.

Decline Management

What can be done to prevent shade tree decline? The key to good health is tree vigor. Provide a site that is suitable for the species involved. Pick a strong species of tree. Provide construction protection for roots and trunks of trees to reduce accidental injury, soil compaction and to allow adequate room for tree growth. Plan ahead for future development. Street maintenance equipment often injures trees after roadways are widened. If twig dieback is observed, proper pruning will reduce disease susceptibility and improve the tree’s appearance. Remove dead or dying branches. When roots are damaged or lost, continue to water and wait one growing season and then thin the crown. This helps the remaining roots sustain the health of the existing foliage. Water, fertilize and care for the tree only when needed. Do not “kill” your tree with kindness. Give your tree a chance to live a full, healthy life by helping when it has a bad year.

Shade tree decline is becoming much more prominent. Being able to recognize conditions which promote decline and taking steps to eliminate stresses before symptoms occur will save many urban shade trees.


Center Publication Number: 223

Shot-hole Disease

Source(s): Nina Eckberg


Shot-hole disease is a combination bacterial infection (Xanthomonas prunii) and fungal disease (Blumeriella gaapi and/or Cercospora sp.).

Shot-hole Disease

Shot-hole Disease Identification

Shot-hole disease (on a laurel in the photos) is a combination bacterial infection (Xanthomonas prunii) and fungal diseases (Blumeriella gaapi and/or Cercospora sp.)

Shot-hole Disease Appearance

Circular holes in the leaves that eventually join and make larger holes. The appearance of shooting a shotgun at the shrub and causing multiple holes.

Shot-hole Disease Hosts

Laurels (bay and Otto Luyken), camellia, ligustrum (privets), hydrangea, ivy.

Shot-hole Disease Season

April through October, peak in May and September.

Shot-hole Disease Damage

Leaves appear to be ‘eaten’ away by the disease, leaving a ragged appearance. As leaves are damaged, they begin to fall away, the plant looses its ability to make food and can become stressed.

Shot-hole Disease Integrated Pest Management

Sanitation is the best way to keep the disease from coming back. Clean up contaminated leaves from under the plant. When diseased leaves build-up under the plant, rain or watering can splash the disease back up on the plant. Spray the leaves with Mancozeb, Kocide, Kop-R-Spray or other recommended products containing copper at the first sign of a problem. Always READ THE LABEL and DIRECTIONS FOR USE section carefully when using pesticides.


Resource(s):

Common Landscape Diseases In Georgia

Center Publication Number: 55

Sinkholes In The Landscape

Source(s): Walter Reeves, College of Agricultural and Environmental Sciences, Former County Extension Agent – DeKalb County


Sinkholes in the yard are an unfortunate but common problem that may arise five to ten years after a home is constructed. These holes, or underground cavities, form gradually but can appear in your lawn overnight.

In Florida, where some homes have been built on top of underground limestone caves, a sinkhole is a serious situation. In the northern half of Georgia, sinkholes like these are rarely seen.

Sinkholes typically develop where construction crews have buried debris, such as tree branches, stumps and construction materials. After a few years this buried debris decays. This leaves behind a large underground cavity hidden by a relatively thin surface layer of soil and grass. The soil layer eventually caves in, causing a sunken area or hole that can seem bottomless.

1f a sinkhole appears in your lawn, inspect it carefully to determine if the problem was caused by buried debris. Enlarge the surface opening so that you can inspect the entire cavity with a flashlight. If you can see traces of decayed trees or building materials, you have a construction sinkhole. By probing the bottom and sides of the cavity with a long rod, you can confirm your suspicions. If you find solid earth on the bottom and sides, the cavity probably is man-made, and can be treated with one of the remedies listed below.

If you find a large pipe in the cavity, a leaky sewer pipe may have caused the sinkhole. Rainwater might have washed soil into the pipe. As the soil is taken away, more soil washes in and the ground above sinks. The best course of action is to consult the proper municipal authority before proceeding any further.

When the cavity is so large that you cannot reach the sides or the bottom or if you see lots of water or soft, mucky soil, you could have a more serious problem. A private geotechnical or soils consultant should be contacted to inspect the site and recommend a solution.

Treating Underground Cavities

  1. Check the location of buried utility lines before you dig. Call 1-800-282-7411 within Georgia and 404-325-5000 within metro Atlanta for free utility location services.
  2. Enlarge the surface opening to access the entire cavity. Look for decaying debris and confirm the cause of the problem.
  3. Remove any large pieces of undecayed debris.
  4. Fill the entire cavity by adding loose fill dirt in 12-inch layers. Pack the soil firmly after each 12-inch layer to prevent future settling. Failure to pack the entire cavity may cause another sinkhole in the future.
  5. Once the cavity is filled, establish grass or other plants on the bare soil. It is probably not a good idea to plant a tree in this area for at least a couple of years. After that time, you can be relatively sure your problem is solved.

Center Publication Number: 32

Slow The Flow – Make Every Drop Count

Source(s):

  • Joan E Marsh
  • Gary R Peiffer

Make every drop of water count so that everyone has enough to use all summer long.

General Watering Tips

  • When watering, wet the soil to a depth of about 6-8 inches which is about one inch of water. Short, surface waterings do more harm than good by encouraging shallow roots.
  • Three to five gallons of water, or less than one minute of watering with a garden hose, will saturate the root zone of a plant.
  • Established shrubs can survive with one 30 second hand-watering into their root zones every 2-3 weeks.
  • When installing new plants, especially large trees and shrubs, build a shallow soil bern (2-3 inches high) so that water can be directed to the plant’s root zones.
  • If possible, consider doing larger plantings during the fall to early winter, or in early spring when there is more adequate rainfall.
  • Trickle, drip or soaker irrigation systems provide adequate water for plant growth and reduce the amount of water used by 80-90%. Most of these systems put out 1-3 gallons of water per hour, and the water goes right to the plant’s roots where it is used.
  • Before deciding how long to run your watering system, test it to see how much water it puts out over a desired time period.
  • Watering plant leaves and/or stems increases your chances of pest problems, especially diseases. Also, it wastes water because very little to no water is absorbed through these plant parts.

Ornamental Plants – Watering Needs

  • Many southern landscape plants can tolerate drought conditions for several days and even weeks once they are well-established (after first 2-3 years). Examples: crape myrtles, junipers, many holly varieties.
  • Place large, valuable and historic trees at the top of your watering priority list. Large oaks are especially vulnerable to drought conditions and you can not easily replace 100 year old oak trees.
  • Most annuals, perennials, and many shrubs (azaleas, rhododendrons) are shallow rooted and therefore have high water demands. Water them more often but limit the size of these planting areas.
  • If planting color areas, such as annuals/perennials, concentrate them in containers or planter boxes, and use some water-holding polymers in your mixes.
  • Water newly planted trees and shrubs BEFORE well-established mature plants. They will need at least 1-2 good waterings per week, to get rooted and to insure their survival.
  • Hold off on the installation of new plants during the driest months of the year (usually June- end of August).
  • Plants growing in shade generally require less water than those in full sun.

Avoid Plant Stress

  • Do not fertilize drought stressed plants. Fertilizers are salts which dehydrate plant roots when the soil is dry. Encouraging plant growth during a drought is not what you want. New growth requires the use of even greater water resources.
  • Drought stressed plants are weakened and more prone to pest attacks.
  • If applying pesticides, follow label precautions and do not apply to a plant that is already wilted or during the hottest hours of the day.
  • Avoid unnecessary pruning. Pruning stimulates new growth which again requires more water.

Mulch

  • Install a 3-4 inch layer of organic mulch (leaves, pine straw, etc.) over plant root zones to conserve soil moisture.
  • Mulch entire root zone 6 inches out from the stem to the tip of the plant’s drip-line (ends of its branches).
  • Do not pile mulch on lower stems or it will encourage rotting and pest problems such as voles.

Turf

  • Most turf grasses can get by on 1 inch of water per week. This can be supplied by one to two good waterings, but you must know how much water your system puts out.
  • Tall fescue grasses are not as drought tolerant and they may require up to two inches of water per week. Mowing fescue as high as possible, 2 to even 3 inches, will help shade its roots and limit drought stress.
  • The best time to water a lawn is between sunset and sunrise while it is already experiencing its natural wet cycle (dew period). However, follow your local water restrictions as required and do not water until after 10 PM.
  • Mow all turf less frequently during dry weather and only remove 1/3 or less of the blade height per mowing. Grass-cycle and leave those clippings on the soil to shade grass roots and provide nutrients.

Trees

  • Do not fertilize drought-stressed or weakened trees.
  • Water deeply by establishing soaker or drip hoses at the tree drip-line (branch tips). Provide one to two good soakings per week.
  • Do not water at the base of trees or onto foliage.
  • Watering leaves in the daytime can cause leaf scorch and watering leaves at night promotes leaf diseases, like mildew, and leaf spots.
  • Establish natural areas or mulch islands under your larger, valuable trees.
  • Leave an air space at trunks, but place mulch over as much of tree root zone as feasible.
  • Limit plant competition by not over-planting in tree root zones.

Slow the Flow – Make every drop count so that everyone has enough drops to use all summer long. This is not just water conservation, it is a wise and equitable use of our natural resources.


Center Publication Number: 43

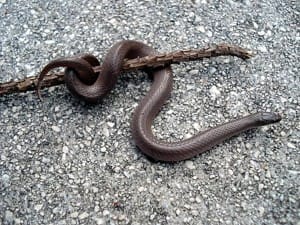
Snakes and Their Control

Source(s): Michael T. Mengak


No other creatures provoke such simultaneous conflicting feelings as do snakes. We are at once attracted and repelled, intrigued by them and their habits and, at the same time, certain people are seized by an almost overwhelming urge to kill. As with any wild animal, caution is advised. Homeowners, hikers, hunters, children and others should not approach or threaten any wild animal, and snakes are no exception.

snake

A major reason many fear snakes is that some are venomous. Of the more than 50 kinds in Georgia, however, only 6 species or about 12 percent are venomous. Our venomous species are Eastern Coral Snake (Micrurus fulvius), Copperhead (Agkistrodon contortrix), Cottonmouth (Agkistrodon piscivorus), Pygmy Rattlesnake (Sistrurus miliarus), Timber Rattlesnake (Crotalus horridus), and Eastern Diamondback Rattlesnake (Crotalus adamanteus).

Fortunately, snakebite is a rare accident. Fewer people are killed by snakes than by lightning. The best defense is knowledge; learn to recognize venomous species. Snakes of Georgia and South Carolina by Whit Gibbons and Patricia West (editors) is a good reference for snake identification. This booklet is available for $5 from the Savannah River Ecology Laboratory in Aiken, SC, the University of Georgia Cooperative Extension Service or your local county extension agent.

Snakes feed on a wide variety of small creatures and are very particular about what they eat. Some species eat only warm-blooded animals such as rodents and birds. Others may eat only toads and frogs. Large land-dwelling snakes are likely to feed on rodents, birds and their eggs, lizards, other snakes, toads and frogs. Aquatic snakes feed primarily on fish and amphibians. Small snakes are likely to eat mice, frogs, toads, earthworms, slugs and soft-bodied insects. Thus snakes are part of the natural system. Many of the things they eat are considered pests, so knowledgeable people spare harmless snakes that live in their yards.

Venomous snakes are another matter. In most circumstances, they should be removed. Be careful – a snake can strike half its length or more. Even when the snake is dead, its reflex movement can result in a bite if handled carelessly. Bites by venomous snakes need prompt medical attention. The bites of non-venomous species can be treated with soap, water and antiseptic.

Any non-venomous snake can be safely removed from a building by using a long-handled broom to gently brush the animal into an empty trash can. Place the lid on the can and take the snake to a wooded area away from any homes and carefully release it.

Refer venomous snakes in buildings to the Wildlife Resources Division of the Department of Natural Resources. Most people are bitten when they try to kill a snake. This only causes the snake to defend itself the only way it can.

The following plan of action will reduce the severity of a snake bite:

  • Stay calm. The snake may be non-venomous, but if it’s venomous, excitement hurts, not helps.
  • Have someone kill the snake so it can be identified. Use extreme caution. Most snakebites occur when attempting to kill the snake.
  • Get to competent medical help as quickly as possible.
  • Ask your doctor what he or she advises regarding snake bite – before it happens.

What attracts snakes to dwellings? If the house is surrounded by natural countryside with rock piles, streams and swamps nearby, snakes will appear from time to time. Naturalistic landscaping, rock gardens, weedy places, piles of boards and debris, deteriorating outbuildings and other similar things may harbor snakes.

Since there are no chemical poisons or effective repellents registered for snake control, the best way to make yards and outbuildings unattractive to snakes is to clean up and clean out. Snakes cannot hear sound, so auditory repellents are ineffective.

The first step is to ensure that there are no openings in dwellings or other structures where snakes can enter. Since snakes can get through very small holes (about the size of a dime), a careful inspection is necessary. For additional information, check with your local county extension office.

At the same time you are keeping snakes out of the house, take steps to make the rest of the premises unattractive. Look at the surroundings as if you were a snake. Are there rodents or other sources of food? Are there places to hide? If the answers are “yes,” plan a program to remove food and cover.

  • Control rodents if they are present.
  • Get rid of debris.
  • Remove brush and leaf piles.
  • Place stacked materials 12 or more inches above the ground or floor and away from walls.
  • Keep the space beneath structures and stacks clean.
  • Keep shrubbery and other plantings away from foundations and walls.
  • Keep shrubbery clean and free of debris. Keep lawns closely mowed. Fill unwanted depressions.
  • Keep stream or pond banks clean and clipped.

These practices will reduce but not eliminate the possibility of finding snakes. Remember, it is best to remove items that a snake would find attractive. Do not try to handle them.

Enjoy their presence by observing them from a safe distance. They are highly evolved predators that have a natural role in the environment. Especially remember that the vast majority are secretive, harmless to humans and beneficial in controlling mice, insects and other pests.


Center Publication Number: 212