Japanese Beetles

Source(s): Randy Drinkard


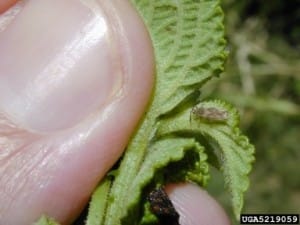
It’s June and Japanese beetles are appearing on a number of plants. The damage adult beetles do in a short period of time can wreak havoc on flowers, shrubs and vegetables. Feeding on the upper surface of leaves, they eat the tissue between the veins, leaving a skeletonized appearance to the damaged leaves. Japanese beetles love certain plants with crape myrtles and roses being favorites.japanese
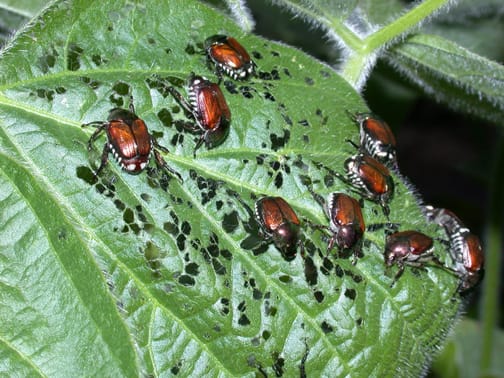
As the name implies, Japanese Beetles are not indigenous to North America. They were accidentally imported from Japan and first appeared in New Jersey in 1916. Despite efforts to contain them, they now infect about half the contiguous 48 states and continue to spread south and west at a rate of 5-10 miles per year. Unfortunately, they will probably be with us for the long haul. The good news is that they can be effectively managed with minimal damage to your landscape.

The adult beetles are generally less that one half inch long. They are metallic green with copper-brown wing covers. Beetles emerge from the ground in early June and feed on more than 300 different plants including herbaceous ornamentals, shrubs, vines, trees, small fruits, fruit trees, row crops, and even poison ivy. They generally live 30-45 days. During that time, females lay 40-60 eggs in the soil. The grubs hatch after 8-14 days and spend 10 months underground, feeding on plant roots and organic matter. Their one-year life cycle comes full circle as the adults emerge the next June.

The most effective means of control is to treat both adult and larval forms. Because the adults are capable of flying in from other areas, controlling one form does not necessarily control the other. Any control measures will be much more effective if all your neighbors control their populations as well.

Adult beetles usually feed in masses and tend to prefer plants in direct sun. Their presence attracts more beetles as they emit pheromones(odors) that attract other beetles to feed and mate. If you catch them early and don’t have too many, hand picking is an effective control. Simply pick or shake off the beetles and drop them in a bucket of soapy water. This is easiest to do in the early morning when the beetles are less active. For larger infestations, spray with Sevin(carbaryl). Be sure to read and follow all label directions. During heavy activity, you will need to spray every 3-7 days. Because Sevin is deadly to bees, try to spray when bees are less active, generally during the hottest part of the day from noon to around 5 pm. When using Sevin on vegetables for insect control, there is a wait period of 3-5 days before crops are safe to harvest and eat. Pheromone traps are not recommended for use in the landscape. They do trap beetles, but in doing so they usually attract many more beetles to your yard and garden than would ordinarily be there.

While we easily see the adult beetles and the damage they do, the larval form can cause extensive damage as well. Larvae are white grubs that are C-shaped when disturbed. White grubs feed primarily on roots of turf grasses but they also attack roots of ornamental trees and shrubs. Heavy infestations can destroy large areas of turf to the extent that the grass can be rolled up like a carpet. You can dig a sample(3 inches deep) to determine their presence. Control measures are warranted if you have more than 10 grubs per square foot of turf area. The most effective time to control grubs is during the late spring(May) or late summer(August) when they are close to the surface of the ground. Applying trichlorfon, imidacloprid(Bayer Advanced) or halofenozide(Grub-B-Gon) to the soil in areas where grubs are active will control them in that specific area.

For organic control, treat the lawn or ground with Bacillus popillae or Milky Spore. Milky spore is the common name for the spores of Bacillus popillae. Bacillus popillae is actually a bacteria that infects Japanese beetle larvae living in the soil and kills them before they develop into adult beetles. Spores build up in the soil over 2-4 years as grubs ingest them and die. Japidemic and Doom are milky spore products.

There are cultural practices that can lower the number of beetles in your landscape. While Japanese Beetles feed on many species of plants, they definitely prefer particular ones. Some that are particularly susceptible to damage include roses, grapes, sassafras, Japanese maple, plum, apple, cherry, peach, crabapple, crape myrtle, rose of sharon, birch, black walnut, willow, asparagus, and virginia creeper. Other plants are very resistant to beetles. To minimize damage in your yard, consider planting a variety of plants that are not attractive to the pests. These include magnolia, redbud, dogwood, red maple, holly, boxwood, hemlock, yew, juniper, spruce, pine, forsythia, clematis, hydrangea, and sweetgum. Remove diseased and damaged fruit from trees and the ground because the odor of this fruit will attract beetles that will then feed on ground fruit and surrounding plants.


Resource(s): Insect Pests of Ornamental Plants

Center Publication Number: 202
Japanese Hollies

Source(s): Robert R Westerfield, College of Agricultural and Environmental Sciences, Extension Horticulturist


While not the most flamboyant plant in the landscape, it’s hard to beat the toughness and versatility of Japanese hollies. Smaller and softer in appearance than Chinese hollies, they make an excellent substitute for overused Yaupon hollies and boxwoods. Well-suited in the formal landscape or used in mass for a more natural look, the dark green leaves of Japanese hollies provide a good background for more colorful plants.

Japanese hollies are excellent plants for the gardener who is looking for shrubs that are low maintenance, drought tolerant and relatively easy to grow. They produce relatively small, spineless leaves and many have small, black berries. They range from dwarf, slow-growing plants to relatively fast-growing, medium-sized shrubs. Some “crenata hollies” have a pyramidal form and can be used as specimen plants in containers.

When looking to incorporate Japanese hollies into your landscape, pay special attention to the particular cultivar. Size can vary greatly, and using the wrong cultivar may mean the continuous maintenance of pruning these plants down to size to fit the space they are planted in. Perhaps one of the best cultivars, and the most compact, is Ilex crenata ‘Compacta’. This particular Japanese holly cultivar rarely grows more than 4 to 6 feet high and forms a dense, dark green, well-shaped plant. Little shearing is required to maintain this shrubs’s compact form.

Ilex creneta ‘Helleri’, or Helleri holly is a dwarf, mounding, compact plant, as well, and makes an excellent landscape plant. It can be placed under most windows without the worry of getting to large and blocking the view.

Ilex crenata ‘Rotundifolia’ or roundleaf holly has larger, flatter leaves than many of the other “crenata hollies” and is sometimes referred to as boxleaf or “boxholly” by some gardeners. It is one of the larger growing crenata hollies, often reaching a height of eight feet if not pruned regularly.

Ilex crenata ‘Repandens’ is a low, spreading Japanese holly that with some pruning of upright limbs can be developed into a four to six foot diameter plant with a height of only two to four feet.

Ilex crenata ‘Convexa’ has the distinguishing characteristic of producing small, convex or cup-shaped leaves. Small, black berries are often produced in adundance as well. Two disadvantages of this variety include its susceptibility to yellowing of the foliage caused by iron deficiency and attack by spidermites. Approximate height in 10 years with proper care is five to six feet.

Japanese hollies also provide an excellent, dark backdrop for variegated plants to light-colored seasonal flowers. Larger, upright and pyramidal forms can be used to accent corners of homes or can be arranged in mass in larger spaces.


Resource(s): Landscape Plants for Georgia
Center Publication Number: 187

Know The Fertlizer Numbers

Source(s): Clint Waltz, Extension Turfgrass Specialist, The University of Georgia


Most folks have heard of 10-10-10, but they may not know what the numbers stand for. So what are the numbers?

All plants require nutrients to grow and develop properly. Various nutrients affect plants differently and are needed in varying amounts.

Essential nutrients are just that: essential. Plants have to have them to sustain the vigor they need to resist environmental stresses, weeds, diseases, insects and other pests.

The 16 essential nutrients are broken into two categories, primary (nitrogen, phosphorus and potassium) and secondary (calcium, magnesium, sulfur, iron and others).

The primary nutrients get the most attention because they’re required in the greatest amounts. Fertilizers are sold based on their amounts.

The numbers

On a fertilizer bag, the numbers refer to the percentage of actual nitrogen (N), phosphate (P2O5) and potash (K2O). So 10 percent of the weight of a bag of 10-10-10 is nitrogen, 10 percent is phosphate and 10 percent is potash.

It’s easy to figure the actual weight of nitrogen. The percentage is listed on the bag. In a 50-pound bag of 10-10-10, the nitrogen would weigh 5 pounds (0.10 times 50).

It’s not as simple, though, for phosphorus (P) and potassium (K). To find the amount of phosphorus, multiply the phosphate number by 0.44. Get the potassium amount by multiplying the potash weight by 0.83.

How it adds up

So that 50-pound bag of 10-10-10 has 5 pounds of phosphate times 0.44, or 2.2 pounds of phosphorus. It has 5 pounds of potash times 0.83, or 4.15 pounds of potassium. With the 5 pounds of nitrogen, then, it has 11.35 pounds of primary nutrients.

Using the same formula, a 50-pound bag of 16-4-8 would have 8 pounds of nitrogen, 0.88 pounds of phosphorus and 3.32 pounds of potassium. That’s 12.2 pounds of primary nutrients.

So what’s the rest of the weight in the bag? Some of it may be secondary nutrients. The rest is filler material to make it easier to apply.

A fertilizer bag containing all three nutrients is considered a “complete” fertilizer. A product with any nutrient missing is called “incomplete.”


Center Publication Number: 146

Leyland Cypress

Source(s): Jacob G Price


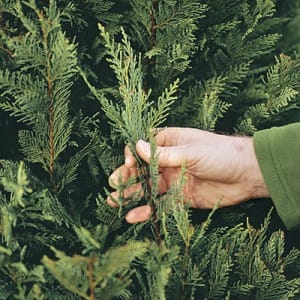
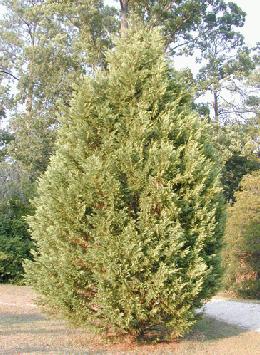
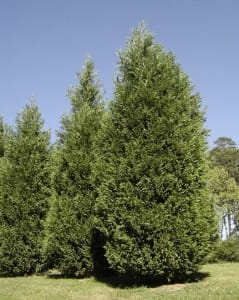
cypressLeyland cypress trees are widely sold and planted in landscapes throughout the Southeast. The pyramidal, fast-growing trees make a nice screen or specimen plant. Functional life of the tree in the southeast is usually less than 20 years.

Planting Location

Grows up to three feet per year in fertile well-drained soils but adaptable to most soil types. Place in full sun for best growth. Tolerant to salt spray. More susceptible to insect and disease problems when stressed by drought or other factors.

Insects/Controlscypresshand

Black Twig Borers, (Ambrosia beetles), can bore into pencil sized limbs and kill the ends of limbs. When first noticed, usually in the spring, they should be pruned out and destroyed. If necessary, preventive barrier sprays such as Pyrethroids and permethrins can be used. Scout the trees in late spring for bagworms and if found, Sevin or Bt products can be used for control. Scale insects and spider mites can damage foliage, but usually are not a major problem. Use bifenthrin or disulfoton for spider mites and cyfluthrin or oils for scale.

Diseases/Controls

Seiridium canker is a serious disease that can kill individual branches and entire trees. Symptoms include yellowing then browning of foliage and numerous oozing cankers on the limbs. Dead foliage is easy to remove with Seiridium infection. Bot cankers are similar, but dead foliage does not fall off easily. Fungicides will not help Seiridium and Bot canker. Pruning affected branches and making sure trees have adequate water help them overcome Seiridium and Bot canker.

Cercosporium, more common in nurseries than landscapes, is a foliar disease that affects the lower branches of newly planted Leylands. Fungicides such as Mancozeb, Daconil, and copper fungicides can control Cercosporium.


Center Publication Number: 70

Leylands Get Really Big

Source(s): Stephen D Pettis


Leyland cypress (Cupressocyparis leylandii) is one of the most commonly used landscape trees in Gwinnett County today. The tree has many fine attributes such as rapid growth, easy propagation, and inexpensiveness. It is a terrific plant for screening due to its rapid growth. Unfortunately, due to poor planning, we are starting to see some serious problems associated with this popular plant. It seems we just plant them too close together.

leyland-2

Leylands have traditionally been pest resistant, owing much of their popularity to this fact. This is changing now due to overuse of the plant, poor sighting and spacing, and the emergence of some lethal fungal infections. There are many disease problems plaguing Leylands today. Because they are often planted too close together, Leyland Cypress is prone to several damaging canker diseases, root rot and other pests. Prolonged drought and other stresses exacerbate disease susceptibility as well.

In Georgia, cankers are probably the most important and destructive diseases of Leyland cypress in the landscape. Cankers are the tree equivalent of human sores; exposed, infected tissue that exudes infectious liquid. Two examples of damaging canker diseases are Seiridium canker and Botryosphaeria (Bot) dieback.

Seiridium canker tends to appear as tip dieback whereas Bot canker tends to appear as branch dieback. Seiridium causes numerous thin, elongated cankers on stems, branches and branch axils. These cankers cause twig and eventually branch dieback. Bot causes sunken, girdling cankers at the base of the dead shoot or branch. Sometimes, the main trunk shows cankers that might extend for a foot or more in length. These cankers rarely girdle the trunk but will kill branches that may be encompassed by the canker as it grows.

Proper establishment and care are the best defenses against canker diseases in residential and commercial landscapes. Due to the endemic nature of these fungi and the size of many Leylands, spraying is not an option. Proper siting and sanitation are the best controls for canker diseases. Plant Leylands at least 12’ apart to avoid overcrowding and reduction of air flow through the canopy of the trees. Try to avoid planting the tree in shady areas where leaf dampness may persist. If a planting or rows of trees have begun to grow into one another, consider taking out every other tree. Sanitation, such as removal of cankered twigs and branches, helps prevent disease spread. Destroy pruned materials, and disinfect pruning tools by rinsing in rubbing alcohol or a solution of 1 part bleach to 9 parts water. Remove extensively damaged trees or trees that are damaged in the main trunk.

Due to its relatively poorly developed root system, plant Leyland Cypress in well-drained soils to encourage plant vigor. Remember, these trees hate ‘wet feet’. To minimize water loss and water competition with other plant species such as turf, mulch an area several feet beyond the lowest limbs. During hot, dry summer days, irrigate trees thoroughly around the base of the tree every 7-14 days, depending on soil composition. Take special care of trees located near driveways, paved areas or heat-reflecting buildings by providing adequate irrigation during periods of drought. Avoiding excessive watering and heat stress is vital to establishment of a healthy, disease resistant Leyland Cypress.


Center Publication Number: 113

Ladybug Home Invasion

Source(s): Willie O Chance


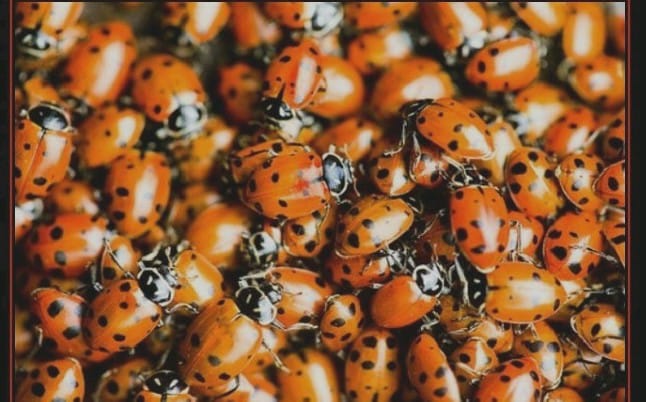
Ladybugs may invade your home as they seek protection from the cold weather. In fact, ladybug home invasions are quite common in the fall according to Kristine Braman and retired USDA entomologist Louis Tedders.

ladybugposter_0001_0001Ladybugs move into our homes as temperatures fall. They are looking for a protected spot to overwinter. The Asian ladybug was imported to the United States in the late 1970’s to eat aphids on pecan trees. Aphids are the small oval insects that feed on leaves, sucking the sweet sap out of the plants. Some people call them plant lice. Ladybugs love to eat aphids.

We have ladybugs native to Georgia, but they do not do a good job controlling tree-feeding aphids. These imported Asian ladybugs feed on pecan aphids, reducing the need for pesticide sprays. However, this supply of inexpensive and safe aphid control is not entirely free.

In Asia, these Asian ladybugs over winter on rock walls. In the U.S. they enter our buildings and gather on walls and ceilings. Many find their way inside our homes. Although they do not bite, sting or eat our food, they often become a nuisance.

How do we get rid of them? Since they are such a help, try not to kill them. Try to relocate them to the outdoors where they belong. This way they can live to eat aphids again next year. Here are several suggestions.

Picking them up individually is not a good idea. It stresses them and they give off a yellow liquid that can stain your carpet, walls, etc. The easiest way to dispose of ladybugs is to suck them up into a hand-held vacuum. Then dump them back outside far away from the house. You can also sweep them out of the house, but be careful that the yellow fluid they secrete does not stain anything.

If you use a regular vacuum, put the toe end of a pair of hose or knee-high stockings over the end of the vacuum hose. Hold it in place by putting a rubber band over the end of the vacuum hose and the stocking. Do not let the stocking get sucked up the vacuum hose. After you vacuum up the lady bugs, the stocking will be full of lady bugs which you can release outside. Caulk or otherwise seal cracks and holes that ladybugs can enter. Seal cracks around doors with weather stripping. This will help keep out other pests as well and reduce energy bills.

A final control would be to spray around your home with an insecticide to kill the ladybugs before they get in. I do not recommend this since it is so much better to just gather them up and put them back outside. If you have decided to kill the bugs, it is fairly easy just to vacuum them all up and dispose of the bag. Please only use sprays as a last resort. Pesticides are a necessary tool in this world but should be used as infrequently as possible.

Try to enjoy the ladybugs. I know kids do! You do not have to let them ruin your house though. Use these tips to send the ladybugs back to their home.


Reviewer(s):

  • Ellen Bauske, Education Coordinator- UGA Center for Urban Agriculture.
  • Gil Landry, Coordinator – UGA Center for Urban Agriculture.

Center Publication Number: 225

Fall Garden Activities

Source(s): Bob Westerfield, Consumer Horticulturist


As the nights become cooler and the days get shorter, it is time for fall garden activities. Although our prime gardening season is over, many fall chores remain in preparation for next year’s gardening season.

Creating a checklist of chores to do now in the garden and yard is important. This way you won’t forget to complete important fall chores and cleanup jobs before the arrival of winter weather.

Clean Up the Vegetable Garden

Pull up and remove vegetable plants that may harbor insects or disease organisms and provide shelter for overwintering stages of diseases and insects. Pests will reproduce again next spring and add to next year’s pest problem. Add compost or organic matter and incorporate these material into the soil to improve aeration and drainage. Till in leaves and any insect and disease-free plants to improve soil tilth.

Plant Bulbs

Plant spring-flowering bulbs such as tulips, daffodils, narcissus and hyacinths. Cooler temperatures condition bulbs to grow healthy roots that help produce attractive blooms next Spring. After planting, place chicken wire over the beds to prevent squirrels and chipmunks from digging up your bulbs.

Add Leaves

Rather than bagging or burning leaves, take a few extra minutes and spread falling leaves as a layer of mulch in flower and vegetable gardens. Leaves serve as a barrier to help preserve soil moisture and add organic matter to the soil as they decay during the winter months. Chop up extra leaves by mulching with the lawn mower and then add the ground leaves to your compost pile.

Trim Trees

Look for insect or diseased damaged branches. Remove any limbs that are dead or dying due to pest or drought injury. Always make clean pruning cuts and do not leave stubs. Place an old sheet or tarp under the tree’s canopy while pruning to collect the trimmings and make cleanup easier and quicker.

Check for Household Insects

Be on the lookout for insects that may begin to migrate indoors. Watch out for roaches and crickets – the two that cause the most alarm. Spiders, box elder bugs and ants can also be a problem. Spiders are actually beneficial, but not inside the house. Try to keep mulch away from the base of your house. Spray or use granular insecticides around the foundation, paying particular attention to doorways and windows.

Continue to Harvest Herbs

Continue to harvest annual herbs such as dill and basil. Look into preserving your herbs through freezing and drying for use all winter long. Avoid heavy pruning of perennial woody herbs such as rosemary and lavender. Severe pruning late in the season can weaken the plant and make it less winter hardy. Collect okra seedpods, gourds, sumac seed heads, rose hips and other plants from your garden that are suitable for dried arrangements.

Store Garden Equipment and Tools

Be sure to drain all hoses and store in the garage to avoid freezing and cracking. Empty the gas tank on your lawn mower, tiller, trimmer or other gas- powered equipment. Wipe and clean equipment and tools before storing inside over winter. If equipment is light-weight enough, try to hang on the wall to save walking space. Scrap dirt from shovels, hoes, trowels, etc then clean with soapy water. Wipe metal surfaces with an oily rag and wooden handles with linseed oil and sharpen blades and replace cord in trimmers.

Inspect the Landscape

Walk around your garden and grounds and tidy up the landscape by removing any dead or unthrifty plants. Make written or mental notes of which plants did not grow well so you can try something new next year. Remove any late-growing weeds to prevent late seed production, and thus, more weeds next year.


Reviewer(s):

  • Mona Adams, CEA- Richmond County. The University of Georgia College of Agricultural and Environmental Sciences.
  • James Morgan, CEA- Dougherty County. The University of Georgia College of Agricultural and Environmental Sciences.
  • Charles Phillips, CEC- Columbia County. The University of Georgia College of Agricultural and Environmental Sciences.

Center Publication Number: 162

Landscape Drainage Problems

Source(s): Walter Reeves, College of Agricultural and Environmental Sciences, Former County Extension Agent – DeKalb County


Predicting Drainage Problems

There are a number of indicators which may help you identify current or potential drainage and water problems around your yard or home.

First, check your survey or plat for the location of nearby flood plains. If you own land in a flood plain, it is reasonable to expect the area will be inundated with water at some point. It is important that no structures, especially homes, are built within a designated flood plain.

Flood plain designations also indicate that hydric soils may be present on your property. Characteristically, hydric soils will hold water more readily than other soils. These areas may be muddy, or collect water, and may be incapable of supporting certain types of landscape plants.

Also check the map for drainage easements. They should be labeled “d.e.” on the plat and are usually located along property lines. A drainage easement indicates that water will be flowing across that stretch of land during a rain storm. Erosion is usually a common problem along such drainage easements. Structures and fences should not be constructed in these areas.

Next, check for nearby rivers, creeks, and bodies of water which would increase the probability of flooding. For example, a creek may appear to be an attractive feature until you realize the flood threat, the unstable soils, and the stream bank erosion problems that may occur. Also remember that the water flow in your creek will increase as upstream development and construction increases. If you do acquire property near a waterway, do not remove the vegetation adjacent to and along the stream bank. This vegetation is an essential buffer zone that will help maintain the water quality and curb erosion problems.

Run off water that is improperly channeled also will cause damage to and devaluation of your property. It is important to note the elevation of your property in relation to adjacent properties. Does the land slope? Where will rain water come from and what is in its path? During a rain storm watch to see where run off water flows and exits. Ideally your home will have sufficient outlets to handle rooftop, driveway, and overland run off.

Run Off Erosion

Erosion due to run off coming from higher elevations is the most common water problem faced by home owners. The problem is most obvious and most damaging when you live downhill from a number of properties. The first step toward finding a solution is watching it rain and noting where the run off originates and where it concentrates or puddles.

Roof water can be piped to a low-impact location such as a drainage easement, a creek, or the street. Down spout fittings can be purchased at a home supply store and used to pipe the water to the low-impact area. You will need to avoid sags in the pipe to ensure downhill flow. This may mean burying the pipe to give it enough “fall.” Always ensure that the outlet is open and clear of debris.

Water flowing over the driveway, as well as other concentrated flows, may be more difficult to handle. If the concentrated flow moves over a relatively flat surface, a thickly grassed area may prevent erosion. Shrubbery, ground covers, or other deep- rooted plants can also be used. It is important to consider the shade and sun factors and the soil type when selecting plants for a particular purpose. You can contact your local Cooperative Extension Service office for recommendations.

If vegetation alone is not the answer to control erosion, a swale or diversion may be a solution. A swale is a broad depression that can be constructed in your yard to transport water more directly where you want. A swale should be constructed to carry the majority of the water flow. By design, it should be at least three feet wide across the top and at least six inches deep. Be sure the swale has enough downhill slope to prevent ponding. The surface should be sodded for protection. Occasionally flat rocks are necessary to protect large swale surfaces from erosion. Rock may also be placed at the outlet to disperse the force of the water. Swales should drain into a creek, drainage easement, street, or wooded area.

If the water flows over a steeper grade and vegetation alone will not control the problem, it may be necessary to terrace the area in order to slow down the water. Ideally, short slope lengths and flattened slopes should be used to prevent erosion. To do this, you can ” stair step” the area. This can be done by installing crossties and filling in behind them to create a flatter, shorter slope length. Each crosstie “wall” should be less than two feet high. These small walls should be embedded into the earth a minimum of four inches and fastened securely with spikes. Steel reinforcing rods (rebar) driven through the ties are usually sufficient. Other types of constructed walls can be made of rock, brick, or block.

Ponding Water

On many sites, water may collect in flat areas or the soil may simply stay saturated for long periods. This could be the result of surface depressions that allow the water to pond.

If surface water stands in depressions on your lawn or flows toward your house, consider constructing a swale or grading portions of your yard so that surface water drains away from the house or surface depressions. If the situation does not allow for regrading or installing diversions, an underground drainage pipe may be necessary.

Water enters these underground drainage pipes through drop inlets, with grates, which are connected to the pipe. The inlet box “T”‘s into a horizontal underground pipe. Place these inlets in low areas or depressions where water will collect. The horizontal pipe should be solid, not perforated, and the pipe slope should be constant to insure water flow.

Perforated drain pipes can be used against foundation walls and basements to collect water or to drain saturated areas. Perforated drain pipe shoo d be at lease four inches in diameter and b surrounded with 12 inches of gravel. Pipe glades should be gentle enough to allow water to enter but provide enough fall so the water can drain readily. Water should be emptied into an existing drainage ditch or curb inlet where possible. Ideally, perforated pipes should be placed 12-18 inches below the surface of the ground (see figure-below).

Hiring a Professional

Sometimes a drainage problem can not be solved without heavy machinery or a professional landscaping company. Difficult situations or tremendous amounts of water in your landscape may be beyond the skills of a homeowner. Consult your phone business pages under “Landscaping” to find companies which specialize in grading and drainage work. The Metro Atlanta Landscape and Turf Association (MALTA) publishes a list all of their members and their specialties. Call (770) 975-4121 to receive your free booklet.

After receiving bids for your project, make sure your contractor has both liability and workman’s compensation insurance. Phone their insurance company before work starts to make sure the premiums are paid and insurance is in force.


Center Publication Number: 14

Lantana Lace Bug

Source(s): Willie O Chance


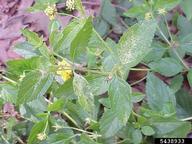
Lantanas can bloom from June through early October in Georgia. Lantana Lace bug can stop lantanas from blooming. The lace bugs feed on leaves and flower buds, leaving stunted green plants with no flowers.

Lantana lacebug injury, Chazz Hesselein, Alabama Cooperative Extension, Bugwood.org
Why do these lantana have injured leaves and no blooms?
Lantana lacebug adult, Forest and Kim Starr, Starr Environmental, Bugwood.org

Description and Damage

The lantana lace bug is a small brown insect up to 1/6 inch long. Adult lace bugs are long, oval insects with a midsection that is slightly wider than the ends. The rear of the lantana lace bug is blunt but rounded off. The young are dull-colored and spiny. Look for the lantana lace bug by shaking the branch over a piece of white paper or light-colored cloth.

Lace bugs feed on the bottom of the leaves and on young flower buds. They make the top of the leaves speckled with white, similar to mite injury. Underneath the leaf you may see brown, tarry spots that are the insect’s droppings. Since lace bugs feed on young flower buds, lantana bloom may be severely reduced or stopped completely.

Cultural Control

  • Lace bugs do have several natural enemies that help to control their numbers – spiders, lacewing larvae, assassin bugs and predaceous mites.
  • Planting resistant varieties may help reduce lace bug numbers.
  • Lantanas that are more resistant to lantana lace bug: Weeping White, White Lightning, Weeping Lavender, Imperial Purple, Patriot Rainbow, Denholm Dwarf White, Radiation, Dallas Red and Gold Mound.
  • Cultivars of Lantana montevidensis are also more resistant to lace bugs.
  • Small leafed varieties seem to be more resistant than large leafed varieties, although both types can be attacked by lantana lace bugs.
  • More susceptible: Patriot Desert Sunset, Pink Frolic and Patriot Sunburst.

Chemical Control

If cultural and natural controls do not limit the lacewing population, you may need to treat with chemicals.- You can treat plants with Orthene (acephate), imidacloprid, or other systemic insecticides. See the Pest Management Handbook for details.- Read and follow all label directions when using pesticides. Check the plants in two weeks or so and treat again if needed. The blooms should slowly return if temperatures are warm enough and other growing conditions are good.

Other problems affecting bloom: Blooming on lantana should slow down as temperatures drop in the fall. Lantanas like full sun, well-drained soils, deep watering once a week and light fertilization. If the plant is lacking one of these, correct the problem. Prune off old seed pods or berries left from prior flowers. Re-fertilize once lightly and water deeply once a week to encourage new blooms. Take care not to over fertilize since this may reduce flowering and increase disease susceptibility.


See these sources for much of this information:

For more information:

Center Publication Number: 268

Fall Berry Color

Source(s): Jim Midcap, Extension Horticulturist, The University of Georgia College of Agricultural and Environmental Sciences.


The bright leaves of fall too soon discolor and drop, leaving bare stems. But then we discover the clusters of jewels still hidden among the plants. The ornamental fruit and berry season is upon us. Bright reds, oranges, yellows, purples and whites suddenly jump to the forefront.


Beautyberries

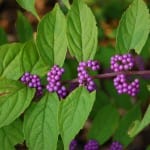
Among the most delightful of these appearances is the stunning purple fruit of the beautyberry. Our native American beautyberry produces dense clusters of lavender-purple fruit at every leaf at the ends of the stems. Long, arching branches are covered with leaves and fruit. And as soon as the leaves drop, the spectacular fruit is exposed.

American beautyberry grows 4 to 6 feet tall or higher and has coarse foliage and rank growth. Oriental beautyberries have smaller leaves, fruit and growth habit. All can be cut back heavily in early spring and still produce berries.

Plant beautyberries in full sun and well-drained soil for good growth and heavy fruit set. There are selections that produce white fruit. The white-fruited types are attractive early, but they discolor and lose their charm long before the purple-fruited types do. All can be used indoors as cut stems in flower arrangements.

Hollies

The hollies are the aristocrats of the fall berry producers.

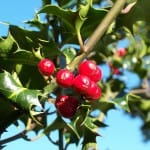
Burford and Foster’s holly produce bright red fruits all over the plants. The contrast of the dark green foliage and bright red berries makes a perfect show. Burford holly develops into a 15- to 20-foot, rounded tree, while Foster’s holly is pyramidal and reaches 40 feet tall. Dwarf Burford is smaller in size, leaf and fruit, yet still reaches 10 feet tall.

Other evergreen hollies with attractive fruit include Savannah, Emily Brunner, yaupon and Mary Nell. The yaupon hollies have bright, translucent fruit. The selection, “Shadow’s Female,” is covered with lustrous, dark green leaves and masses of bright red fruit in fall.

Deciduous hollies

The deciduous hollies, possum haw and winterberry, can be spectacular, with bare branches loaded with red or orange berries. Winter Red winterberry holds its large red fruit the longest. Like most hollies, a male pollinator is needed for fruit set.

Many yellow-fruited hollies could brighten up our landscapes. The Chinese holly, “D’Or,” looks like a Burford with gleaming yellow berries. Some yaupon hollies also have yellow fruit. Yellow fruits often last late into the season because the birds don’t see them and they remain uneaten.

Pyracantha

Many other plants can add colorful fruit to our landscapes, too. The pyracantha or firethorn are spectacular when espaliered on a wall and covered with dark red or bright orange berries.

Nandina

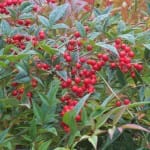
Our tall nandina provides shining red berries against the evergreen foliage. Long canes covered with colorful berries can be cut and used in winter decorations without harming the plant. These fall and winter-berried plants add a sparkle to the garden just when we were ready to settle in for the winter.


Resource(s): Landscape Plants for Georgia

Center Publication Number: 154