Common Tomato Problems

This important information is shared with us by Robert R Westerfield, College of Agricultural and Environmental Sciences, Extension Horticulturist. He is our vegetable guru.


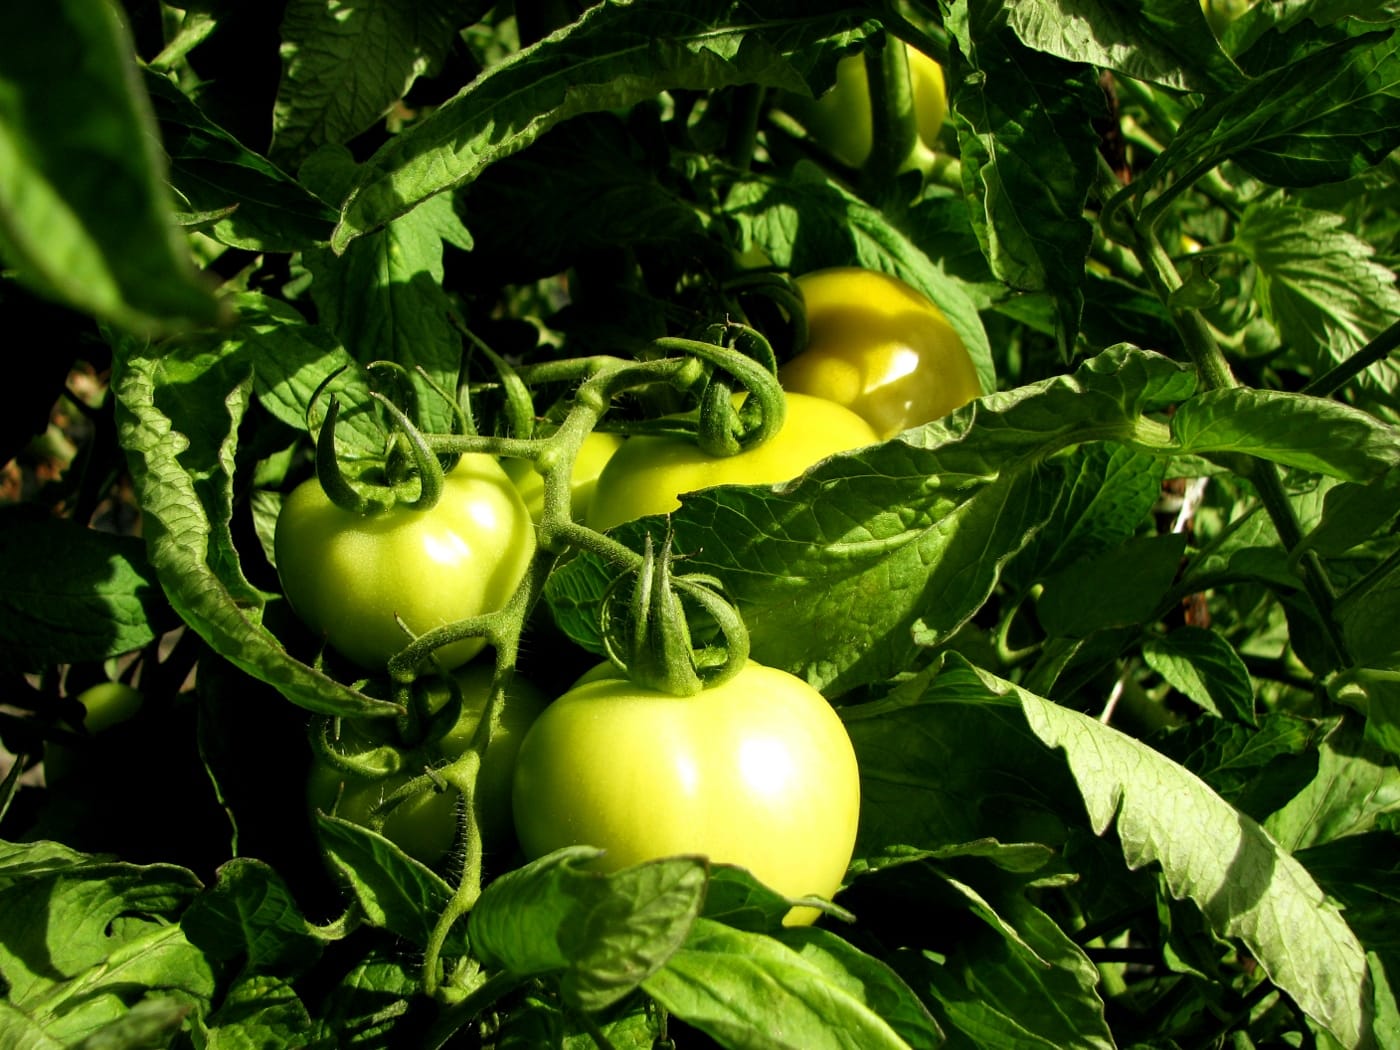
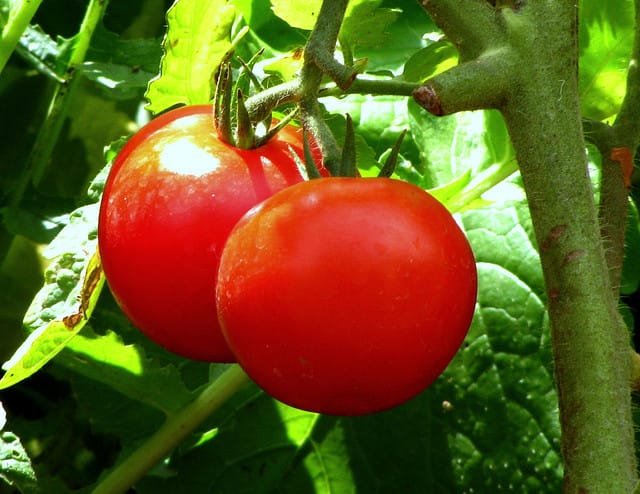
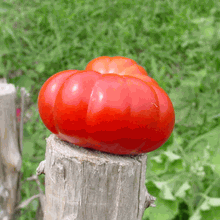
The tomato is the most commonly-grown vegetable in America. Unfortunately, producing big, red, juicy tomatoes requires considerable effort in preventing and controlling diseases.

tomatoslices

Select tomato varieties that are disease resistant. This is very important! This may be your only chance to control certain diseases. The letters behind a variety’s name tell what diseases it is resistant to: T-Tobacco Mosaic Virus, V-Verticillium Wilt, F-Fusarium wilt and N-Nematodes, some good possibilities are Celebrity and Better bush but there are many others. Resistance does not mean the plants are immune to these diseases.

Move tomatoes away from where they or potatoes, eggplant or peppers were planted last year. Soils in these areas may harbor leftover diseases. Bury all plant debris when tilling and keep mulches pulled back an inch or two from the stem.

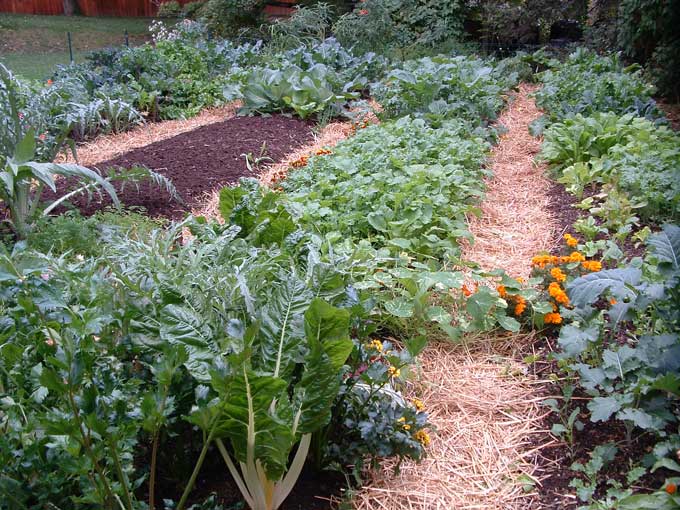
You can plant tomatoes in a traditional vegetable garden, a raised bed or put a few plants in a flower garden. I would avoid potted tomatoes because they require extra care in watering. If you grow potted tomatoes-use 5 gallon or larger pots. Water until water runs out the drain holes and then let the soil dry slightly before watering again.

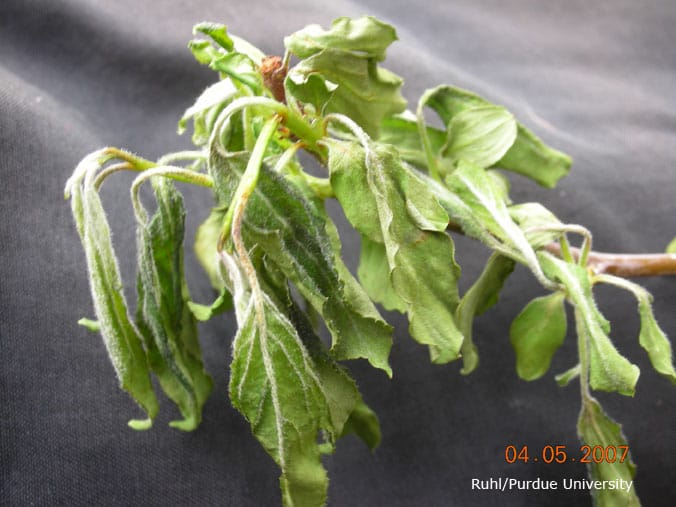
The number one tomato disease now is Tomato Spotted Wilt Virus (TSWV). It is spread by thrips. Usually the top of the plant looks stunted or wilted. The young leaves may turn yellow and often have brown or black discoloration in them. The veins on the underside of leaves may thicken and turn purple. Fruit can have raised or flat rings or circles on them. Ripe fruit will have yellow circles or semicircles. The stem can have long brown lesions.

Once tomatoes get the disease, there is no control. There are two varieties of tomato that are resistant to TSWV. I have not yet seen them yet in stores. Spraying for thrips is also not effective.

Destroy infected plants as quickly as possible early in the season to prevent spread. Seal them up in a plastic bag. Even after the plant is pulled up thrips can leave it to spread the virus. Late in the season you may just want to let the infected plants finish ripening the fruit they have. Late season infection is less of a concern.

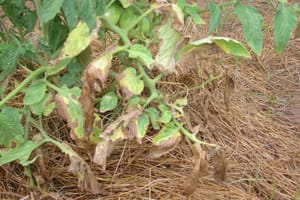
A fungus causes Fusarium wilt. It blocks the water conducting tissues in the plant. The leaves yellow and wilt, often starting at the bottom of the plant. This disease can affect just one side or one to several branches of the plant. The plant can die early producing no fruit. If you cut into the plant, the vascular system (just under the bark) will be brown. Control Fusarium wilt by planting resistant varieties. The ‘F’ after the name, like Celebrity VFN identifies these. Fusarium wilt can survive in the soil. Do not plant tomatoes in infected areas more than once every four years.

Bacterial wilt causes a rapid wilting and death of the plant. The plant dies so quickly it does not have time to yellow. To identify Bacterial wilt, cut through the stem. Bacterial wilt browns the pith or middle of the stem. On bad infections, the pith may be hollow. Cut a short section of the stem and suspend it in a clear glass of water. You can often see a milky ooze streaming out of the bottom of the cut stem. There are no controls or resistant varieties for bacterial wilt. It also attacks peppers, potatoes and eggplant. Carefully dig out infected plants and soil and discard. Do not plant any of these vegetables in this area for at least four years.
Southern blight is a white mold that rots the stem at or near the soil line. The plant then wilts or dies. Look for the cottony fungus growth and the light brown BB-sized fruiting structures of the fungus. The fungus may be slightly above or below the soil line. You may not see the fungus growing on infected plants when the weather is dry.

Bury all plant residues before planting, plant vegetables farther apart, and treat with Terraclor at planting if you have a problem with Southern blight. Some people wrap the stem near the soil line with foil to slow this disease and to control cutworms. The foil must extend two inches above and below the soil line.

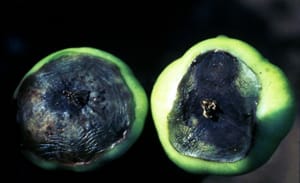
Blossom-end rot (BER) appears as a dry leathery spot on the blossom end of tomatoes. It can also affect peppers and watermelons. The spot is usually on the blossom end, is tough and leathery and slightly sunken. Other rots may infect this spot. These fruits may turn red first.

BER is caused by lack of calcium in the blossom end of the fruit. By the time the tomato reaches the size of a nickel it has most of the calcium that it will ever have. This is why we need to prevent blossom end rot early. Inadequate water supply, low pH or low soil calcium levels can cause this problem. Find and correct these problems.

Once a plant has BER, it is hard to control. Calcium is best taken up by the roots so sprays are not very effective. Control and prevent BER by:

  • Water the plants well and let the soil dry between waterings. A sample watering schedule is three-quarter inch twice a week if there is no rain.
  • Apply a two to three inch mulch around the plant. Do not heavily prune the plant.
  • Soil sample and lime and fertilize as needed. Avoid large applications of high nitrogen fertilizers when fruit are small.
  • Add gypsum (calcium sulfate) or lime to the soil at planting. Mix a cup in each planting hole or use one pound per 100 square feet. You can apply this once you see the problem but these treatments work slowly. Plants often appear to grow out of the problem as conditions improve.

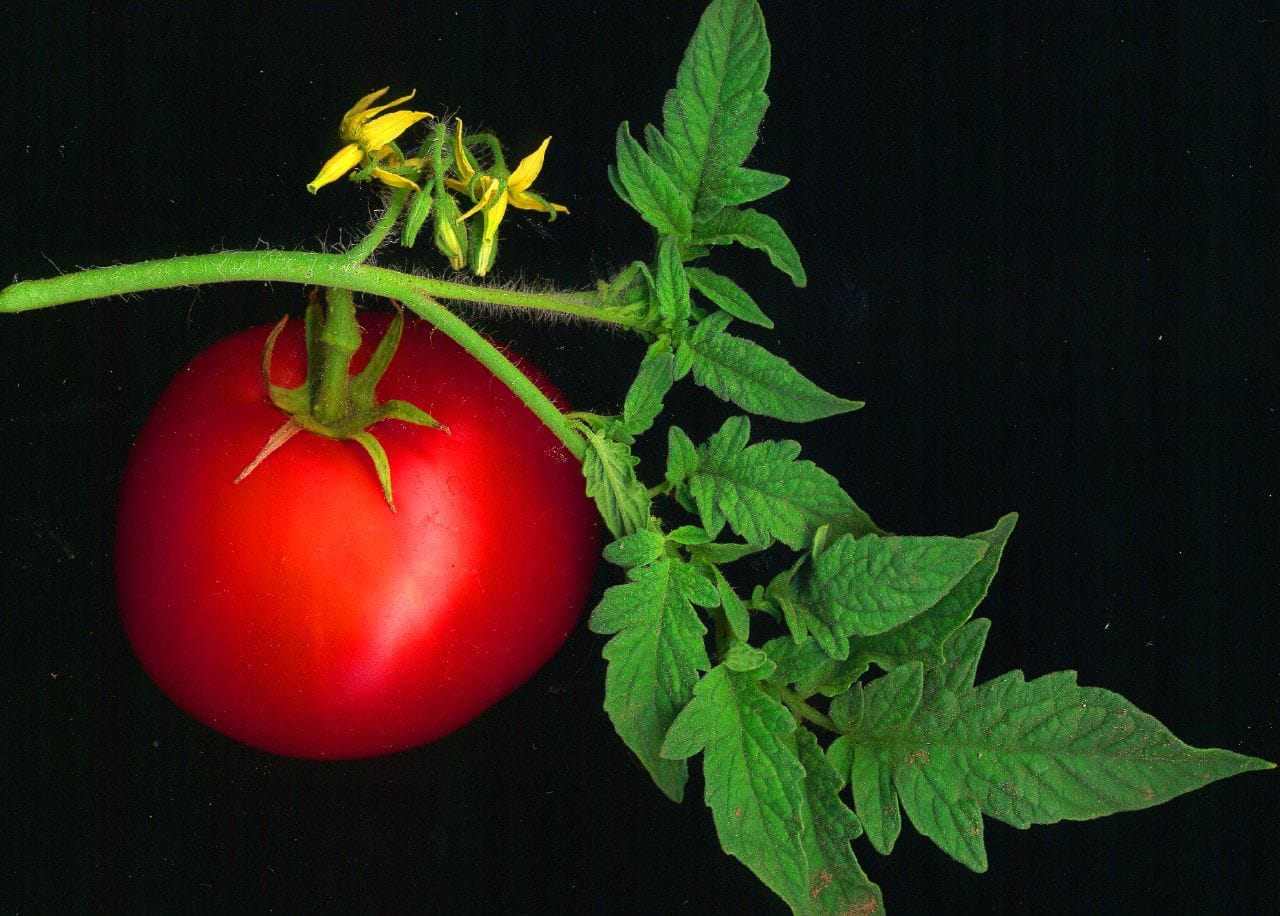
For further information. Tomatoes flowers will not set fruit if temperatures are not right, if the plant is water stressed or if it already has enough fruit. Night temperatures should be 55o to 75o F. for best fruiting. Night temperatures above 90o will especially cause problems. Water twice a week (3/4 inch each time) and mulch plants. There is a blossom set chemical you can spray if you can locate it in the garden centers.

Leaf Rolling occurs when the plant has set a heavy load of fruit and the light intensity is high. It can be caused by wet soils. The condition is harmless and should not hurt final production. Prune less heavily and plant in a well-drained area.

Uneven ripening occurs as grey or white spots inside the fruit. Several factors can be involved including improper nutrition, high temperature and disease. The only thing we can correct is nutrition. Do not use too much nitrogen and/or too little potassium. Soil sample and fertilize accordingly. Use high potassium fertilizers, 5-10-15, 15-0-15 especially as fruits begin to get larger than a quarter.

Fruit cracking is due to rapid growth after periods of slow growth. Rain after drought and heavy fertilization can cause fruit cracking. Harvest fruits after they begin to turn red but before they crack. Follow the watering practices we have discussed and look for cracking resistant varieties.

Catfacing is caused by cool temperatures at time of pollination. The fruit is deformed with ‘zippers’ on the skin. The fruit can have lobes, tear drops or several blossom scars. Plant resistant varieties, plant later, or use row covers to increase the temperature on cool days and nights. The large beefsteak varieties appear to be more susceptible. The fruit is still edible.

Sun scald appears as a white blistered area on the top of the tomato. Do not prune heavily and maintain nutrition and pest control so as to provide a good leafy cover for the fruits. Be careful not to confuse this with Blossom End Rot.


Resource(s): Vegetable Gardening in Georgia

Center Publication Number: 100

Happy Gardening!

Growing Tomatoes

Source(s): Robert R Westerfield, College of Agricultural and Environmental Sciences, Extension Horticulturist


It would be hard to imagine any home garden that did not have at least a few tomato plants. Tomatoes are considered by many to be the most prized vegetable in the garden. There is also plenty of discussion among fellow gardeners as to the best varieties and method of growing each type. This publication will discuss the basics of growing tomatoes successfully, as well as avoiding common problems encountered by the home gardener.

Tomatoes_1400x1050Soil Requirements

Tomato plants can be started indoors from seed four to seven weeks before they are to be planted. Transplants can also be purchased from a garden center, ready to plant immediately. If starting your own plants from seed, use a light soil mix and give the plants plenty of light. You may need to use supplemental light if a south-facing sunny window is not available for growing. About a week before transplanting, harden-off indoor grown plants by gradually exposing them to an increasing number of hours of light each day.

Tomato plants can be set out in the garden in mid-March to early May after any danger of frost has passed. Some southern areas of Georgia can also produce a second crop of tomatoes when planted in late July.
Tomatoes are warm-season plants that grow best at temperatures of 70 degrees to 80 degrees F and require six to eight hours of sunlight. Choose a sunny location that receives at least eight hours of sunlight each day.

Tomatoes prefer soil that is well-drained and amended heavily with organic matter. Rotted manures, compost, rotted sawdust or other humus can be tilled into the garden site as soon as the soils can be worked in the spring.

Tomatoes require a soil with a pH in the range of 6.2 to 6.8. The pH is the general measurement of acidity in the soil. Soil testing through your local county extension office is the best way to determine the pH. If the pH of the soil is too low, add dolomitic limestone according to the soil recommendations. In the absence of a soil test, apply lime at the rate of 5 pounds per 100 square feet of area. Add lime several months before planting to allow time for it to react with the soil. Till or spade the lime into the soil. Dolomitic limestone also provides calcium and magnesium, which are important elements for the growth and health of the plants. If the pH test comes back normal, but the calcium level is low, apply gypsum at the rate of 1 pound per 100 square feet.

Planting3875245604_aff00dc673_z

Select only healthy transplants for planting in the garden. Tomatoes can develop roots all along their stems so plant them deeply to encourage a strong root system. Set the transplants down to the first set of true leaves near the soil surface. If transplants are in peat pots, it is not necessary to remove the container, but be sure to plant them deep enough so the pot is not exposed to the soil surface, causing the root ball to dry out. Firm the soil around the plants to force out any air pockets.
Give tomatoes a light amount of fertilizer at planting time. This can be accomplished by using a starter solution of fertilizer. Pour about 1 pint of starter solution (2 tablespoons of 5-10-10 or 5-10-5 fertilizer dissolved in 1 gallon of water) around each plant.
If plants are to be staked or trellised, space them 24 inches apart in rows 4 to 6 feet apart. Although it requires more work initially, staking makes caring for tomatoes easier and keeps the plant’s leaves from contacting the ground and possibly introducing disease. This in turn produces higher quality fruit.
Staking can be done using commercially available cages or by using 6-foot tall, 1-inch square wooden stakes. Drive wooden stakes into the ground about 1 foot deep and 4 to 6 inches from the transplants. Heavy twine or strips of cloth can be used to tie the plants to the stake about every 10 inches vertically as the plants grow. Tomatoes can also be supported by training them to trellises or using a weaving system of cord and stakes.

Mulching

Tomatoes will benefit from mulch placed around their stems. Mulching should be done soon after transplanting. A material such as weed-free straw, chopped leaves or compost can make an excellent mulch and will help conserve moisture and reduce weed growth. Apply mulch to a depth of 2 to 3 inches. Newspaper can also be used as an effective mulch. Lay the newspaper about three sheets thick around plants to act as a weed barrier and to conserve moisture. Then place an organic mulch on top of the paper.
Synthetic weed barrier rolls are also available and can be very effective in reducing weed problems and conserving moisture. They work best when laid down over beds prior to planting transplants. Small slits can then be made in the material to allow for planting of the transplants. Soil or small stakes may be needed on the edge of the material to secure it during windy conditions.

Tomato_scannedFertilizing

Tomatoes are medium feeders and will require fertilizer beyond the initial starter solution. It’s best to soil test through your local county extension office to find out the actual requirements for your soil. In the absence of a soil test, incorporate 1.5 pounds of 10-10-10 fertilizer for 100 square feet of bed prior to planting. Use a complete fertilizer that contains minor nutrients. After the first tomatoes form on the vine and are about the size of a quarter, side-dress them with 10-10-10 at the rate of 1 pound per 100 square feet of bed. Repeat every three to four weeks until harvest is completed.
If a liquid soluble fertilizer solution is used, be careful not to apply too much or too frequently as this can lead to excess nitrogen. This is a common problem causing vigorous vegetative shoot growth but few blooms or fruit.

Watering

Tomatoes need about 1 to 2 inches of water per week depending on the type of soil they are growing in. If rainfall does not provide this quantity, water plants thoroughly once or twice per week. One or two heavy soakings are better than many light sprinklings.
Consider using drip irrigation or soaker hoses around your plants. These methods will help conserve moisture and avoid getting the foliage wet which can cause disease. Hoses can be laid near each plant above the soil but under the mulch layer.

Harvesting and Handling

For best quality, harvest tomatoes when they are fully ripened on the vine. If harvested before they are ripe, but after they reach the mature green stage, tomatoes can be allowed to ripen in the home.
Place unripe mature green or pink fruit in a room with a temperature of around 70 degrees F. Fruit should be well-ventilated and not jammed together.
Fully ripened fruit may be placed in the refrigerator to prolong keeping, but never put unripened tomatoes in the refrigerator. Tomatoes can last several weeks under refrigeration.


Resource(s):

Japanese Hollies

Source(s): Robert R Westerfield, College of Agricultural and Environmental Sciences, Extension Horticulturist


While not the most flamboyant plant in the landscape, it’s hard to beat the toughness and versatility of Japanese hollies. Smaller and softer in appearance than Chinese hollies, they make an excellent substitute for overused Yaupon hollies and boxwoods. Well-suited in the formal landscape or used in mass for a more natural look, the dark green leaves of Japanese hollies provide a good background for more colorful plants.

Japanese hollies are excellent plants for the gardener who is looking for shrubs that are low maintenance, drought tolerant and relatively easy to grow. They produce relatively small, spineless leaves and many have small, black berries. They range from dwarf, slow-growing plants to relatively fast-growing, medium-sized shrubs. Some “crenata hollies” have a pyramidal form and can be used as specimen plants in containers.

When looking to incorporate Japanese hollies into your landscape, pay special attention to the particular cultivar. Size can vary greatly, and using the wrong cultivar may mean the continuous maintenance of pruning these plants down to size to fit the space they are planted in. Perhaps one of the best cultivars, and the most compact, is Ilex crenata ‘Compacta’. This particular Japanese holly cultivar rarely grows more than 4 to 6 feet high and forms a dense, dark green, well-shaped plant. Little shearing is required to maintain this shrubs’s compact form.

Ilex creneta ‘Helleri’, or Helleri holly is a dwarf, mounding, compact plant, as well, and makes an excellent landscape plant. It can be placed under most windows without the worry of getting to large and blocking the view.

Ilex crenata ‘Rotundifolia’ or roundleaf holly has larger, flatter leaves than many of the other “crenata hollies” and is sometimes referred to as boxleaf or “boxholly” by some gardeners. It is one of the larger growing crenata hollies, often reaching a height of eight feet if not pruned regularly.

Ilex crenata ‘Repandens’ is a low, spreading Japanese holly that with some pruning of upright limbs can be developed into a four to six foot diameter plant with a height of only two to four feet.

Ilex crenata ‘Convexa’ has the distinguishing characteristic of producing small, convex or cup-shaped leaves. Small, black berries are often produced in adundance as well. Two disadvantages of this variety include its susceptibility to yellowing of the foliage caused by iron deficiency and attack by spidermites. Approximate height in 10 years with proper care is five to six feet.

Japanese hollies also provide an excellent, dark backdrop for variegated plants to light-colored seasonal flowers. Larger, upright and pyramidal forms can be used to accent corners of homes or can be arranged in mass in larger spaces.


Resource(s): Landscape Plants for Georgia
Center Publication Number: 187

Fall Garden Activities

Source(s): Bob Westerfield, Consumer Horticulturist


As the nights become cooler and the days get shorter, it is time for fall garden activities. Although our prime gardening season is over, many fall chores remain in preparation for next year’s gardening season.

Creating a checklist of chores to do now in the garden and yard is important. This way you won’t forget to complete important fall chores and cleanup jobs before the arrival of winter weather.

Clean Up the Vegetable Garden

Pull up and remove vegetable plants that may harbor insects or disease organisms and provide shelter for overwintering stages of diseases and insects. Pests will reproduce again next spring and add to next year’s pest problem. Add compost or organic matter and incorporate these material into the soil to improve aeration and drainage. Till in leaves and any insect and disease-free plants to improve soil tilth.

Plant Bulbs

Plant spring-flowering bulbs such as tulips, daffodils, narcissus and hyacinths. Cooler temperatures condition bulbs to grow healthy roots that help produce attractive blooms next Spring. After planting, place chicken wire over the beds to prevent squirrels and chipmunks from digging up your bulbs.

Add Leaves

Rather than bagging or burning leaves, take a few extra minutes and spread falling leaves as a layer of mulch in flower and vegetable gardens. Leaves serve as a barrier to help preserve soil moisture and add organic matter to the soil as they decay during the winter months. Chop up extra leaves by mulching with the lawn mower and then add the ground leaves to your compost pile.

Trim Trees

Look for insect or diseased damaged branches. Remove any limbs that are dead or dying due to pest or drought injury. Always make clean pruning cuts and do not leave stubs. Place an old sheet or tarp under the tree’s canopy while pruning to collect the trimmings and make cleanup easier and quicker.

Check for Household Insects

Be on the lookout for insects that may begin to migrate indoors. Watch out for roaches and crickets – the two that cause the most alarm. Spiders, box elder bugs and ants can also be a problem. Spiders are actually beneficial, but not inside the house. Try to keep mulch away from the base of your house. Spray or use granular insecticides around the foundation, paying particular attention to doorways and windows.

Continue to Harvest Herbs

Continue to harvest annual herbs such as dill and basil. Look into preserving your herbs through freezing and drying for use all winter long. Avoid heavy pruning of perennial woody herbs such as rosemary and lavender. Severe pruning late in the season can weaken the plant and make it less winter hardy. Collect okra seedpods, gourds, sumac seed heads, rose hips and other plants from your garden that are suitable for dried arrangements.

Store Garden Equipment and Tools

Be sure to drain all hoses and store in the garage to avoid freezing and cracking. Empty the gas tank on your lawn mower, tiller, trimmer or other gas- powered equipment. Wipe and clean equipment and tools before storing inside over winter. If equipment is light-weight enough, try to hang on the wall to save walking space. Scrap dirt from shovels, hoes, trowels, etc then clean with soapy water. Wipe metal surfaces with an oily rag and wooden handles with linseed oil and sharpen blades and replace cord in trimmers.

Inspect the Landscape

Walk around your garden and grounds and tidy up the landscape by removing any dead or unthrifty plants. Make written or mental notes of which plants did not grow well so you can try something new next year. Remove any late-growing weeds to prevent late seed production, and thus, more weeds next year.


Reviewer(s):

  • Mona Adams, CEA- Richmond County. The University of Georgia College of Agricultural and Environmental Sciences.
  • James Morgan, CEA- Dougherty County. The University of Georgia College of Agricultural and Environmental Sciences.
  • Charles Phillips, CEC- Columbia County. The University of Georgia College of Agricultural and Environmental Sciences.

Center Publication Number: 162

Plant A Fall Garden

Source(s): Robert R Westerfield, College of Agricultural and Environmental Sciences, Extension Horticulturist


So you didn’t get your vegetable garden planted this spring because you were busy or the ground was too wet? And you still want some fresh, tasty vegetables. Well, it’s not too late to plant a fall garden.

falllIn most cases, choose early-maturing vegetables. Lettuce, radishes, spinach, turnips and peas can be started from seed. Lettuce and radish can be seeded about every two weeks. Broccoli, cauliflower and collard plants can be planted toward the middle of August all the way through mid-September.

For hardy crops like cabbage, cauliflower and collards, count back from your average first frost date (if you know) the number of days the vegetable takes to mature, and plant at that time. If you don’t know either of those, then call your local County Extension Agent and find out.

For half-hardy plants like beets and carrots, allow an additional week. And for tender crops like beans and sweet corn, allow an extra two weeks. Hopefully, this will keep an early frost from killing your vegetables before they mature.

The garden pests will be out there in full force, so be extra diligent in watching for them.

You can grow an abundant crop of fall tomatoes, but where can you buy young tomato plants in the middle of the summer?

The easiest way to solve that problem is to cut small suckers from spring-planted tomatoes and let them grow to full-size plants.

You may have pinched out suckers at the first of the season, but some have grown back in the axil of the stems. They should be 4 to 6 inches long and have a growing point with several leaves. Sometime this month, cut the suckers from the plant, remove the lower leaves up to the bud and place them in a jar of water for an hour or two.

Then plant them in pots for later transplanting or plant them directly into the garden. Keep them watered heavily for a few days until they’ve taken root.

If you don’t want to do that, then simply lop off the top foot or so of a healthy plant and set it in water for a few days, then plant it directly into the garden. Just don’t forget about. It will need to be watered and mulched well until roots form.


Resource(s): Vegetable Gardening in Georgia

Center Publication Number: 98

Summer Landscape Chores

Source(s): Robert R Westerfield, College of Agricultural and Environmental Sciences, Extension Horticulturist


The summer heat makes it difficult to work outside for long. But some chores in your landscape need to be addressed to keep your plants attractive and healthy.

flower1

Probably the most critical detail right now is the effect of this summer’s recent record heat. Many plants can suffer from extended hot, dry conditions.

Allowing plants to get to the wilting point before watering may cause irreversible damage to some varieties, especially shallow-rooted annuals and perennials.

If water restrictions allow, give these plants a drink at night; or better, early in the morning to avoid the hottest part of the day and the greatest amount of evaporation.

Don’t forget to water your most prized trees as well. It’s easy to replace a $3 annual flower, but nearly impossible to restore a 50-year-old oak.
While walking around your landscape, continue to deadhead flowers of annuals and perennials. This will keep the plants from going to seed in some cases and help them initiate more blooms for the rest of the summer. Deadheading can also lessen the chances of disease and insect attack by removing potential infection sites – dead or decomposing flowerheads.

Check your roses carefully for signs of spidermite damage. Spidermites love the hot, dry weather and will take every opportunity to invade your roses. Keep spraying throughout the growing season with a combination fungicide, insecticide and miticide.

When you need to apply chemicals, do it either very early or very late in the day to avoid burn on the foliage from hot temperatures. Apply insecticides late in the day to avoid killing honeybees as they are usually more active in the early morning hours.

If weeds have been a problem in the flower beds, hand removal may be the best bet. It’s hard to kill mature weeds with chemicals. Spot treatments with a nonselective herbicide such as Roundup or glyphosate may be possible if you’re careful not to contact desirable plants.

Adding a new layer of mulch can go a long way, too, toward controlling unwanted weeds, as well as, helping to keep the soil evenly moist.

Take a close look at vigorously growing shrubs such as privet, hollies and ligustrum. They may need a trim to keep them in shape and away from your windows. Light pruning of the fast-growing shoots won’t harm the plant. And this type of pruning will give plants more compact form. Save heavy pruning, though, for late winter.

Remember to lightly fertilize annual flowers and roses each month. Water the fertilizer in thoroughly after applying to get the nutrients into the plants’ root zone. If you use a liquid fertilizer, read the directions carefully. And don’t apply liquid fertilizers on flowers or foliage during the heat of the day as burn may occur.

Begin soon to plan your fall landscape changes. Many catalogs require you to order now for a fall shipment. Look at the success of your existing landscape and ask yourself if you’re happy with the arrangement, spacing and color.

Draw out what changes you’ll make and begin to check on the availability of plants for this fall. Fall is the ideal time to plant most landscape plants.

When you’ve finished scouting and maintaining your landscape, kick off your shoes in the comfort of your air-conditioning. You’ll feel better knowing tha your landscape is healthy and ready to take on another hot summer day in Georgia.


Resource(s):

Care of Ornamental Plants in the Landscape

Center Publication Number: 97

Summer Vegetable Garden Care

Source(s): Robert R Westerfield, College of Agricultural and Environmental Sciences, Extension Horticulturist


As the days get hotter and drier, keep a watchful eye on your vegetable garden. Careful attention to a few details will help your garden produce a bountiful harvest all summer.

ta

Water Management

Focus your attention on water management first. Most gardens need at least 1 inch of water per week. If it doesn’t rain, apply a half-inch of water twice a week.

Some vegetables may need a little more water, depending on the soil type and temperature. If you can, use soaker hoses or drip irrigation to avoid wetting the foliage. Wet foliage can lead to diseases.

Overhead irrigation is okay – if it’s all you have. As with all watering, though, run irrigation at night or in the early morning hours so as to allow the plants time to dry during the day.

Using a watering can or hose can be effective ways to water small gardens. They make it easy to target the moisture directly to the plant, and no water is wasted between the rows.

Weed and Mulch

Water isn’t the only thing you need to stay on top of this summer. Attention needs to be focused on weeds, too. They can rob moisture and nutrients from vegetables and create competition for space. It’s always easiest to control weeds when they are young and not yet fully rooted. Hand-pulling and hoeing are still the most effective ways to do this task.

Small mini-tillers can be used to quickly chew up weeds found in vegetable rows. Be very careful not to get too close to the plants and injure their roots. For safety’s safe, I till the middle of the rows and then hand-weed closer to the plants.
After weeding, place a few inches of pine straw, wheat straw, old wood chips or other mulch material around your plants to help conserve moisture and keep weeds away.

I use about three sheets of newspaper around my tomato, pepper and squash plants as a base mulch. Then I cover the paper with straw to provide an extra layer of protection against weeds. The newsprint eventually breaks down into organic matter.
Be careful when using grass clippings as mulch, as many people do. You may be introducing more weed seeds into your garden than you ever imagined. Especially if your lawn contains weeds and weed seed heads.

Watch for Good, Bad Bugs

Don’t forget to scout your garden for pest problems. Tomatoes, especially, have a hard time with disease in Georgia’s hot, humid climate. Hand-pick any infected, suspicious-looking leaves. Remove plants completely that are heavily infected with disease. Take samples to your local University of Georgia Extension office if you need help identifying a problem.

Insects can attack your garden during the heat of the summer, too. Inspect your plants carefully for signs of insect damage. Be sure to check the underside of leaves and fruits, as insects often hide there to take advantage of the shade.

Remember that most insects in the garden are actually beneficial and cause no problem to your plants. Make sure you properly identify the insect pest before you spray an insecticide. Again, your county extension agent can help you develop a control regime. Sometimes hand-picking bugs is all it takes if only a few harmful insects are present.

Finally, harvest vegetables as soon as they’re ripe. Leaving them on the plant too long will lead to poor quality and attract more diseases and insects. Picking squash, okra and indeterminate tomatoes frequently can also extend your harvest. If you allow the fruit to stay on the plants too long, they’ll actually shutdown production.


Resource(s):

Vegetable Gardening in Georgia

Center Publication Number: 93

Tomato Pests and Problems

Source(s): Robert R Westerfield, College of Agricultural and Environmental Sciences, Extension Horticulturist Diseases and Insects


Although tomatoes are fairly tolerant of insect damage, they will occasionally have trouble from some common garden pests. Whiteflies, hornworms, aphids, leafminers, stinkbugs, loopers, cutworms and mole crickets (south Georgia) have been known to cause problems on tomatoes.

Early Blight on Tomato plant leaves
Blossom-end rot on Tomatoes

Insecticidal soap and Bt (Bacillus turingiensis) are used by many organic gardeners with fair success. Repeated applications and scouting for pests frequently are necessary for continued control. A general purpose garden insecticide applied according to label directions will control most of these pests. Use care, however, when spraying because these pesticides will also kill many of the beneficial insects that are protecting your garden naturally.

Diseases and viruses on tomatoes can be a real problem for the home gardener. For detailed information on tomato diseases, please refer to a separate publication available from your local county extension office. Cultural practices discussed earlier in this publication, and improved variety selection, will go a long way in preventing disease problems. It makes more sense to maintain a healthy plant and prevent disease problems, than to rely on spraying multiple chemicals for control.

Blossom-End Rot

Blossom-end rot can be a serious problem with tomatoes. The main symptom is a dark, sunken water-soaked area at the blossom end of the fruit. This physiological disorder is associated with a low concentration of calcium in the fruit. Blossom-end rot is also induced more often when there is drought stress followed by excessive soil moisture; these fluctuations reduce uptake and movement of available calcium.

To manage blossom-end rot:

Maintain the soil pH between 6.2 to 6.8 and supply adequate levels of calcium through applications of dolimitic limestone or gypsum.
Avoid drought stress and extreme moisture fluctuations by using mulch and deep, timely irrigation once or twice a week.
Avoid over fertilizing plants with high ammoniacal nitrogen fertilizers. Excessive nitrogen can depress the uptake of calcium.
Foliar applications of calcium with products such as Blossom End Rot Stop, are only short term fixes and often work poorly because of poor absorption and movement to the fruit area where it is needed.


Resource(s):

Cold Damage to Ornamental Plants

Source(s): Robert R Westerfield, College of Agricultural and Environmental Sciences, Extension Horticulturist


Cold damage to ornamental plants can be a problem during the winter in the Georgia landscape. This is true whether you live in the upper elevations of the mountains or in the most southern regions of the state. Regardless of where you live, recommended practices can maximize the chances that your prized landscape plants will survive the winter.

cold

During the summer months, ornamental plants are actively growing and would be severely injured by even the slightest frost. During the late summer and early fall, the plants must prepare themselves for winter through a process called cold acclimation. This process is initiated by the cooler temperatures and shorter day lengths that naturally occur at this time of the year.

Cold acclimation must occur in a timely fashion. If it occurs too early, the growing season of the plants will be shortened; if too late, they will be injured or killed by early frosts. Several factors including local weather conditions, plant selection, and maintenance practices during the growing season, can affect the timing and extent of cold acclimation of landscape plants.

Types of Damage and Conditions

Cold injury can occur on all parts of the plant including fruit, stems, leaves, trunk and roots. Typically, homeowners notice the cold damage first on the leaves and stems. Ice forms within the plant’s cells, the plant tissue dies, and leaves or stems become brownish-black and mushy. Cold acclimated plants can often withstand this type of ice formation. Plants that are not acclimated may sustain injury to the root system and may be severely damaged or killed. Sometimes this is not noticed until the plant fails to leaf out the following spring.

Windy conditions and accompanying cold also may cause plant damage through desiccation (evaporative water loss exceeds water absorption). This is the drying out of the plant. Marginal leaf scorching or leaf-tip burn is characteristic of this problem. Leaves may eventually turn completely brown and defoliate.

Damage to flower and leaf buds can occur during periods of low or fluctuating temperatures. This can lead to a reduction or total loss of blooms and damage of the foliage the following spring. Damage can be appraised by removing several buds and cutting them open to reveal their condition. If they appear green throughout, they are healthy; if they are partially brown or darkened, they have been injured.

One common problem that may occur during cold temperatures in woody plants is bark splitting. Bark splitting appears as loose bark in various areas on the trunk. As the bark exfoliates from dead tissue on the trunk, a frost canker can form. The canker may initially appear as a darkened, moist area. Bark splitting can cause structural damage and reduce the plant’s ability to transport nutrients and water. This can cause the death of the entire plant.

Although not common in Georgia, frost cracks on the trunks of woody plants can occur in sections of the state when plants are exposed to extremely cold temperatures. A frost crack is a long, deep, narrow crevice running up and down the trunk of a tree. As temperatures cool down, the temperature of the trunk drops quickly and the trunk contracts and may split.

Preventive Measures

Plant and Site Selection

The best way to prevent cold damage is to select a plant that can tolerate cold temperatures in your area. Georgia has different climatic zones, making it important to select plants that meet the minimum cold hardy requirements for your area. When selecting cold-tolerant plants, be sure to consider whether they can survive the summer heat in your area as well.

In addition to plant selection, proper site selection is essential. Assess your property to determine the location of the coldest and the warmest spots. During the winter, the coldest spots are often found on the north and northwest part of the property and in low areas where cold air settles. The warmest spots are usually on the southern part of the property.

Assessing the microclimates of your property is also important. Elevation, landform, soil properties, canopy cover, and proximity of structures or other plants determine a microclimate. Microclimates can be used to help protect plants by placing cold-sensitive plants near the part of the house that receives southern exposure or near larger plants or other structures.

Maintaining proper plant nutrition increases a plant’s tolerance to cold injury. A plant that has been given the appropriate nutrition is healthier and more capable of acclimating to cold temperatures. Fertilizing plants at the proper time of year is also vital. Fertilizing plants in the fall (after August or September) with a fertilizer high in nitrogen can cause a flush of new growth that is more susceptible to cold temperatures. Soil sampling is the best method to determine your plants’ nutritional needs. Contact your local county agent for testing procedures.

Pruning and Transplanting

Pruning in late summer or early fall can cause new growth that is more susceptible to cold injury. Prune plants just prior to the appearance of new growth in late winter or early spring. Plants transplanted in late fall or early winter are also more susceptible to cold injury. These plants may not acclimate properly when exposed to low temperatures. Transplant in the early fall.

Canopies and Shade

Radiational freezes occur on calm, clear nights when temperatures drop because of heat loss from the surfaces of objects. Canopies help reduce radiant heat loss from the plants and soil by preventing heat loss to the atmosphere.

Plants that grow in shaded areas are less susceptible to winter desiccation, or drying out, than those grown in full sun. Plants that prefer full sun do not do well in the shade and will be unhealthy and less tolerant of cold temperatures if sited incorrectly.

Windbreaks

Windbreaks such as fences, buildings, evergreen plantings and temporary structures can help protect plants from cold injury. Windbreaks are most useful in reducing injury caused by cold winds and advective freezes (freezes that occur when temperatures drop because of the invasion of cold air masses into the area). They should generally be located anywhere cold winds are a problem; this is often on the northwest side of the planting.

Covering and Heating

Protect plants in containers either by placing them inside a protective structure (house, garage, greenhouse or shed) or by placing a protective covering over them. Container plants are especially susceptible to cold temperatures; their roots are more exposed because they are above ground. Plants with roots that are damaged by cold temperatures may not show immediate signs of damage; these plants will show signs of stress when temperatures rise and the demand for water from the roots is greater.

Push together container plants that are left outside and mulch or cover them to decrease heat loss from the sides of the containers. Wrap the bases of the containers in plastic, burlap or blankets to reduce heat loss.

Plants growing close to the ground are usually protected by heat radiating from the soil. Tall, more open plants do not receive as much radiating heat and are not as protected from the cold. Mulching helps reduce heat loss of the soil, thus minimizing temperature fluctuations. Protecting the roots of tender perennials may also be beneficial for them to survive the cold and come back in the spring.

Covering your plants with sheets, blankets or cardboard boxes helps protect them from low temperature injury. Plastic sheeting is not recommended; the plant can heat up rapidly as temperatures rise be damaged). Remove the cover and provide ventilation during the day to allow the release of the heat that is trapped by solar radiation. You can build a frame from PVC or similar material to keep the cover from coming in contact with the plant and possibly breaking leaves and stems.

Water Needs Before a Freeze

Plants continue to have water requirements during the winter months. Therefore, following sound irrigation practices is essential for a healthy and cold hardy plant. Check the water needs of plants prior to a predicted cold snap and water if necessary. Moist soil absorbs more heat, helping to maintain an elevated temperature around the plants. Mulching the base of plants helps to retain moisture.

After a Freeze

Cold damage may not be apparent in the plant for several days or weeks. To determine if your plants have been damaged by the cold, wait several days after a freeze and remove several buds, stems and leaves (if present) from the plant. Use a sharp knife or razor blade to cut a cross section of the bud’s top. If there is any discoloration in the bud, they have been damaged.

To determine if stems have been injured by the cold, peel the bark back to reveal the cambium layer (layer directly under the bark). If there is any black or brown discoloration, damage has occurred. Leaf damage may appear as obvious black or burnt foliage, usually occurring at the tip of the branches. Damage on buds, stems and leaves may be localized and the entire plant may not be affected.

Waiting to prune after freezes have passed will guard against removing living wood. If localized damage has occurred to the foliage or stems, prune several inches below the injured tissue. Although injured buds may reduce or eliminate flowering or leaf emergence in the spring, no pruning is necessary.


Center Publication Number: 157

Winter Chores in the Landscape

Source(s): Robert R Westerfield, College of Agricultural and Environmental Sciences, Extension Horticulturist


The bleak, blustery days of winter often give us the feeling we should be working inside instead of attending to our landscapes. On the really cold days, this certainly makes sense; but there are actually a number of important tasks that should be done now to prepare our landscapes for the coming spring flush.

winter

Pruning

Begin now to prune shrubs and trees (including fruit trees) to shape them and remove dead wood. Remember to delay pruning of spring-flowering plants, such as azaleas, forsythia and spireas, until after they have finished blooming in the spring – unless they need some major overhaul pruning. Severe pruning is best done in February before new growth begins.

This is also a good time to check the condition of our pruning equipment. Now is the perfect time to inspect and sharpen any dull blades. Learn to use a small file or sharpening stone and stay away from the electric grinders.

Transplanting

Although the ideal time to transplant shrubs and small trees may have been in late fall, you can still move plants now through early spring. The three keys to successful transplanting are: 1) transplant shrubs and trees when the ground is not too moist or soggy; 2) dig and move transplants with as many intact roots as possible; and 3) prepare the planting hole as well as possible.

Taking as much of the original root ball as practical will greatly aid in reducing transplant shock. One useful trick to use when transplanting a shrub or tree a short distance in the yard is to have a flat piece of cardboard or plywood nearby. Place the removed shrub or tree on the cardboard or plywood and then simply drag the plant to the intended planting site. By doing it this way there is much less chance of losing part of the root ball because the plant is barely lifted off the ground.

Always dig the planting holes for new transplants prior to digging up the plants themselves. This reduces the amount of time the roots are exposed to drying winds and sunlight, thus helping to reduce transplant shock.

Don’t forget to water newly transplanted shrubs and trees. Transplants need a good soaking immediately after moving and additional waterings during dry or windy periods. Mulch all new transplants with a 4 inch layer of suitable material to reduce erosion.

Clean Up

Now is a great time to do some general maintenance around our flower beds. Remove any existing dead foliage from the annuals and perennials in the landscape to reduce disease reoccurence later in the year. Be sure to mark the spots where dormant perennial plants and bulbs are growing so you don’t over plant this area in the spring.

Remove old soggy mulch if it has become matted and add a few inches of fresh pine straw or pine bark. Some gardeners prefer pine bark because it remains in place and does not blow and scatter around like pine straw.

Scout the lawn for emerged winter annuals and apply the appropriate postemergent herbicide if needed. Colorful, but troublesome patches of clover, chickweed and henbit popup seemingly overnight and cover areas in the lawn. Controlling these weeds now before they produce seeds will reduce weed populations in the future.

Other Tasks

  • If your lawn was weedy last summer, now is the time to apply pre-emergent herbicide to control this summer’s weeds. Be sure to select a product labeled for the type turf grass you have. Do not use pre-emergence controls if you are planning to re-plant or reseed your lawn soon with feccue.
  • Fruit trees should be pruned in late winter. Apples and pears are pruned to an upright growth habit and central leader. Peaches are pruned to an open bowl shape.
  • Start seeds of your favorite spring garden vegetables inside now so that they are ready to plant when soil temperatures are warmer. Use a good, sterile, growing medium to start tomatoes, peppers, eggplant, etc. Keep seed trays where they will receive plenty of light and be sure the seeds are moist but not overly wet.
  • In the month of February, plant bare-root roses into a well amended bed. Be sure to leave the grafted crown of the plant above the soil.
  • Boxwoods and hollies may show signs of leaf miner. At first the damage appears as small holes in the leaves but later develops into elongated discolored areas. Apply a recommended systemic insecticide at the first sign of damage.
  • Hold off the temptation to fertilize warm season turf grasses until they are well into the green-up stage. Delay fertilizing ornamental shrubs until mid to late March.
  • Check fig trees for any winter cold damage and prune away affected branches. Sometimes heavy pruning is needed to remove all of the damaged wood.
  • Fertilize fruit trees in March according to soil test recommendations. Remember to begin a disease and insect spray program for all fruit trees. Continue applications at the recommended intervals until the fruit ripens. Avoid spraying when the flowers are open and keep a record of dates, amounts and chemicals used.
  • Start seeds of summer annuals such as marigolds, petunias, salvia and zinnia indoors. Do not place the transplants in the ground until all threat of frost is gone.
  • Hosta plants can be dug and split for transplanting after they begin to emerge in the spring. Watch for slugs and snails and apply recommended baits as needed to control them.
  • If you have mum plants that survive the winter, you know you don’t have to buy mums in the fall ever again. It is easy to go out in late winter and find clumps with fresh growth tight inside the old dead stems. Lift these, separate and replant – perhaps putting them in pots, where they can grow all year in a secluded nursery and be moved into place as autumn decor.
  • Recycle those old mini blinds in the garden. Cut slats into 6-8” pieces with wire snips and use a permanent marker to record seed varieties and planting dates.

Winter truly is a great time to get out in the landscape. Although it may be hard to break ourselves away from the fireplace, doing a few chores now will have our landscapes looking better this spring.


Resource(s):
Care of Ornamental Plants in the Landscape