
All of this rain has me very excited about getting back to our seed starting project.
I have one note about seed starting media. If you choose to purchase bagged media for starting seeds indoors, do not choose something with fertilizer in the mix. This will be too strong for seedlings. There are plenty of bagged mixes specifically for seed starting so choose one of those.
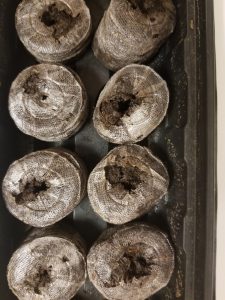
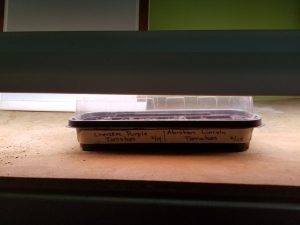
We are ready to expand our pellets. Notice the seed pellets are fully expanded with no standing water:
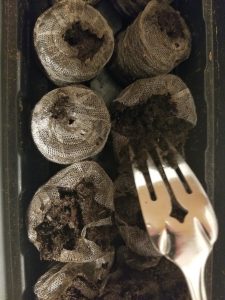
Next, take a fork and open up the top a bit and fluff the media. I like to take this time to make sure that the moisture is uniform all the way through with no dry spots:
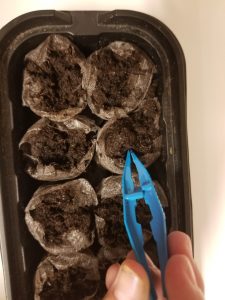
Now you are ready to plant your seeds. If you are mixing seed types in one tray, make sure that they will emerge and grow at about the same rate. I like to use plastic forceps to exactly place the seed where I want them. Some seeds, like lettuce and herbs, are very small and easily lost in the tray. Know how deeply to plant the seeds. Most of the ones you will probably plant just need to be lightly covered with the planting media.
It is worth the effort to do some research on your seed types. For example, cilantro seeds don’t germinate easily when exposed directly to light. Also, there are some seeds that just do better planting directly into the soil, beans and corn are good examples.
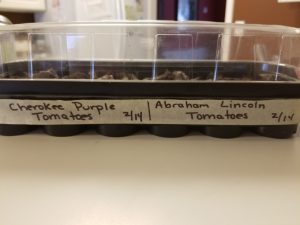
At this point it is a great idea to label your seed tray. Sharpie markers on masking tape work well. The tape sticks to the tray but can be removed later. Do not be tempted to label the lid. You will be removing the lid later and you don’t want to forget the original orientation. Finally, put the lid on the tray, making sure it fits tightly.
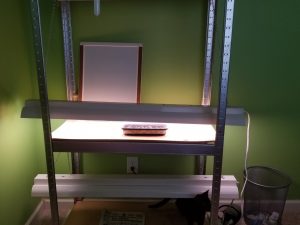
Do not place your seed tray near a window and hope for the best. You will be disappointed. You will not get enough light for healthy seedlings and the temperature fluctuation at the window will be problematic.
Use a light system. The system does not have to be complicated. I have a light fixture with florescent bulbs attached to a structure with moveable chains. This setup was originally housed in a bathroom tub but it is now in my grown daughter’s bedroom. Very simple. You need the chain to move the light so it stays just above the seed tray. To produce robust seedlings you need the light no more than an inch or two above the tray. This will be imperative as the seeds germinate and grow.
If you are germinating seeds in a place that is reasonably warm you do not need a heating mat. Those were designed for outside greenhouses and places like Michigan. By using a heating mat when you don’t need one, you risk drying out your planting media.
So far this is pretty simple, right? If you have any questions or concerns you can comment or email me at beckygri@uga.edu. Send photos! Next week we will discuss seedling care.
Happy Seed Starting!

Becky is a Georgia Certified Beekeeper and works with community and school gardeners to increase beneficial insect habitat.She is the coordinator of the Great Georgia Pollinator Census, happening this year on August 19th and 20th, 2022.She is also part of UGA's Native Plants and Beneficial Insect Working Group.
- ParSLAY the Day! - June 12, 2024
- 6th Annual Great Southeast Pollinator Census - May 28, 2024
- Are you ready for Pepper Palooza? - July 5, 2023
This is great information. The growing-media tip (pick one designed for seed-starting) is SO important!
For gardeners new to seed starting who might not be ready to invest in a system that hangs a tube-light overhead, it is possible to prop the ends of your lights on bricks stacked on either side of your seed-tray, to hold the light 1-2 inches above your little plants. As the plants grow, stack on another brick at each end to raise the lights. That is how I managed lighting at the Extension office for my seedlings there. Not beautiful, but I had bricks, and it worked.
At home, my seed-trays are on a baker’s rack shelf, and I poke 22-inch tube-lights through the filigree that runs up the sides of the shelving. As the plants grow, I move the lights up to another opening in the filigree. Other gardeners may be able to look around their homes and find some other way to hold those lights at the right distance from their plants.
Really enjoying this seed-starting series!
-Amy