Forcing Bulbs to Bloom Inside

Source(s): Willie O Chance


Many Georgia gardeners look forward to the colorful blossoms of spring-flowering bulbs. The yellows, reds and lavenders are a promise of summer’s coming. Although bulbs are usually planted outdoors, you can grow many types indoors. With a little bit of care and patience, spring-flowering bulbs like crocus, hyacinths, narcissus and tulips can easily be forced to bloom inside.

Forcing bulbs simply means manipulating the light, humidity, and temperature conditions such that bulbs believe spring has arrived and it is time to bloom. Most spring-flowering bulbs need a period of cool temperatures before blooming. During this time the bulb grows roots and forms flower shoots inside the bulb. Proper watering and good drainage are also essential for good growth. Not all bulbs are created equally when it comes to force blooming. Narcissus and hyacinths are easiest to force but you can also try tulips, crocus, daffodils, muscari and others.

Selecting Bulbs and Containers

When selecting bulbs for indoor forcing, bigger is better. Larger bulbs have more stored food which means a greater chance of success. Bulbs should be firm, large and healthy looking. Pick bulbs that show no signs of withering, disease, mold or insect damage.

The best containers for bulb forcing are ‘bulb pans’. These are shallow, wide clay pots that provide excellent drainage and lots of room for bulbs. However, any clay or plastic container with drainage holes will work. Wash reused pots with a dilute bleach solution (one part bleach, nine parts water) before planting into them.

The best soil for growing bulbs is a loose, friable, well-drained loam. It is best to use a sterile, artificial soil mix with a high percentage of vermiculite. Avoid using soil from your garden, as it is often full of weeds and diseases. Soak clay pots for 24 hours before using. Place one inch of gravel in the bottom of the pot and add some soil. Arrange bulbs so they are almost touching. Cover bulbs and firm the soil around them.

Most bulbs are covered by ½ inch of soil except for hyacinths which may protrude slightly above the soil line. Water to settle the soil. Keep the soil moist but not wet or soggy as bulbs will rot if kept too wet.

Store containers with bulbs in a dark place at 40o to 50o F for 10 to 12 weeks – a little longer for tulips (15 weeks). The best location is probably an old refrigerator that does not cool well. Bulbs can be chilled in any refrigerator, but must not freeze.

Flowering

Bulbs should be well rooted after the cooling period. Roots may have grown out the drainage holes with shoots appearing above the soil line. Rooted bulbs are kept in a dimly lit, cool (50o – 60oF) room for about 10 – 14 days. Then move pots into a well-lit room of about 50o – 60oF. Water regularly and keep pots from drafts and heaters. Time to bloom will vary with variety but they should bud within 4 to 6 weeks. Flowers will last longer if kept cool. After bloom you may transfer bulbs to the garden or discard since forced bulbs seldom bloom well again.

Various bulbs will respond differently to forcing. You might try planting several types of bulbs and note the results. If at first you do not succeed, try again. Planning, patience and experience will help you succeed at forcing flowering bulbs and bringing spring inside during dreary winter days.


Center Publication Number: 238
Forcing Branches to Bloom Inside

Source(s): Willie O Chance


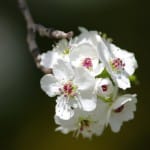
It will still be awhile before many of our spring-blooming shrubs and trees begin to flower. But you can enjoy these flowers weeks earlier by cutting branches and forcing them to bloom inside. Forcing spring-flowering shrubs and trees will allow you to enjoy spring color earlier and for longer.

Cut branches that are forced into bloom add sunshine to gloomy winter days. It is not hard to coax branches of many shrubs and trees to flower earlier than normal. Spring-flowering trees and shrubs can be forced into bloom once low winter temperatures have satisfied their dormancy requirements. Provided with good light, water and proper temperatures, branches should burst into flower five days to two weeks after cutting.

Forsythia, quince and pussy willow are easy to force into bloom. Not all shrubs, however, are as easy. Those with late spring blooms are far more difficult. These would include viburnums, lilac and weigela. For best results, cut them close to their regular flowering time.

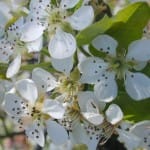
Cherries and plums are excellent forcing specimens. The old-fashioned purpleleaf plum forces earlier than cherry. Many plants can be forced one to two months before their normal flowering time. February is an excellent month for forcing many earlier flowering selections. March works well for the later flowering ones.

The reason we can do this is because of the way spring-flowering plants bud and bloom. When winter arrives, the flower buds are already formed on trees and shrubs. A period of dormancy is required before they will bloom. Plants differ in the amount of chilling, moisture, light and warm temperatures necessary to break this dormancy. By February, in most years, dormancy has been broken. You can then force branches by duplicating spring conditions.

Choose a mild day to cut branches and try to cut them during the warmest part of the day when the buds are filled with moisture. Choose branches that are well budded and have interesting curves. Follow good pruning practices and prune to maintain the natural shape of the plant. Allow the flowers to develop slowly to fully encourage large blooms with good color.

First, mash the bottom inch or two of the stems with a hammer and place in water. Add a floral preservative or sugar with a drop of bleach. Change the water every few days over the forcing period. These practices extend the life of the branches by reducing the bacteria in the water and keeping stems unclogged. Water uptake through the stems should keep the branches from drying out unless the room is too warm.

Leave the branches in a cool, dark spot until the buds begin to swell, then move them into a well-lighted area to encourage the flower color to develop. Avoid placing the branches in direct sunlight. Cool temperatures allow buds to develop slowly and to maintain flower color. When color appears in the bud it is time to arrange the branches in containers. Don’t wait until the blossoms are fully opened.

Here are a few shrubs you can force, including when to cut them and how long it will take from cutting to flower. Time to flower may vary based on when cuttings are taken.

Shrub/Forcing Time/Cutting Time

  • Azalea/3-6 weeks/late Jan-early Feb
  • Crabapple/2-3 weeks/mid-March
  • Flowering Cherry/2-3 weeks/late Jan
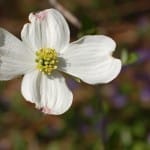
  • Flowering Dogwood/2-4 weeks/mid-March
  • Flowering Pear/4-5 weeks/late Jan-early Feb
  • Willow/1-2 weeks/February

Center Publication Number: 239

Help for Holiday Plants

Source(s): Willie O Chance


The Christmas season is over and gone for another year. Unfortunately, so are the flowers on your poinsettias. Does this means it’s time to toss them and your other holiday plants out? Why not keep them and grow them to rebloom later this year?


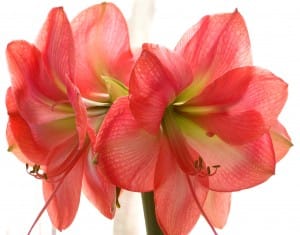
Amaryllis

After your amaryllis has bloomed, the first step is to cut off the old flower stalk or stalks. Place the plant in a bright location and continue to water to encourage foliage growth. Continue this process throughout the spring and summer until fall. In late August or early September, reduce watering and allow the bulb to rest for two months in a cool (not freezing) location. If the soil has become crusty or hard, you may want to repot the bulb in fresh potting soil so that 1/3 of the bulb is above the soil surface and about an inch of soil is between the bulb and the sides of the pot. About mid to late October, put the plant in a well-lit location. Water sparingly until the flower stalk emerges, then water daily. Reflowering should occur about eight weeks later, just in time for the holidays.

Azaleas

After your azalea has ceased flowering, place the plant in a sunny east or west window, where it will receive lots of indirect but bright light. The ideal temperature range is 60o to 70o Fahrenheit as azaleas will suffer in dry air above 70o F. Keep azaleas evenly moist and mist occasionally, if possible. Remove spent or wilted blooms to encourage future flowering. Heavy leaf drop and/or yellowing of the foliage means that the plant is likely getting too much water or not enough light. Try a new location and check the soil to be sure it is not overly wet. Fertilize in the spring and summer with a product designed for acid-loving plants; read and carefully follow directions for indoor, container plants.

Christmas Cactus

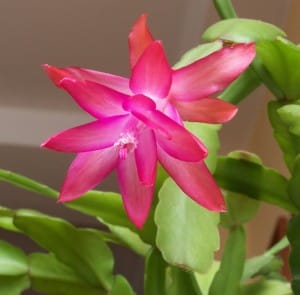
After the holidays, place your Christmas cactus in a cool, well-lit location. Water sparingly or when the soil surface becomes dry to the touch. Keep temperatures not over 70o F. during the day and 50o to 55o F. at night, if possible. Continue this process throughout spring and summer, feeding with a houseplant fertilizer according to the label directions. Short, cool days are needed to reflower Christmas cactus plants in time for the holidays. Therefore, provide these plants with 60o F. temperatures and 14 hours of continuous, uninterrupted darkness every night followed by 10 hours of bright light during the day beginning in October and lasting through November. Then relocate Christmas cactus plants to a bright area where they will continue to develop flower buds and bloom.

Poinsettias

Poinsettias are a challenge to grow inside and rebloom, but reflowering can be accomplished with care and patience. After most of the leaves have dropped, cut the stems back to reshape the plant and encourage new growth. You may also need to repot the plant if the soil has become crusty and hard. Place the poinsettia in a bright location and continue to water and fertilize. To initiate the colorful “flowers”(bracts), provide poinsettias with 14 hours of continuous, uninterrupted darkness at nights followed by 10 hours of bright light each day beginning in mid October. Once the bracts have begun to develop, return the plant to normal indoor growing conditions of bright light and barely moist soil. Continue to grow and enjoy your colorful poinsettia plant.


Center Publication Number: 241

Fall Webworms: Webs in the Trees

Source(s): Willie O Chance


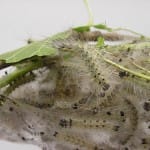
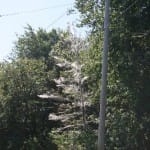
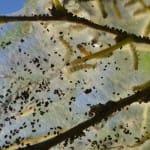
Two types of caterpillars make webs in trees. The Eastern tent caterpillar makes webs in the forks of the branches. They are more of a problem early in the spring. The fall webworm makes their webs on the ends of the branches and is more prevalent in the late summer and fall. Fall webworms are the most visible since their webs are located on the end of the branches. Their webs remain in the tree after the webworms leave and the webs can collect until there are many in a tree.

Fall Webworms Description

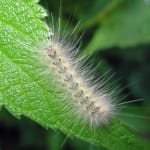
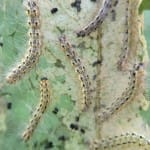
Fall webworms can be up to one inch long. They come in two color forms. Those with black heads are yellowish white while those with red heads are brown. Fall webworms are covered with long, soft gray hairs.

Fall Webworms Behavior

Fall webworms will feed on more than 100 types of trees but they prefer trees like pecans, black walnut, mulberry, elm, sweetgum, willow, apple, ash and oak. I most often see them in pecan trees.

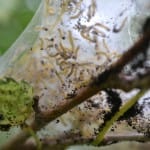
The caterpillars form fine silken webs on the ends of the branches. They will enlarge the webs if they need more leaves. They feed on the leaves in these webs for a couple of weeks before they leave the trees to become pupae. These pupae eventually turn into a white moth. This moth may have black spots. This moth can fly away to lay eggs on trees to start another generation of webworms. There can be up to four generations of fall webworms in a year. The webworms survive the winter as pupae in cocoons in protected places.

These caterpillars feed on the leaves of the tree. This hurts the tree some but the tree should recover. Healthy trees are able to withstand a great deal of insect damage to their leaves without lasting injury. I would not be concerned about insects feeding on healthy trees unless most of the leaves were gone. If trees are weakened, webworm infestation may damage or kill the tree.

Healthy trees can usually stand the loss of almost all their leaves and still live. This is true of most deciduous trees (trees that lose their leaves in the fall) but not needled, evergreen trees like pines, cedars, junipers and other conifers. Evergreen trees with needles cannot withstand the loss of their leaves and must be better protected against loss of leaves. Fortunately, webworms do not like to attack needled evergreen trees.

Fall Webworms Control

Since most trees will not die from caterpillar attack, I do not generally recommend spraying. If you want to control the caterpillars by spraying, you must treat the entire tree – perhaps more than once. You will usually need to hire a tree service to do this. The person treating the tree will need to find some way to get the insecticide inside the webs to kill the caterpillars. For these reasons I generally suggest that we just live with these worms a while. They will eventually leave.

If you do decide to spray; use insecticidal soap, horticultural oils or Bacillus thuringiensis to kill small caterpillars. These insecticides are less likely to kill the natural predators that keep the levels of these webworms low. These chemicals are not good at killing large caterpillars. Watch the southern-most branches of trees in early spring to find the webs before the caterpillars get large. For larger caterpillars, use a chemical like cyfluthrin or bifenthrin. Once again – find a way to get the insecticide into the webs for best control.

Some people cut the branches off or burn out these webs. This may damage the tree more than the caterpillars would. I do not recommend that you do this. Put up with the fall webworms for a while and they should go away on their own.


Resource(s):

Ladybug Home Invasion

Source(s): Willie O Chance


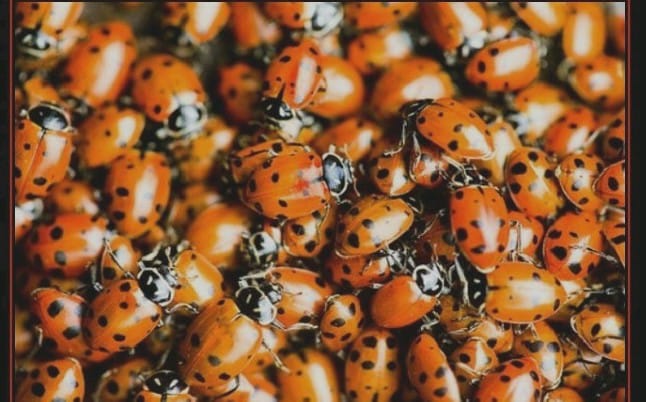
Ladybugs may invade your home as they seek protection from the cold weather. In fact, ladybug home invasions are quite common in the fall according to Kristine Braman and retired USDA entomologist Louis Tedders.

ladybugposter_0001_0001Ladybugs move into our homes as temperatures fall. They are looking for a protected spot to overwinter. The Asian ladybug was imported to the United States in the late 1970’s to eat aphids on pecan trees. Aphids are the small oval insects that feed on leaves, sucking the sweet sap out of the plants. Some people call them plant lice. Ladybugs love to eat aphids.

We have ladybugs native to Georgia, but they do not do a good job controlling tree-feeding aphids. These imported Asian ladybugs feed on pecan aphids, reducing the need for pesticide sprays. However, this supply of inexpensive and safe aphid control is not entirely free.

In Asia, these Asian ladybugs over winter on rock walls. In the U.S. they enter our buildings and gather on walls and ceilings. Many find their way inside our homes. Although they do not bite, sting or eat our food, they often become a nuisance.

How do we get rid of them? Since they are such a help, try not to kill them. Try to relocate them to the outdoors where they belong. This way they can live to eat aphids again next year. Here are several suggestions.

Picking them up individually is not a good idea. It stresses them and they give off a yellow liquid that can stain your carpet, walls, etc. The easiest way to dispose of ladybugs is to suck them up into a hand-held vacuum. Then dump them back outside far away from the house. You can also sweep them out of the house, but be careful that the yellow fluid they secrete does not stain anything.

If you use a regular vacuum, put the toe end of a pair of hose or knee-high stockings over the end of the vacuum hose. Hold it in place by putting a rubber band over the end of the vacuum hose and the stocking. Do not let the stocking get sucked up the vacuum hose. After you vacuum up the lady bugs, the stocking will be full of lady bugs which you can release outside. Caulk or otherwise seal cracks and holes that ladybugs can enter. Seal cracks around doors with weather stripping. This will help keep out other pests as well and reduce energy bills.

A final control would be to spray around your home with an insecticide to kill the ladybugs before they get in. I do not recommend this since it is so much better to just gather them up and put them back outside. If you have decided to kill the bugs, it is fairly easy just to vacuum them all up and dispose of the bag. Please only use sprays as a last resort. Pesticides are a necessary tool in this world but should be used as infrequently as possible.

Try to enjoy the ladybugs. I know kids do! You do not have to let them ruin your house though. Use these tips to send the ladybugs back to their home.


Reviewer(s):

  • Ellen Bauske, Education Coordinator- UGA Center for Urban Agriculture.
  • Gil Landry, Coordinator – UGA Center for Urban Agriculture.

Center Publication Number: 225

Lantana Lace Bug

Source(s): Willie O Chance


Lantanas can bloom from June through early October in Georgia. Lantana Lace bug can stop lantanas from blooming. The lace bugs feed on leaves and flower buds, leaving stunted green plants with no flowers.

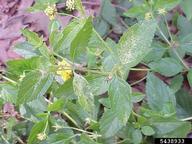
Lantana lacebug injury, Chazz Hesselein, Alabama Cooperative Extension, Bugwood.org
Why do these lantana have injured leaves and no blooms?
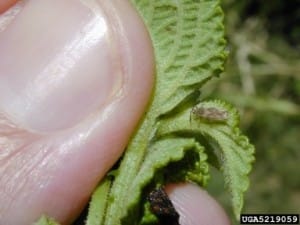
Lantana lacebug adult, Forest and Kim Starr, Starr Environmental, Bugwood.org

Description and Damage

The lantana lace bug is a small brown insect up to 1/6 inch long. Adult lace bugs are long, oval insects with a midsection that is slightly wider than the ends. The rear of the lantana lace bug is blunt but rounded off. The young are dull-colored and spiny. Look for the lantana lace bug by shaking the branch over a piece of white paper or light-colored cloth.

Lace bugs feed on the bottom of the leaves and on young flower buds. They make the top of the leaves speckled with white, similar to mite injury. Underneath the leaf you may see brown, tarry spots that are the insect’s droppings. Since lace bugs feed on young flower buds, lantana bloom may be severely reduced or stopped completely.

Cultural Control

  • Lace bugs do have several natural enemies that help to control their numbers – spiders, lacewing larvae, assassin bugs and predaceous mites.
  • Planting resistant varieties may help reduce lace bug numbers.
  • Lantanas that are more resistant to lantana lace bug: Weeping White, White Lightning, Weeping Lavender, Imperial Purple, Patriot Rainbow, Denholm Dwarf White, Radiation, Dallas Red and Gold Mound.
  • Cultivars of Lantana montevidensis are also more resistant to lace bugs.
  • Small leafed varieties seem to be more resistant than large leafed varieties, although both types can be attacked by lantana lace bugs.
  • More susceptible: Patriot Desert Sunset, Pink Frolic and Patriot Sunburst.

Chemical Control

If cultural and natural controls do not limit the lacewing population, you may need to treat with chemicals.- You can treat plants with Orthene (acephate), imidacloprid, or other systemic insecticides. See the Pest Management Handbook for details.- Read and follow all label directions when using pesticides. Check the plants in two weeks or so and treat again if needed. The blooms should slowly return if temperatures are warm enough and other growing conditions are good.

Other problems affecting bloom: Blooming on lantana should slow down as temperatures drop in the fall. Lantanas like full sun, well-drained soils, deep watering once a week and light fertilization. If the plant is lacking one of these, correct the problem. Prune off old seed pods or berries left from prior flowers. Re-fertilize once lightly and water deeply once a week to encourage new blooms. Take care not to over fertilize since this may reduce flowering and increase disease susceptibility.


See these sources for much of this information:

For more information:

Center Publication Number: 268

Last Call for Winter Jobs

Source(s): Willie O. Chance, UGA College of Agricultural and Environmental Sciences Extension Agent, Houston County.


Spring is almost here – ready or not. And this is the last call for many winter garden jobs. Try to do these chores as soon as possible, before your plants really start growing.

Tea Scale

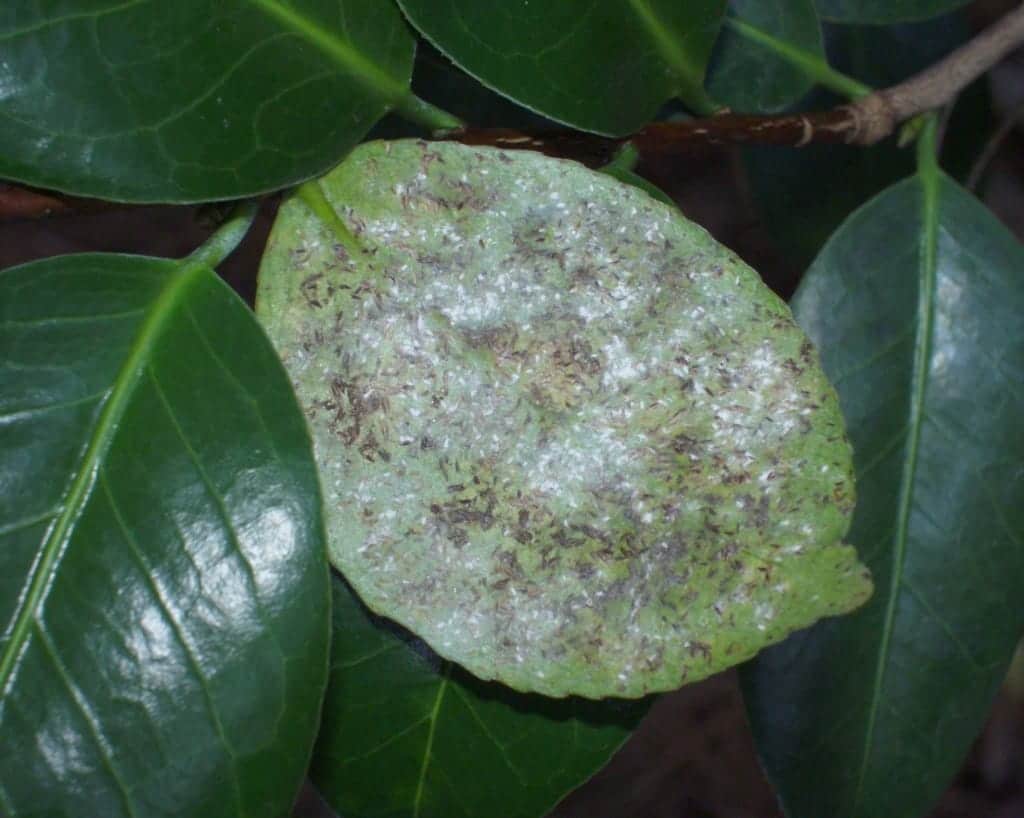
Control scale insects on branches of shrubs and trees with a dormant oil spray. Also, check and control overwintering infestations of scale insects found on the foliage of evergreen plants, such as camellias, cleyeras and hollies. Begin using other insecticides once your plants begin to bud or leaf out.

Remove old foliage on liriope. You can use a mower set on the highest setting or a weed eater. Do this before new growth starts (look in the center of the plant for new leaves). Cutting liriope back removes the old, ugly and blighted leaves. Never mow mondo grass (dwarf lily turf or monkey grass), however, as shearded mondo grass foliage does not grow back as well as liriope foliage.

Transplant trees and shrubs as soon as possible. Fall is best time to transplant, but now is okay, too. The later you wait, however, the lower their chance of survival.

Mulch, mulch, mulch! A layer of mulch, three to four inches thick, helps control weeds and keeps the soil moist. There are many sources of free or inexpensive mulch, so you have no reason not to mulch. This works well for fruits, vegetables, shrubs and flowers.

Fertilize pecan tree now before the grass really gets started. There are several options, but be sure to use a fertilizer with zinc in it. Pecans require zinc to make their leaves stronger and to help in kernel development. If using 10-10-10, apply one pound to new trees and four pounds per inch of trunk diameter at chest height to older trees. Spread it evenly around the tree, well beyond the drip line (the point to which the branches reach).

Prune spring-flowering plants, such as azaleas, camellias, forsythias, quince and spireas, etc. as soon as they finish blooming. Avoid shearing these plants, but selectively remove branches to maintain the beauty and shape of the plants.

Fertilize bulbs as soon as they come up. After they bloom, let the foliage die back naturally. This allows the bulb to store energy for next year’s blooms. If you want to move bulbs, mark where they are growing and then transplant them after the foliage dies back. Keep bulbs watered as needed.

Prune crape myrtles, chaste trees (Vitex), hollies and roses and other summer-blooming shrubs as soon as possible. Many other shrubs can be pruned now as well. Prune trees as little as possible. Do not give them an overall shearing. This can ruin their shape. Instead, remove individual branches completely back to where they are attached to the main branch.

Nandina grows like bamboo. These plants have long canes with leaves at the tops of the branches. Prune nandina plants by cutting one-third of the canes at one-third of the height of the plant. Prune another third at two-thirds height and leave one third alone. This should make the plant bushy. Mahonia and Aucuba (Gold dust plant) can also be pruned this way.

Do you have enough to do now? For more information on these and other lawn, landscape and garden topics, contact your local Cooperative Extension office.


Resource(s): Care of Ornamental Plants in the Landscape

Center Publication Number: 165

Fall is the time to plant and transplant trees and shrubs

Image credit, Krissy Slagle, UGA

By Merritt Melancon and Frank M. Watson , UGA Cooperative Extension 

Although most planting and transplanting occurs in the spring, fall is the best time of year to plant or transplant trees and shrubs.

“Trees planted in the fall have an opportunity to establish an extensive root system while the plant is dormant,” said Frank Watson, the University of Georgia Cooperative Extension coordinator in Wilkes County. “The soil temperature in most parts of the state is warm enough to support root growth during most or all of the winter season.”

Image credit, Krissy Slagle, UGA
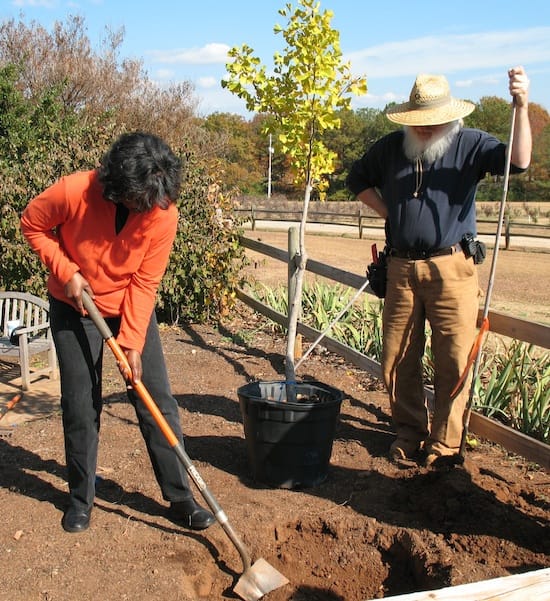
Fall is the perfect time to install new trees or shrubs or remove existing ones to new locations. University of Georgia Cooperative Extension experts recommend digging the planting hole two to three times the diameter of the soil ball. Image credit: Krissy Slagle.

First make sure the trees or shrubs are healthy enough to plant in a new environment. If you’re buying new trees or shrubs from a nursery, make sure the trunk is not damaged, said Matthew Chappell, a UGA Extension nursery production specialist.

“If you see any damage to the bark, do not purchase (that tree),” Chappell said. The same goes for trees that are already on your property. You don’t want to stress an already damaged tree by transplanting.

Chappell added that picking trees with straight trunks and symmetrical canopies will save you a lot of heartache in the future. They’ll be easier to prune into a desired shape and typically are more structurally sound.

Also avoid purchasing pot-bound trees. Check the container for circling roots which indicate that the tree or shrub will have a poor root system after it’s been planted.

If you’re working with a tree that’s already on your property, help the plant take a break from producing new branches and leaves before transplanting. The plant can then put most of its energy into adapting to its new environment, not into producing new growth above the soil. Avoid applying high nitrogen fertilizers to plants for about two months prior to moving. Another way to reduce new growth is to restrict the amount of water applied. However, severe water stress prior to transplanting can weaken the plant and decrease the survival rate, Watson said.

In addition to having their growth restricted, transplanted shrubs and trees need to have their roots pruned. Pruning a tree’s roots — trimming them back until they fit inside the soil ball — maximizes the quantity of feeder roots that are moved with the plant. Ideally, plants targeted for fall transplanting would have their roots pruned the spring before they’re replanted, but they can still be pruned 30 to 60 days before transplanting in the fall.

Whether you’re working with a newly purchased plant or one on your property, it’s important to pay extra attention to preparing the plant’s new home. Properly preparing the planting site will affect root growth, which determines the plant’s chances of survival and subsequent growth.

The planting hole should be two to three times the diameter of the soil ball. Place the plant at the same soil depth it was grown at. If planting several small plants close together, it may be more efficient and better for the plant to prepare an entire bed.

When physically planting your shrub or tree, try not to disturb the soil ball of the plant. This will ensure maximum contact between the roots and the soil, which will speed the plant’s creation of its new root system.

A broken or loosened soil ball may prevent the plant from absorbing all of the water it needs. Wetting the soil around the shrub or tree can keep the soil ball together as you transplant. You may want to use wire baskets or other equipment that is available for moving plants.

Don’t plant trees and shrubs so that water pools on the surface of the planting hole. But remember, the plant will need extra water for the first two years.

Wait several months, maybe until the following spring, to fertilize the newly transplanted tree. This allows the root system to establish itself before spurring new growth above ground.

(Merritt Melancon is a news editor with the University of Georgia College of Agricultural and Environmental Sciences. Frank Watson is the University of Georgia Cooperative Extension agent in Wilkes County, Ga.)

Tomato Wilt

Source(s): Willie O Chance


Taming the Dreaded Tomato Wilt

One word strikes fear in the hearts of tomato gardeners. That word is ‘wilt’. Imagine a long season of hard work ending in a yellow, dried up plant with no fruit. How disappointing! To comfort frightened tomato lovers, let me describe the tomato wilts. Though they are not curable, they can sometimes be prevented.

If a tomato appears wilted or stunted in the top of the plant, it may have Tomato spotted wilt virus (TSWV). This is a common tomato disease. It is spread by thrips. Usually the top of the plant looks stunted or wilted but the leaves are not limp as though they had no water. The young leaves may yellow and have red, brown or black discolorations in them. These discolorations may form a ring or circle. The veins on the underside of leaves may thicken and turn purple. Green fruit can have raised or flat rings, semi-circles or circles on them which yellow as the fruit ripens.

Once tomatoes get the disease, there is no control. Some varieties of tomato are resistant to TSWV, although they may not be completely immune. Resistant varieties include Amelia, Stiletto, Bella Rosa, Top Gun, Crista and Muriel (a Roma-type variety). Some resistant varieties may not be as flavorful as some other home garden varieties. Leaving them on the vine until they are fully ripe should help address this issue.

TSWV resistant peppers include Excursion II and Heritage. You can look for these and other TSWV resistant tomatoes and peppers in garden centers. Some seed sources include Harris Seeds (www.harrisseeds.com), Twilley Seed (www.twilleyseed.com), Clifton Seed Company (www.cliftonseed.com/), and Rupp Seeds (www.ruppseeds.com).

Later planted tomatoes may have fewer problems with TSWV. Since this disease over-winters in weeds – destroy weeds to reduce the disease. Weeds of particular concern include dandelion, annual sow thistle, chickweed, buttercup and plantain. For more information see http://craven.ces.ncsu.edu/index.php?page=news&ci=LAWN+14.

Spraying for the thrips that spread TSWV is not effective. Bag and destroy infected plants as quickly as possible early in the season to prevent spread. Late in the season you may want to just let the infected plants finish ripening the fruit they have.

If a tomato is wilting, as though it is running out of water, you may have one of several problems.  At least three diseases can cause this – Fusarium wilt, Bacterial wilt or Southern blight.

A fungus causes Fusarium wilt. It blocks the water conducting tissues in the plant. The leaves yellow and wilt, often starting at the bottom of the plant. This disease can affect just one side or one to several branches of the plant. The plant can die early producing no fruit. If you cut into the plant, the vascular system (just under the surface of the stem) will be brown.

Prevent Fusarium wilt by planting resistant varieties. The ‘F’ after the variety name (like Celebrity VFN) identifies these varieties. Fusarium wilt can survive in the soil. Do not plant tomatoes in infected areas more than once every four years. Rotate tomatoes to a new location each year. Do not plant them in the same area that you planted potatoes, eggplant or pepper last season.

Bacterial wilt causes a rapid wilting and death of the plant. The plant dies so quickly it may not have time to turn yellow. To identify Bacterial wilt, cut through the stem. Bacteria wilt browns the pith or middle of the stem. On bad infections, the pith may be hollow. Cut a short section of the stem and suspend it in a clear glass of water. You can often see a milky, bacterial ooze streaming out of the bottom of the cut stem.

There are no controls or resistant varieties for bacterial wilt. It also attacks peppers, potatoes and eggplant. Carefully dig out infected plants and soil and discard. Do not plant any of these vegetables in this area for at least four years.

Southern blight is a white mold that rots the stem at or near the soil line. The plant is stunted, wilts or dies. Look for the cottony fungus growth and the light brown BB sized fruiting structures of the fungus. The fungus may be at or slightly above or below the soil line. You may not see the white fungus growth if the weather is dry, even though the plant may still be infected.

To manage the disease, bury all plant residues before planting, plant vegetables farther apart, and treat with Terraclor at planting if you have a problem with Southern blight. Do not allow mulch to touch the base of the plant. Keep mulch at least 2 inches away from the stem of the plant. Some people wrap the stem near the soil line with foil to slow this disease. The foil should extend 2 inches above and 2 inches below the soil line.

Tomato wilts can be devastating, but you can learn to live with it. Knowing your enemy helps to remove the fear from dealing with this disease.

For more information:

Call your local Extension Agent at (800) ASK-UGA1 or locate your local Extension Office at http://www.caes.uga.edu/extension/statewide.cfm

Pest Management Handbook (Follow all label recommendations when using any pesticide) – www.ent.uga.edu/pmh/


Resource(s):

Controlling Red Tip Photinia Leaf Spot

Source(s): Willie O Chance


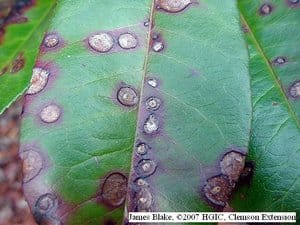
How do I control the leaf spot/blight on red tip photinias (red tips)?

entspotweb

The only control for this disease is to cut the bush down and plant something else. Sorry about that! Not all red tips get the disease, but all are susceptible to it.

Weather and the location and condition of the plant determine if the red tip gets the disease and how bad the disease is. Fungicides can slow the spread of the disease but you must spray regularly covering every leaf of the plant. This is not feasible. We do not generally recommend that you spray fungicides for this disease. There are some practical things that you can do that may help slow disease spread.

Rake up and burn, bury or destroy fallen leaves. This removes infected leaves that may reinfect leaves still on the tree.

Apply a two to three inch deep mulch around the plant.

Do not let the leaves get wet when you water. Water between 9 p.m. and 9 a.m.

With large red tips, prune off the lower branches and make them into small trees. This can make it more difficult for the disease to reinfect the plant once leaves fall off. Prune off heavily infected limbs.

The best control is to replace the red tips with a durable plant that does not get leaf spot diseases. Contact your local County Extension Office for suggestions or see these publications on the web:


Resource(s):

Center Publication Number: 84