Aphids

Source(s): Jack Arnott


Aphids (plant lice) are small (1/8″), soft-bodied insects that can be many colors with pale yellow or green being the most common. Most are not winged but there may be some winged adults. There are many species of aphids. Some of the aphids, woolly aphids, are covered with white, waxy threads.

aphids

Generally aphids are found in aggregations on tender new growth. They are fairly sedentary and don’t move much unless disturbed. Aphids have needle-like piercing/sucking mouthparts. These are inserted into the plant and sap is withdrawn. They suck in more than they can use. The excess comes out the two cornicles, (which look like tailpipes) on the abdomen and is often called honeydew. Honeydew is a sugary protein substance that may be fed upon by other insects such as ants. Honeydew that isn’t taken by the ants drops to the leaf surface and serves as a medium for the development of fungus such as sooty mold. Sooty mold can coat the leaf and reduce its food making ability.

Aphid females generally reproduce asexually producing more females. The adults live about three weeks and can produce large numbers in a short time. Males usually produced prior to winter then mating occurs and the eggs are laid to overwinter under bark or bud scales. Large numbers of aphids can reduce the plant vigor; however the loss of sap generally does not pose a serious threat to healthy, established plants, trees and shrubs. While feeding, aphids inject saliva into the plant. Some aphids do little damage, while the saliva others causes curled or distorted growth or transmit plant viruses.

CONTROL: Before resorting to chemical methods check for natural controls at work.

Biological: Many natural enemies are usually present in the yard already. There are several species of ladybugs or ladybird beetles which feed on aphids. Their larvae (young) also eat aphids. Other aphid predators include green lacewings and their larvae (called aphid lions), syrphid fly (hover fly) larvae, predacious stink bugs and assasin bugs, and the praying mantis. Some wasps and fungi parasitize aphids and help control their levels.

Mechanical:
 Aphids can be removed by pruning out the affected part of the plant. For a light infestation using a strong spray from the garden hose directed at the aphids can knock them off where they will die if not eaten by predators. If infestation is light, pick them off with your fingers. Maintain good screening on windows to prevent access to houseplants.

Chemical: Some plant species are very sensitive to nitrogen and an outbreak can be triggered by a high nitrogen fertilizer. Use a slow release fertilizer. Options include summer oils, insecticidal soaps, cyfluthrin, imidacloprid or malathion. Spot treat with a pyrethrin based insecticide. These products kill by contact so thorough spray coverage is essential. Read the label carefully before purchase and use. Insure the target pest and plant are on the label. Some insecticides and formulations might burn desirable plants. Indoors use only pesticides that are labeled for control of insects inside. FOLLOW ALL INSTRUCTIONS ON LABEL.


Resource(s): Insect Pests of Ornamental Plants

Center Publication Number: 51

Annual Bluegrass Control in Warm Season Turf

Source(s): Jacob G Price


Introduction: Annual bluegrass, Poa annua, is a very common tufted winter annual that can be difficult to control. Annual bluegrass has a yellow-green color and forms whitish spiklets on the branch tips. This grass produces seedheads throughout its lifecycle with most of the seedheads being formed in the spring.

Pre-emergence Control: For centipedegrass, St. Augustinegrass, zoysiagrass, and dormant bermudagrass, Atrazine and Simazine are listed as having excellent control. Balan (benefin), Surflan(oryzalin), Barricade (prodiamine), Regalstar (oxadiazon + prodiamine), and Echelon (sulfentrazone + prodiamine), are also listed as excellent for the above grasses, and bermudagrass does not have to be dormant at application. Products such as Halts and Pendulum (pendimethalin) also give good control.   Apply these pre-emergence herbicides in late September to early October.
Post-emergence Control: For control of annual bluegrass in centipedegrass, St. Augustinegrass, zoysiagrass, and dormant bermudagrass, products containing Atrazine or Simazine provide control. However, Atrazine and Simazine may not control annual bluegrass if it has been used year after year in the same location. Certainty (sulfosulfuron), should provide some control on smallbluegrass on the above turfgrasses. In zoysiagrass and bermudagrass lawns only, Revolver(foramsulfuron), and Monument (trifloxysulfuron-sodium) are excellent.
For non residential  (Sod and Seed Farms, Golf Courses, Athletic Fields, Commercial Properties, etc.) with zoysiagrass, centipedegrass, and bermudagrass, TranXit (rimsulfuron), provides excellent control of emerged annual bluegrass.  Katana (flazasulfuron), applications in the spring are effective. Kerb (pronamide), takes 4-6 weeks to work and can be used on the above grasses and in St. Augustinegrass.
Post Emergence Herbicides
                                           St. Aug.      Centipede      Zoysia         Bermuda
Atrazine/Simazine
T
T
T
T   dormant
*Certainty
T
T
T
T
Revolver
S
S
T
T
Monument
S
S
T
T
TranXit
S
T
T
T
Katana
S
T
T
T
Kerb
T
T
T
T
(T = tolerant); (S = sensitive, do not use this herbicide on indicated turfgrass); * not effective on mature bluegrass.
 
Produced: 2009/Revised:  2011 : Jake Price of the University of Georgia Extension Service, Lowndes County.

Resource(s):

An Herbal Glossary

Source(s): Wayne J. McLaurin


An Herbal Glossary
Herbs In Southern Gardens 
Common terms used in the culture of herbs:
Absorption: A method of extracting plant oil by laying herbs on tallow or lard, as in the making of pomade.
Annual: Plant that completes its life cycle in one growing season.
Biennial: Plant that requires 18 to 24 months to complete its life cycle.
Blanch: To process quickly in boiling water to help prevent deterioration.
Bouquet garni: A bundle of herbs tied with string and added to soups and stews and other dishes; the classical bouquet garni consists of two stalks each parsley and thyme, one sprig of marjoram or chervil, and one-half bay leaf.
Composite: A flower head made up of smaller complete flowers.
Cultivar: A cultivated variety of a plant.
Decoction: A method of extracting juice and oil from roots, bark, or seeds by soaking the plant material in water that is slowly heated to boiling and left to cool before use.
Dentate: Toothed or jagged, as a leaf edge.
Distillation: A purification process through which liquid is vaporized, condensed, and collected.
Essential Oils: Concentrated plant extracts responsible for flavor and fragrance, often derived through distillation.
Fixative: A material, such as gum benzoin or orris root, that preserves the scent of potpourri by absorbing the plant oils and slowly releasing them.
Fines herbes: A mix of several herbs used to flavor food during cooking; herbs traditionally used include parsley, chervil, tarragon, chives.
Floret: The smaller flower that in combination makes up the larger flower head.
Herb: From the Latin herba; usually, though not always, a green, succulent, temperate- zoned plant; generally used today to indicate a plant with culinary, fragrance, cosmetic, or medicinal use.
Herbaceous: Non-woody, generally dying back to the ground each winter.
Herbal: A book describing the appearance and use of plants.
Hybrid: Plant produced by a cross between two cultivars, usually within the same species.
Inflorescence: The characteristic arrangement of flowers on a stalk or in a cluster.
Infusion: An herbal liquid made by steeping leaves and stems in boiling hot water, covering for several minutes, then straining.
Knot garden: A garden design involving plantings in intricate, interwoven geometric patterns.
Maceration: Extraction of plant oils by soaking herbs in water or oil.
Perennial: A plant that continues its growth cycle year after year.
Pharmacognosy: A body of information about the history and medicinal uses of herbs and plants in their natural state.
Pharmacopoeia: The reference compendium of medicine used by physicians.
Phytotherapy: The use of plants for medicine.
Potherb: A plant that furnishes edible flowers, leaves, or stems usually prepared by boiling or steaming.
Potpourri: A mixture of dried fragrant plant materials combined with a fixative.
Poultice: A moist medicinal pack made by filling a small sack of thin material with an herbal paste.
Ravigote: A sauce made of various herbs mixed with vinegar.
Remoulade: An oil or mayonnaise-based sauce with mixed spices and herbs.
Rhizome: An underground stem that produces new plants at nodes.
Sachet: A small cloth packet containing dried herbs or herb mixture and used to scent drawers and closets.
Simple: A term used in colonial America for a medicinal herb used to cure a single disease or ailment; use reflected in the word “officinalis” in the scientific name of the plant.
Spice: From the Latin species, a term usually applied to a substance made from roots, bark, seed, or fruit of a tropical plant and used for culinary, fragrance, or medicinal purposes.
Stolon: A stem growing along the surface of the ground from which new plants grow at nodes.
Umbel: A flower head in the shape of an inverted umbrella, often a cluster of smaller flowers.
Tea: An infusion made by pouring boiling water over dried herb stems or leaves.
Tilth: Soil condition indicating degree of soil particulation or friability.
Tisane: A delicately flavored herbal drink made by pouring boiling water over fresh or dried herb leaves or flowers, steeping for several minutes, and straining out the plant material.
Toilet Waters: Mixtures of herbs and/or plant oils with water or isopropyl alcohol.
Topiary: A horticultural art by which shrubby plants are clipped into shapes or vining plants are trained over a form.
Tussie-mussie: A small herbal bouquet originally carried in Medieval times to ward off odors.

Resource(s): Herbs in Southern Gardens

Center Publication Number: 264

Alligatorweed

Source(s): Jacob G Price


Introduction: 

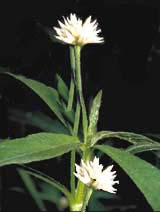
Alligatorweed is a perennial aquatic weed commonly found in shallow waterways in Florida and other southern states. It belongs to the pigweed family and is sometimes accidentally introduced to landscape situations with new St. Augustine sod. It can survive on terrestrial sites that remain wet or boggy.

alli

Description:

Alligatorweed has 2 to 5 inch oppositely arranged leaves that are elliptic shaped and have a distinct mid-rib. This species has white flowers. Leaves have hollow and very smooth stems. It can go unrecognized in closely mowed St. Augustine turf.

Control: 

The best control is to inspect sod to make sure the weed is not present. If the weed is present in large enough quantities it can compete for water and nutrients and cause sparse areas in the new turf. Under normal circumstances the weed should die out in 4-8 weeks because soil and moisture conditions in Coastal Georgia are not favorable to alligatorweed. There are no herbicides labeled for alligatorweed control in turfgrass. However if the problem persists for more than 2 months and the turf is well established, Image can be sprayed at maximum rates. Image has good activity on pigweeds, and as alligator weed is in the pigweed family, Image may very well control this weed. Alternatively two-way and three-way herbicides that contain 2,4-D and dicamba may also be used. But, these products can severely injure St. Augustinegrass, and should only be used at the lowest rate recommended on the label for St. Augustinegrass and centipedegrass.


Resource(s): Weed Management

Center Publication Number: 81

Abiotic Problems of Citrus in Georgia

Source(s): Randy Drinkard


Citrus experience problems, such as:

  • fruit shedding,
  • leaf drop,
  • fruit splitting,
  • attack from insects and disease.

Fruit Shedding

Natural abscission of flowers and fruits prevents citrus from overproducing. Homeowners frequently become concerned about the excessive shed of young blossoms and fruits in early spring. This is a natural abscission of blossoms and fruits characteristic of all citrus. Another natural fruit shedding occurs in May and June when the fruits are marble sized. Only one or two percent (sometimes less than one percent) of the blossoms are needed for adequate yields.

Leaf Drop

Healthy trees lose large numbers of their leaves which is a natural leaf drop that may be most noticeable in early spring. Citrus leaves live for 18 to 24 months and then begin shedding, with some leaf drop occurring throughout the year. The homeowner should always be alert to other possible causes of leaf shedding, including mite damage, excessive or insufficient soil moisture, cold damage or root diseases.

Fruit Splitting

In late summer (August – September) fruit splitting may occur with certain oranges and tangerines. It usually occurs when a period of fruit growth cessation (associated with moisture stress) is followed by a rapid increase in fruit size as the result of heavy rain. Other than alleviating moisture stress, little can be done about the problem.

Citrus Insect and Disease Control in Georgia

Citrus fruits may be grown successfully in the home garden with little or no control of insects and disease. Fruits produced without pesticide sprays may be very poor in external quality as a result of damage by several mites, insects and fungus diseases. Although these unattractive fruits may have little eye appeal, this external damage usually has no detrimental effect on the internal fruit quality. The appearance of the tree may suffer, but trees are seldom critically damaged by most citrus pests. Natural biological controls will assist in maintaining pests at low population levels.

For those who prefer to spray, three cover sprays during each season should be sufficient. A post-bloom spray for scales, mites and fungal disease, a summer oil for scales and mites and a fall mite spray usually are satisfactory.

Formulating a spray program can be somewhat difficult because of the many factors involved. Government regulations are constantly changing regarding the use of agricultural chemicals. Consult your local County Extension Agent for information on developing a spray program for home citrus trees.


Resource(s): Citrus Fruits for Southern and Coastal Georgia

Reviewer(s):

  • Steve Brady, CEA – Cobb County. The University of Georgia College of Agricultural and Environmental Sciences.
  • Jennifer Davidson, CEA – Muscogee County. The University of Georgia College of Agricultural and Environmental Sciences.

Center Publication Number: 173

A Teaching Garden

Source(s): The Cherokee County Master Gardeners


The Cherokee County Master Gardeners have put their knowledge to work and on display. They have come up with solutions to many gardening dilemmas. Their teaching garden is located on the grounds of the Senior Citizens Center at 1001 Univeter Road in Canton, GA.

garden1 garden2

Lifetime Master Gardener Marcia Winchester oversees the entire garden, holding two work days a month. The sessions are educational and are an excellent tool for teaching new Master Gardener interns.

In 1996, the CCMG had no budget so the garden was developed solely with plant donations from the Master Gardeners and senior citizens. A large portion of it was a vegetable garden, planted so that seniors could enjoy fresh vegetables.

Over the years, the garden has slowly evolved. A cement pad and two swings were donated by contractor Bob Castle. Home Depot in Woodstock donated materials for a pergola, and Bates Lumber Co. in Canton contributed nails. On April 27th, instructor Carlos Jones of the Sequoia Vocation Arts Dept. directed some of his students in the building of the pergola. This anchored the garden, giving it a nice central focal point. Modeled after the Cobb county Backacher garden, the garden was broken into several smaller gardens and a chair and co-chair were assigned to maintain it. A grant was given to pour a cement path so that seniors could maneuver easily.

Plantings in the front of the building are formal. Plants are low maintenance, drought tolerant, annuals and perennials. A shaded, dry area underneath a spanse of windows near the entrance posed a challenge. It is planted with evergreen plants and white blooming annuals that take very little time to maintain. If you are tired of watering, this is an excellent example of drought tolerant plants that work well in home gardens.

In 2003, a Patriot Garden was installed around the roadside mailbox, with a memorial plaque dedicating the garden to our military. The color scheme is predominately red, white and blue, in memory of 9/11 and military veterans who use the senior center.

The large area in back is divided into several gardens, separated by cement paths. The “Vegetable Garden” consists of several raised beds. Permanent trellises were installed several years ago to provide support for climbing vegetable plants. Recently the two front vegetable beds were converted into experimental peanut beds. Five blueberry bushes, donated by a MG training class from several years ago, provide senior citizens with blueberries for several weeks during the summer.

The area around the pergola is the “Fragrant Garden”. Plants there were funded by a State Master Gardener grant. This is a lovely place to sit in the shade and enjoy the fragrances year round.

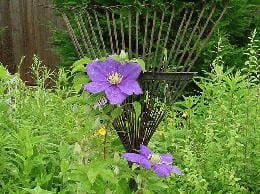
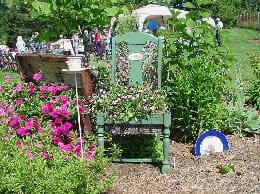
The “Heirloom Garden” is full of plants reminiscent of gardens from the Old South. China plates mark plants with their common names, and the area includes yard art to support the garden’s theme: a gazing ball, a wheel barrel used as a planter, an old chest left open with annuals cascading out, and a brass headboard that serves as a short fence. Purple, yellow, orange, and white blooming flowers are repeated throughout the garden.

The “Butterfly Garden” is one of our oldest gardens. It is in the process of being redesigned as light patterns have changed. The “Memorial Garden” (in memory of all the Meals-on-Wheels volunteers) is a small heart-shaped garden, outlined with dwarf hollies and inset with ice plant for summer color. It includes a white Crepe Myrtle for gentle shade. A donated wrought iron table and two chairs are located nearby—for sitting and remembering old friends.

A “Xeriscape Garden” is located by one of the downspouts of the Senior Center. In one corner it gets lots of water when it rains; otherwise the soil is extremely hot and dry. The soil is a mixture of orange clay and gravel from the construction of the building. Native plants have been used in its design. The “Holding Area” was expanded and screened off with a decorative white picket fence. Two new propagation beds were installed this summer.

In 2004 the Cherokee County Commissioners funded the installation of an irrigation system. At the request of the County Extension Agent, Todd Hurt, we decided to install a “drip” irrigation system to demonstrate water use efficiency and minimize weed growth. A variety of low volume emitters were used to show the flexibility of low volume systems.

DIRECTIONS to the garden driving from I-575: Take exit 14. Traveling from the south, turn left at the end of the exit ramp. Go through 3 lights and at 4th light turn right onto Univeter Road. Travel .8 miles and the Senior Center will be on the left. Traveling from the north, turn right at the end of the exit ramp and go through 2 lights. At the 3rd light turn right onto Univeter Road. Travel .8 miles and the Senior Center will be on the left.


Resource(s): Landscape Plants for Georgia

Center Publication Number: 123

A Shady Perennial Garden

Source(s):  Rebecca Pickett


Herbaceous perennials usually die back in winter and reappear each spring to thrive and bloom again. They don’t always live forever, nor are they free of maintenance.

royal-helleborus

GET READY …

  • Good bed preparation is essential for the growth of healthy perennials. Prepare all beds in the summer for fall planting and in the winter for spring planting. Correct drainage problems before planting.
  • Check the drainage by running a percolation test. Dig a 10″ hole and fill it with water. The next day, fill the hole with water again and time how long it stays in the hole. If the water is gone in 8-10 hours (1″ per hour), this site is suitable for most perennials.

BED PREPARATION …

  • Dig or till your soil 8 inches deep.
  • Remove all this worked soil and set it aside (your topsoil). -With a spading fork loosen the next 8″ of soil and work in coarse (granite) sand or wood chips.
  • Replace your topsoil and mix in 4″ of coarse sand or granite dust and 4″ of organic material (compost, shredded bark, etc.). This results in a 24″ thick layer of improved soil.
  • Add lime and fertilizer as recommended by your soil test. (Barbara Allen)

GET SET …
Resist the urge to plant one of each kind. Use odd numbers of plants (3,5,7) and plant them in asymmetrical groups or “drifts.” The visual effect of this type of planting will be more effective than a polka-dot or geometric design.

RECOMMENDED PERENNIALS

FOR PARTIAL SHADE: (Afternoon shade or dappled light under trees)

PROPER NAME (COMMON NAME)

‘BEST VARIETY’

FLOWER COLOR HEIGHT

BLOOM TIME

COMMENTS
Ajuga reptans (bugleweed) ‘Burgundy Glow’,

“Atropurpurea’

blue, lavender,

pink, white

4-12″, late spring Ground cover grown mainly for foliage. Several types available.
Anemone vitifolia (grapeleaf anemone)

‘Robustissima’

pink 11/2-3′, early fall Spreads rapidly. Nice foliage all

summer. Also try A. japonica.

Aquilegia canadensis (Canadian columbine) red & yellow 1-2′, spring Better here than the hybrids.
Astilbe arendsii ‘Deutschland’; ‘Fanal’;

‘Rheinland’, ‘Finale’

white; red;
pink
1-3′, late spring Lovely feathery blooms. Needs lots of water. Watch for spider mites.
Astilbe chinensis ‘Pumila’ pink 1-2′, spring Needs less water than arendsii.
Digitalis mertonensis (strawberry foxglove) rosy pink 3-4′, summer Lasts 2 or 3 years. Very pretty.
Heuchera americana (alum root)

‘Sunset’

greenish white 1-11/2‘, summer Does better than hybrids.
Heuchera micrantha (alum root)
‘Palace Purple’
creamy 1-11/2 ’,summer Grown for its purplish foliage.
Lobelia cardinalis
syphilitica
(cardinal flower)

(big blue lobelia)

red

blue

2-4′, late summer Must have rich, moist soil. Likes stream banks. Reseeds like crazy.
Phlox divaricata (woodland phlox) ‘Fuller’s White’
‘Louisiana’
white

blue

12-15″, spring Evergreen, spreads slowly. This native should be used more.
Tiarella cordifolia (foamflower) white 6-12″, spring Rich, moist soil, not much sun.
Tradescantia virginiana (spiderwort)
‘Snow Cap’
‘Zwanenburg Blue’
white

deep blue

1-2′, summer Blooms mornings & cloudy days.
Will take a good bit of sun.
FOR FULL SHADE: (meaning little if any direct sunlight)
Begonia grandis (hardy begonia) pink 2′, late summer Angel-wing leaves. No dividing.
Brunnera macrophylla (heartleaf brunnera) light blue 18″, spring Forget me-not flowers, big heart­ shaped leaf. Goes dormant in heat
Chrysogonum virginianum (green and gold)

‘Piccadilly’

yellow 6-9″, spring Thick mat of foliage. Blooms on and off all year. Evergreen.
Dicentra eximia (fringed bleeding heart) pink, white 1-1½’, spring Better than spectabilis for heat.
Dicentra spectabilis (common bleeding heart pink, white 1-1½, spring Beautiful sight in spring.
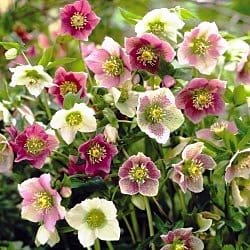
Helleborus orientalis (Lenten rose) shades of deep rose to white 18”, February Evergreen foliage. Flowers las a long time. Reseeds prolifically.
Hosta (plantain lily, funkia) hundreds White, lilac 6” – 4”, summer Grow different kinds for contrast of foliage. The shade plant here.
Iris cristata (crested iris) Blue with yellow crest 6”, late spring Spreads quickly. Charming dwarf.
Mertensia virginica (Virginia bluebells) Blue 1-2’, early spring Dies back after early bloom. Nice.
Sanquinana canadensis (bloodroot White 6”, early spring The harbinger of spring
Trillium grandiflorum (wake-robin) None 1-2” early spring Spring delight. Cutting will kill.
Ferns Japanese Painted Fern,
Christmas Fern (evergreen),
Maidenhair Fern (evergreen),
Japanese Shield Fern
None 12” and up There are various textures and heights to try. They offer a pleasing contrast to the leaves of hostas and can fill in where early spring bloomers have died back

GROW

  • Best planting time in Atlanta is near Oct. 15 or April 1.
  • Loosen root balls and set the crown no deeper than it was before.
  • Firm soil gently around roots and water deeply.
  • Markers will help identify and protect. Put stepping stones in wide beds to limit soil compaction caused by footsteps.
  • Heavy winter mulch is not recommended here; it encourages crown rot. A 1 1/2 to 2′ summer mulch of pine straw, bark or wood chips is necessary to hold moisture in and keep weeds out.
  • Once established, fertilize your bed with 1 1/2 lb, of 8-8-8 or 10-10-10 per 100 sq. ft. in early spring and again during late spring and/or midsummer. A pound of granular fertilizer is equal to about 2 cups.
  • Water deeply once a week during dry spells. Avoid frequent, shallow watering or watering late in the day. Wet foliage promotes disease problems.
  • Keep weeds, dead foliage and spent blooms removed.
  • Some plants will need staking. Try bamboo stakes and soft jute twine, or cut up tomato cages.
  • When foliage dies in fall, clean it out and do not let leaves pile up in winter. Yep, crown rot again! Give the bed a good cleanout in spring and add new mulch as summer heat approaches.
  • Some plants will need dividing every two or three years, others will not. Divide and share with friends.

POSSIBLE PROBLEMS…

  • Snails or slugs: They eat leaves and leave a slime trail. Try beer in saucers or crushed eggshells around plants.
  • Spittlebuq: Deposits foamy ‘spittle’ in crown or leaf joint. Try rotenone or recommended insecticide.
  • Mealybug: Small, cottony spot on stem. Blast off with hose or touch with alcohol swab.
  • Leafminer: Leaves trails in leaf of columbine. Pick off leaf or use appropriate pesticide.
  • Aphids: Clusters of oval green/black/brown specks on leaf or stem. Blast with hose, use insecticidal soap or an insecticide.
  • Thrips: Cause malformed, brown flower buds. Pick off affected buds or use insecticide.
  • Spider Mites: Cause a stippled white or dried out look on leaves. Daylilies turn bronze or yellow. Blast with hose or use a miticide.
  • Powdery Mildew: A white haze develops on leaves, especially phlox and crepe myrtle. Use a recommended fungicide for both prevention and treatment.
  • Crown rot, Root rot: Just about any plant will succumb to these if planted too deeply or allowed to have wet feet for too long.

Many thanks to the following for the benefit of their ideas:

  • Barbara Allen, Master Gardener (Her ‘Recipe’ for preparing a bed is one of many methods.)
  • Allan M. Armitage, The University of Georgia
  • Jane Bath, Land Arts, Inc,, Monroe, GA
  • Jimmy Stewart, Garden Designs, Atlanta, GA
  • Chuck Zdeb, Master Gardener

Resource(s): Flowering Perennials for Georgia Gardens

Center Publication Number: 1

A Landscape Feature that Helps Protect Water Quality

Source(s): Steve Brady, Cobb County Extension


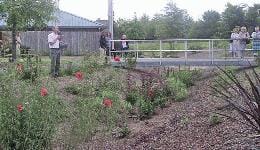
How can your landscape help protect water quality? By installing a rain garden you can have an attractive display of interesting colors, textures and forms that improves water quality.

land1

A rain garden is not a bog garden or a swamp. It is designed to receive some of the water that pours off of your driveway, roof or other impervious surfaces. Instead of sending it rushing off to the nearest storm drain or stream, the water is allowed to slow down and pause long enough for some of it to soak into the water table. This helps reduce the volume of water that scours our creeks. In addition, the water that exceeds the pool capacity of your rain garden has a moment to settle out soil particles, fertilizers, chemicals, etc in a process called biofiltration.

Naturally people think a rain garden will breed mosquitoes. If properly constructed, the water that is held in the garden will perk into the soil in 24 to 48 hours after a rain event. Mosquitoes need more than three days to breed in calm water.

Construction of the garden is not without challenges. The Demonstration Rain Garden here in Cobb County met and overcame several. A stormwater channel carries water off of the highway and runs next to our rain garden site. Just days before we started construction, a 4 inch rain event filled the channel and water backed up to the Cobb County Water System’s back door. Before we could go any farther the channel had to be re-engineered.

The next challenge stemmed from the fact that this location was once used as a steam locomotive factory. Te soil was not only extremely compacted, but also had a pH of 7.8 (very high) due to all the ash. After much plowing, grading, amending, and tilling the rain garden was functional.

Today the garden not only reduces runoff and pollution, it also serves as an environmental education site, and place for plant evaluations. It adds beauty to an otherwise boring landscape.

The garden is located at 660 South Cobb Drive where it intersects with Atlanta Road in Marietta. It is behind the Cobb County Water System’s building. The public is always welcome.

An excellent and easy to follow brochure is available called Rain Gardens for Home Landscapes. It will take you through the construction step by step. It includes the plants that are adapted to both wet and dry periods. You would only water this garden to get plants established. After that, the plants should be able to tolerate the extremes and still add interest to your landscape. Consider adding this low maintenance landscape feature to your yard and help protect water quality at the same time.


Resource(s): Landscape Plants for Georgia

A Better Way To Plant Shrubs and Trees

Source(s):
  • Carl Whitcomb, PhD, Carl is a consultant to the nursery industry and author of several books, including Establishment and Maintenance of Landscape Plants, Lacebark, Inc., P.O. Box 2383, Stillwater, OK 74076). He lives in Stillwater, Oklahoma.
  • Walter Reeves

For starters, dig a shallow hole and avoid soil amendments.

Planting Shrubs and Trees

How you plant a shrub or tree determines whether the plant struggles to grow, dies outright, or takes off and thrives. I know this firsthand. For 20 years I conducted research with a wide variety of ornamental shrubs and trees, planting them in different ways and observing the results. I learned, often to my surprise, that many common recommendations about planting are wrong or useless. You may think that the traditional approach to transplanting-digging a deep planting hole, amending the soil with organic matter, pruning branches to compensate for lost roots, and not fertilizing at planting time produces good results, but my research shows that a different approach works better.

Whether you’re planting a bareroot, balled and burlapped (B&B), or container plant, your shrub or tree is more likely to thrive if you provide a well-drained site, a wide, shallow planting hole, the right kind and amount of fertilizer, and regular watering. It will do even better if you use organic matter as a mulch instead of as a soil amendment and leave the plant unpruned, unless it has weak, damaged or ill-placed branches.

The time of year is another important consideration when you plant a tree or shrub. Spring, summer and fall can all be appropriate planting times, as long as you take into account the impact of each season on plant growth. In many parts of the country, the cool weather, high humidity, and abundant rainfall of spring make this a particularly good time to plant. In summer, warmer temperatures promote growth but also increase a plant’s demand for water, so if you decide to plant at this time, choose a plant that has been well watered at the garden center, and irrigate it as needed after planting. Fall planting also has advantages – cooler air temperatures reduce the demand for water while the lingering warmth of the soil encourages rapid root growth. Take care, however, to allow your transplant enough time to become established before winter sets in.

Check the soil drainage before you plant. No amount of care in planting can make a shrub or tree thrive if the soil is so wet that the roots don’t get enough oxygen and they suffocate. To test drainage, dig a hole 8 in. wide and 12 in. deep, fill it with water several times during the day until the soil is saturated and then fill it again in the evening. If there is standing water in the hole 24 hours later, you must improve the drainage or limit yourself to the relatively few woody plants that tolerate wet sites.

The easiest way to improve drainage is to plant on berms or raised mounds of soil. Start by loosening the soil beneath the mound to a depth of 4 in. to 6 in. Next, pile additional topsoil 6 in. to 1 ft. high in a circle at least three times as wide as the root system of the plant, and set it in place as if the top of the mound were ground level. Mounds tend to dry quickly (and the lighter the soil, the faster they dry out), so you have to water diligently the first, and often the second year, until the roots establish themselves.

The surest way to improve drainage is to run perforated drain pipe through a gravel-filled, underground trench. The pipe must run to a low spot to carry away water. Since most roots are in the top 1 ft. of soil, the pipe must be installed 16 in. to 18 in. deep.

If you can’t improve the drainage plant shrub or tree species that tolerate wet sites. For help in choosing a suitable plant, check with a local nursery or consult these books: Landscape Plants for Eastern North America, by Harrison L. Flint, John Wiley & Sons, 1 Wiley Drive, Somerset, N.J. 08875); Pocket Guide to Choosing Woody Ornamentals by Gerd Krussmann Timber Press, 9999 S.W. Wilshire, Portland, OR 97225); and Know It and Grow It 11: A Guide to the Identification and Use of Landscape Plants, by Carl Whitcomb, Lacebark, Inc., P.O. Box 2383, Stillwater, OK 74076).

Dig a wide planting hole

The ideal planting hole is wide and shallow – at least twice the width of the root system of the plant, and the wider the better. Roots need oxygen for growth, and they get most of it from open spaces between particles of soil. A broad circle of loosened soil around a new shrub or tree helps to insure that the roots have the air they need during the first growing season.

Dig a planting hole the same depth as the root system of your shrub or tree. Deeper holes can lead to trouble. The soil may settle enough after transplanting to create a depression around the plant. If rain collects and stands in the depression, or if soil washes in and packs around the trunk, there is a danger of encouraging root and trunk diseases. Many publications suggest digging a deep planting hole, then packing the soil in the bottom to prevent settling. Since air is vital to root growth, it makes no sense to dig the soil out, then pack it back in.

Prune sparingly, if at all

On the face of it, pruning a shrub or tree at planting time sounds plausible. When a nursery digs up a bare-root or a B&B plant, most of the root system remains in the ground, producing a plant with a top too big for its roots. Even container-grown plants can end up disproportionately top-heavy after their potbound roots are pruned away.

It would seem that such extensive root loss would prevent the plant from taking up enough water, so you’d need to cut back the top to reduce its water needs. But, in fact, my research shows that even if shrubs or trees lose many roots during transplanting, the unpruned plants do better than the pruned ones during the first year. They put on more growth, and fewer of them die. After two years, the pruned trees catch up with their unpruned neighbors, but pruning takes its toll. The pruned trees, especially those with one-third or more of their branches removed, often have less attractive shapes. Also, severe pruning frequently prompts young trees to produce new branches that are too close to adjacent ones, or that grow out from the trunk at narrow angles. By contrast, unpruned trees generally have better-spaced branches with stronger angles, and they look more natural.

Why does an unpruned shrub or tree thrive? I have a theory. The root system, though diminished in size by digging or pruning, appears to be able to keep up with the early demand for water from the top if the soil has plenty of moisture. Meanwhile, the root system of an unpruned plant grows faster than that of a pruned plant because expanding leaf buds produce hormones and sugars that stimulate root growth, and the more buds, the faster the growth. Plants with better root systems are more likely to thrive, especially during hot, dry weather.

While I’ve found that pruning for balance between top and roots does no good, corrective pruning does have a place at planting time. If a shrub or tree has a cluster of branches growing too close together for good looks or health, remove a branch or two. You also should remove damaged branches; the weaker of two branches that cross; and branches that ascend from the trunk at a steep angle, because their crotches, the places where the branches meet the trunk, will always be weak.

Hold the soil amendments

For decades, gardeners have mixed organic amendments into the soil to help establish newly planted shrubs and trees. The resulting “lighter” soil might sound like a good idea, but I’ve found that soil amended with peat moss, pine bark and similar organic materials produces no better results than unamended soil and sometimes gives less vigorous growth. Of all of my findings, this one has generated the most controversy among professionals and home gardeners alike. When I finished my first talk about these experiments, the moderator implied that my results were somehow unpatriotic, commenting that he didn’t intend to ask me what I thought about apple pie or motherhood. Actually, I, too, once believed in the need for soil amendments. In fact, my first experiments were designed to learn which additives were best for planting, and I was as surprised as anyone to learn that none of them produced better results than unamended soil. I’ve since repeated my experiments in several parts of the country and on different kinds of soil, and got the same results.

In the first year or two after planting, the difference between shrubs and trees in amended soil and unamended soil is moderate above ground, but often striking below ground. Since plants in amended soil rarely show visible signs of stress, there is no reason to question the

practice. But after digging up hundreds of plants, I’ve learned that plants in unamended soil send roots as far as 3 ft. or 4 ft. from the original root ball in a year or two, while the roots of plants in amended soil are still largely confined to the planting hole.

Roots in amended soil grow more slowly because they often have too little or too much water. On well-drained sites, soil amendments such as peat often deprive the roots of moisture. The amended soil quickly loses much of the water it absorbs to the surrounding, often finer-textured, soil, which acts like an ink-blotter and pulls water from the peat by capillary action. The loss is very rapid when the ground is relatively dry, and is compounded by the demand for water from the top growth of the plant. During hot, dry spells, when a plant loses lots of water, the amended soil may be dry enough to cause plant stress even though the surrounding unamended soil is still moist enough to support growth.

On poorly-drained sites, soil amendments can collect too much water. The amended soil has a coarser texture than the surrounding soil and therefore allows water to penetrate more rapidly. During a rainy period or prolonged irrigation, the planting hole can fill up like a bathtub, causing roots to suffocate, or suffer enough stress and dieback to encourage root diseases.

Some acid-loving plants, such as azaleas, do grow better when the soil is heavily amended with organic matter, which tends to be acidic as it breaks down. The benefit, however, stems largely from the decrease in soil Ph rather than improved soil structure. You could skip the peat moss, lower the pH with powdered or granular sulfur and have equally good results.

If you have organic matter available, you’ll have better results if you use it as a mulch, imitating the way organic matter would be added to the soil in nature, rather than using it as a soil amendment.

Fertilize as needed

Should you fertilize newly-planted shrubs and trees? Yes, provided a soil test shows that fertilizer is, in fact, needed. It’s important not to deprive the plant of nitrogen or other nutrients following planting.

You can apply fertilizer by spreading it on the soil surface, or by adding it to the planting hole. Much has been said and written to warn gardeners that fertilizer in the planting hole causes root damage, a bugaboo probably based on experiments in the 1920s and 30s when the principal form of nitrogen fertilizer was sodium nitrate. Fertilizers are salts. Those with a high salt index (the measure of saltiness)- may absorb water that roots need when the soil is dry. Leaves die, and the damage is misleadingly called fertilizer burn. Today, though, there are forms of nitrogen fertilizer that can be added to the planting hole safely. For example, urea, one of the most widely available forms of nitrogen fertilizer, has a salt index of 1.6 per.

Test the soil before you plant, and apply no more fertilizer than the soil test calls for. (Any fertilizer applied at excessive rates can cause problems.) If fertilizer is needed, choose one with a low salt index. To supply nitrogen, look for a formulation that includes ureaformaldehyde, IBDU (isobutylene diurea) or ammoniated phosphate. If your soil has a phosphorus deficiency, incorporate superphosphate (with an analysis of 0-20-0) or triple superphosphate (0-46-0) into the soil as the test results suggest. (It is important to note that phosphorus does not move through the soil. It must be mixed into the root zone in order to be readily available to plants.) The salt index of superphosphate and triple superphosphate is near zero. If you have to add potassium, be aware that potassium chloride (muriate of potash), the most common potassium source, has a very high salt index. Use it with care.

In general, fertilizers derived from organic sources pose little risk of salt damage because they release nutrients very slowly. Slow-release or controlled-release chemical fertilizers offer the same advantage; even if they contain nutrients in forms that have high salt indices, they become available to plants so slowly that they are unlikely to cause any harm. Organic and other slow-release fertilizers cost more initially, but they don’t need to be applied as frequently.

In good soils, fertilizing at planting time has little impact on the first flush of top growth following planting. That growth is influenced mostly by growing conditions the previous summer and fall, when buds were formed. However, remember that fertilizing at, or shortly after, planting encourages additional growth that year and promotes bud development the first fall following planting. These buds will produce the spring flush of growth one year after planting, and it’s that growth that reflects how “happy” the plant is in the new site.

Lay on the mulch

Young shrubs and trees do better when competition is kept in check, and mulch is the best way to supply the relief they need. Mulch suppresses weeds, conserves moisture, checks erosion, prevents soil compaction in heavy rains and moderates soil temperature. Pine bark, aged woodchips, pine straw, chopped leaves – most organic materials, in fact – work well as mulch.

Apply mulch to a sizable area around a newly-planted tree or shrub – the roots will eventually extend far from the trunk. The right depth for mulch is 2 in. to 4 in., depending on the type of soil it covers. Less mulch is required for heavy soils, more for light soils. In either case, mulch that is too deep can cause problems. It can prevent the soil from drying out, depriving plant roots of necessary oxygen. Extremely deep mulch also may encourage rodents which can damage plant stems. Do not place mulch more than 2 in. deep next to the stem of a tree or shrub. an excessively deep, fine-textured mulch around the stem may kill the bark near the soil line, resulting in the eventual death of the entire plant.

Keep in mind that organic mulches may temporarily tie up a substantial portion of soil nitrogen, which is used by the microorganisms that break down the mulch. In time, the nitrogen bound by the microorganisms will be released, but in the short run, additional nitrogen may be required to support vigorous growth of new plantings. To prevent problems, broadcast a bit of nitrogen fertilizer on the soil before you mulch.

Water diligently

All plants need soil with adequate moisture, especially while their root systems are growing rapidly. Water is the necessary ingredient for plant growth that is most often in short supply. If rain falls short, make up the deficit by watering deeply every five to seven days, taking care not to suffocate roots by overwatering. In my research, supplemental watering throughout the first growing season made an enormous difference in the growth of transplanted shrubs and trees.

I recommend drip irrigation systems whenever possible. They conserve moisture, while minimizing the liability of overwatering. Since you don’t wet the foliage, you don’t encourage leaf diseases. The key to using drip irrigation is to water thoroughly, then allow the soil to dry moderately before watering again. Placing mulch over the drip system helps slow evaporation of moisture from the soil.

Start with a healthy plant

I have one last suggestion to offer about planting shrubs and trees: select only thrifty plants, those grown properly at the nursery and handled with care before sale. Thrifty plants are those with good, deep leaf color and plump stems and buds. The key to successful transplant establishment is the energy inside the plant. This is more important than what is done outside the plant. All the care in the world cannot make a sickly plant thrive.

Once you have chosen a healthy specimen, it is up to you to provide the conditions that will enable the plant to adapt to its new site and prosper there. Give it a wide hole, the necessary fertilizer, mulch and plenty of water, and it will reward you with vigorous growth.


Resource(s):

Center Publication Number: 10

Responsible Lawn Care

Source(s): Clint Waltz, Extension Turfgrass Specialist, The University of Georgia


Water is a precious resource that has long been taken for granted. However, the recent droughts and our rapid population growth has helped focus the need for better resource management.

Often overlooked, our landscapes can help reduce the environmental impact of urbanization. Plants reduce soil erosion, cool the environment, improve air quality, decrease water run-off, filter impurities from the water and enhance community character.

The time has come for everyone to share in protecting our precious water resources and the environment. The following lawn management steps will minimize water pollution from fertilizers, pesticides and sediment while maintaining a healthy, vigorous and attractive lawn.

Lawns and landscapes need water, fertilizers, and sometimes other chemicals to maintain good health. However, improper use of these products can pollute lakes, rivers and streams. In sandy soils, some lawn care products may seep into groundwater and pollute aquifers.

Regardless of whether you hire a commercial lawn care company or do it yourself, insist that the following steps be followed. Make sure your contractor has a Georgia Pesticides Applicators License if they are going to apply pesticides.

For more information, contact your local county Extension office. Additional turf management information is available on the Georgia Turf website.


  1. Prevent Problems
    • Plant the right grass. UGA Extension bulletin 773, “Lawns In Georgia”, explains which grasses grow best in Georgia. It also provides recommended establishment steps for a new lawn and maintenance practices for an established lawn.
    • Plant at the right time so that the lawn gets a good start. Sod is the most effective and rapid means of establishing a lawn. If you establish by seeding, cover with a straw or other type of mulch to prevent soil erosion.
    • Do not try to seed a lawn on a steep slope or in an area that does not drain well. Sod across the slope to protect the soil from erosion and runoff.
  2. Water it Right
    • Water only when the lawn needs it. Most grasses need about one inch of water per week of active growth. It is time to water when the grass appears a dull bluish green, the leaf blades begin to fold or roll and footprints remain as the grass begins to wilt.
    • Do not overwater. You should wet the soil to just below the root depth or generally to a depth of 6 to 8 inches. Apply 1/2 inch of water to a sandy soil and about 1 inch to a clay soil. If runoff occurs during irrigation, stop and allow the water to soak into the soil for a few hours before applying more.
    • Water the grass – not the pavement or street. Place sprinklers and automatic irrigation heads so that the water falls only on the lawn.
    • Water in early morning to reduce evaporation losses and remove disease-enhancing dew.
    • Water newly seeded areas lightly and often enough to prevent the surface from drying out for the first 2 weeks until seedlings become established.
  3. Mow it Right
    • Mow regularly at the correct height (see Table) to encourage deep roots and help keep out weeds. Use a sharp blade and remove only a third of the grass height at one time. Mow when the grass is dry.
    • Leave clippings on the lawn. If you mow regularly and let the clippings decompose on the lawn, you will recycle about 25% of the nitrogen your lawn needs. If you remove clippings, compost them for use as a mulch.
  4. Fertilize it Right
    • Apply the right amount of fertilizer at the right time to maintain a healthy lawn.
    • Do not apply fertilizer before a heavy rain is expected.
    • Test the soil every two to three years to determine if lime, phosphorus or potassium is needed.
    • Choose a fertilizer with some slow-release form of nitrogen to reduce the potential leaching into groundwater, especially on sandy soils or to reduce loss from runoff.
    • Calibrate your spreader every time it is used to apply the right rate and get even distribution.
    • Fill the spreader on a paved surface so spills can be easily cleaned up. Don’t leave fertilizer on paved surfaces where it will wash off. Blow or sweep this fertilizer back onto the lawn.
  5. Use Pesticides Sparingly
    • Have weeds, diseases or insects properly identified before applying a pesticide. Follow the product label directions and time applications when the pest is most sensitive.
    • Do not apply pesticides when heavy rain is likely because some chemicals can leach through sandy soils and pollute shallow water tables or runoff sloping sites or compacted soils.
    • Calibrate your sprayer or spreader to deliver the correct amount of product and ensure even application.
    • Prevent spills. Mix liquid solutions and fill sprayers on grassy surfaces so no liquid spills on pavements. Mix granular materials on smooth, impenetrable surfaces so spills can be easily cleaned up.

**** Mowing Height for Lawn Grasses in Georgia ****
Grass Cutting Height (inches)
Bahiagrass 2 to 3
Bluegrass 2 to 3
Common Bermudagrass 1 to 3
Hybrid Bermudagrass 0.5 to 1.5
Zoysia 0.5 to 1.5
Centipedegrass 1 to 1.5
Carpetgrass 1 to 1.5
St. Augustine 2 to 3
Ryegrass 1 to 2
Tall Fescue 2 to 3

Resource(s):  Lawns in Georgia

Center Publication Number:  143