Protect Plants from Cold Weather

Source(s): Stephen D Pettis


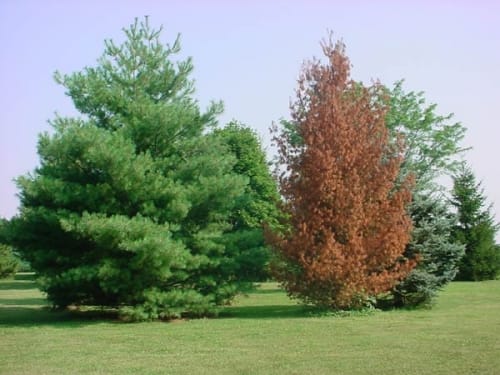
Cold injury, the damage caused to plants by freezing temperatures, may occur on the fruit, stems, leaves, trunk and roots. Water inside plant parts can freeze and expand, tearing cell walls and causing them to leak. This damage may go unnoticed until the plant fails to come out of dormancy in the spring.

wirrigemcolddamage306b

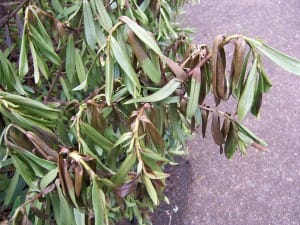
There are three types of cold injury. The first is called a ‘burn’. Often cold damaged plant parts will become mushy and turn brown or black. Over time the damaged leaves or stems will dry out and appear to have been burned with a torch. Sunken areas may appear on branches and trunks and the bark may peel.

The second type of cold damage, desiccation, can be caused by winter winds. Cold air does not hold moisture like warm air (summer humidity and dry winter air) and can dehydrate plants if it is sustained for long periods of time. Leaves may dry up at the edges and eventually turn completely brown.

The third type of winter damage is wood splitting or ‘frost cracks’. This damage occurs on stems and branches. On particularly cold nights, water in the cells just beneath the bark of trees and shrubs freezes. When the sun hits these areas the next day, the water thaws quickly killing the cells and splitting the wood. Eventually, longitudinal (lengthwise) cracks may appear. Often these are not evident until the following summer.

Preventing cold damage to plants begins by planting plants that are native to our area or acclimated to the temperatures we experience. The USDA has created climatic zones based on average coldest temperatures for the regions of the US. Plants are categorized according to the areas in which they are hardy. Gardeners can choose plants that will perform in their area. For a map of the USDA hardiness zones they may visit the USDA website http://www.usna.usda.gov/Hardzone/ushzmap.html.

There are other ways to protect tender plants during the winter:

  • Plant site selection can be crucial to winter hardiness of some plants. Planting under a tree canopy or near the southwest side of a home to maximize evening winter sun can protect plants.
  • Plant nutrition can play a minor role in freezing. Maintaining proper fertility levels can lower the temperatures a plant can tolerate by 5 degrees.
  • Windbreaks can be constructed or planted to block frigid winter winds.
  • Plants can be covered with fabric on cold nights. Be sure to remove the fabric every day.
  • Finally, watering plants keeps them hydrated and prevents plants from drying due to cold air and frozen soil.


Resource(s):

Center Publication Number: 161

Diagnosing Problems of St. Augustinegrass

Source(s): Jacob G Price


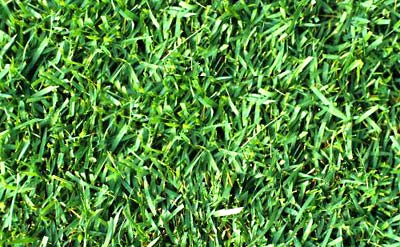
St. Augustinegrass is becoming increasingly popular in Georgia landscapes. This turf is susceptible to several insect and disease problems that occur in Georgia. Treatments for each situation are often very different so correct diagnosis is important before choosing a treatment option.

st_augustine21

Chinch Bugs and Take-All Disease: (Fig. 1). Take- All Disease kills large areas of turf. Stolons, grass blades, and roots die, leaving turf that is easily pulled up. Roots are dark brown, and dark lesions are sometimes seen on stolons. (Fig. 2). Take-All Disease is usually associated with a pH of 6.3 or above at the soil surface. Incidences of Take-All Disease are increasing in Georgia. Chinch Bugs and Take-All Disease are the two most serious problems in St. Augustinegrass. (Fig. 3). Mature Chinch Bugs are about 1/8” long. Nymphal stages are reddish in color. If suspected, the fast moving insects can be found in thatch or on blades of grass in sunny areas of the lawn. The first symptoms of Chinch Bugs are yellowing of individual blades of grass which quickly becomes large brown areas.

StAugtine2Other Insects and Diseases: Brown Patch damages grass in circular patterns that enlarge to 8′. At first the area appears sunken. Excess moisture, high nitrogen fertilizer, and temperatures between 70-85 degrees, usually precede the outbreak. Gray Leaf Spot appears as tiny gray to brown spots on blades of grass usually in shaded areas with high moisture. Over-all appearance is irregular thinning of turf. Fairy-Ring is a disease that first appears as a lush green circle or semi-circle that moves outward with potential to leave bare areas of turf behind. Fairy-ring fungi often occur where roots or buried debris are decaying. Mushroom circles often appear in the fall. Mole Crickets are insects which feed on and sever roots which gives turf a spongy feel. Large irregular areas may die. They can be detected by pouring 1 gallon of water mixed with 2 tbsp of dishwashing liquid over the borders of the infested area. Sod Webworms and Fall Armyworms can also be detected with soap and water. The worms leave chewed edges on grass blades and can eat the grass to the ground. White Grubs are larvae of several types of beetles. Detection requires digging a square foot section to a depth of 4 inches and counting grubs. Treatment depends on the number and species detected. For more information and control options contact your local county extension office.

March April May June July August September October
**Chinch Bugs
x
x
x
x
**Take-All Disease
x
x
x
x
x
x
Brown Patch
x
x
x
x
Gray Leaf Spot
x
x
x
Fairy Ring
x
x
x
x
x
x
x
x
Mole Crickets
x
x
x
x
x
x
Sod/Fall Armyworms
x
x
White Grubs
x
x
x
x
x
x

**Very serious and must be dealt with as soon as detected.


Resource(s):
Turfgrass Diseases
Turfgrass Diseases: Quick Reference Guide

Center Publication Number: 244

Pruning Crape Myrtles

Source(s): Stephen D Pettis


The Crape myrtle (Lagerstroemia indica) is one of the most commonly used flowering trees in landscaping today. It also has the dubious distinction among gardeners and horticulturists as the plant that gets butchered in the worst way by homeowners and property maintenance companies.

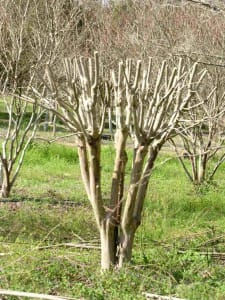
Perfectly pruned crape myrtle. Note the umbrella shape of the canopy.

‘Crape murder’ is a term used to describe the horrific pruning that many unfortunate crapes must endure and it isn’t far off the mark. The plants do not seem to mind particularly, as they are actually stimulated by extreme pruning. But, to those of us who empathize with abused creatures, the sight of mutilated crape myrtles is hard to stomach.

Crape myrtles are trained by nurseries into two basic shapes: single-stemmed tree-form and multi-stemmed. To achieve these shapes, growers allow crapes to grow for a year in either containers or fields, and cut them down to the ground in the spring of the second year. Later that summer when the plant has coppiced or grown many stems from the original root system, the grower will choose the single best stem and train it into a single-stemmed tree-form tree or choose an odd number of the best stems (3 or 5 for example) for a multi-stemmed tree. These trees are then grown out to salable size and purchased by landscapers and homeowners.

Pruning crapes so that they retain the appropriate form is relatively simple. Prune the trees in the winter when dormant. For trees that are just the right height or shorter, simply prune off the old flower heads and seedpods. If the tree was perfect last year but the past summer’s growth made the plant too tall, remove just that growth. Always remove any suckers that have sprouted from the roots or lower trunk. The key is to not allow the trees to get so overgrown that extreme pruning is ever necessary.

Sometimes though, we may forget to do our yearly maintenance pruning or it may be we take over a property where the previous maintenance person did a lousy job and now a harsh pruning is necessary. In either case, the trees can be pruned in such a way as to minimize the aesthetic impact of the removal of sizable portions of the tree. Begin by identifying the main stems and remove any others that might have suckered from the roots. Next, prune out any branches that rub and any branches in the interior of the tree that have suckered. Then decide the height you wish the tree to become. Make cuts at the very top of each trunk to remove any growth above that height. The tree may look a little flat-topped, but you can make shaping cuts to make the canopy the shape you want. I prefer the very top to be a little flat and to taper the sides into a rounded shape. One might describe it as umbrella shaped(see picture).


Resource(s):

Center Publication Number: 112

Dark-Winged Fungus Gnats

Source(s): W.A. Attwater, University of Guelph, Ontario.


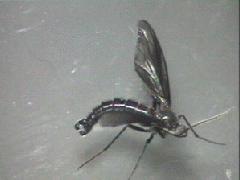
DARK-WINGED FUNGUS GNATS (Diptera: Sciaridae). Dark-winged fungus gnats or sciarid flies, primarily in the genus Bradysia, are pests of ornamental and other potted plants.

fungusgnat

Adults are 3-4 mm long and gray-black. They are common on soil surfaces or under leaves in moist shady places, especially in areas such as greenhouses. Adults are weak fliers and often run over the surface of soil. They are often attracted to lights in the house at night. Adults live approximately one week and do not cause feeding injury to plants.

Female flies can produce between 75-200 smooth, oval, white eggs which are laid on the soil surface and in crevices. Larvae emerge in 4 to 6 days and are creamy-white with black heads. Complete development occurs within 2-3 weeks at 22 °C, which is a common house temperature. The pupal stage appears as a thin cocoon, and lasts 4-6 days at 22 °C. Several generations of flies commonly overlap.

Larvae of several species feed on decaying organic matter and fungi in soil. Media mixes with a high peat content can favour infestations, especially in the presence of decaying plant tissue. The larvae also feed on rotting plant roots and lower stem tissue. They seldom affect sound plant tissue. Some species occasionally become pests in mushroom production operations.

Controls

  • Remove breeding sites such as infested soil and decaying plant material.
  • Replace infested mixtures with sterilized soil.
  • Seal bags of opened sterilized soil.
  • Allow the soil to dry between watering of houseplants.
  • Follow good sanitation practises.
  • Use screening on windows, doors and vents.
  • Beneficial (entomopathogenic) nematodes and predatory mites are available for the control of fungus gnats.
  • Insecticides with a domestic registration are also available.
  • Use the recommended rates and follow all safety precautions given on the manufacturer’s label.

Center Publication Number: 168

Raccoon Damage and Control

Source(s): Jim Howell, Ph.D., Entomologist, The University of Georgia


Many areas considered to be in the “country” just a few years ago are now more urban. Because of this transition in land use, raccoons and other animals once called wildlife may now be considered backyard pests.

raccoon

Identification

Raccoons are stocky, 2 to 3 feet long and usually 10 to 30 pounds. They are grizzled gray, with a bushy tail marked by alternating gray and black rings. The black “mask” across the face is the trademark feature by which most of us know them.


Biology

Though raccoons prefer a wooded habitat that includes water – lakes, rivers, marshes – they are amazingly adaptable, and many have found a relatively easy life in the urban and suburban environments of our cities and towns. In more forested areas, raccoons commonly den in hollowed trees, ground burrows or under brush piles. But in the urban environment, they have moved into our chimneys, attics and wall spaces.

Raccoons are omnivores, eating both plant and animal foods. Plant foods include berries, corn, fruit, nuts and vegetables. They are opportunistic hunters and feed on insects, grubs, crayfish, frogs, fish, bird eggs, nestlings, squirrels, rats and other small animals they can catch. They are most active at night, but sometimes they forage for food during the day.

Raccoons usually breed in February and March and bear one annual litter of three to five kits in April and May, though late matings can result in births as late as August. The home range varies from one to 20 square miles, depending on food or mate availability. They do not hibernate but may “hole up” in severe weather.

Damage

Raccoons can be a serious nuisance problem when they decide to enter our homes, using chimneys, attics or wall spaces as a replacement den instead of a hollow tree. For their size they are powerful animals and can rip off boards and shingles in search of a retreat. Raccoons are amazingly dexterous, too. In urban areas, they routinely open garbage cans and dump the contents in search of food. They often dig up sod in search of insects and earthworms, thus damaging our lawns. They may feast on unpicked vegetables as well, thereby destroying our gardens. Raccoons can even injure pets sometimes, such as cats and small dogs. Lastly, raccoons are a major wildlife reservoir for rabies in the United States.

Control

First of all, do not feed wild animals. Depending on your location, this may even be a crime. This activity encourages the animals to stay in the area and often results in their invading our homes. Bring pet foods in at night and store in a garage or other secure place. Place garbage in metal cans with tops that can be secured until pickup. Sprinkle soap flakes on the lawn and water in to help deter raccoons from digging up the lawn. Sprinkle diluted Tobasco over the vegetables in your garden to help deter raccoons from damaging your plants.

Inside Nuisance

If a raccoon has entered through a pet door, close off all other doors to the house. The animal may leave the same way it came in. If you hear noises in your chimney – whines, snarls, whimpers, etc., especially in February and May, it may well be a nest of raccoons. Do not start a fire in the fireplace in hopes of driving them out. The female will leave and the young will be left. The young raccoons can not escape. For chimney, attic or wall space removal, contact a licensed professional. Racccoons are considered game animals in many states and trapping them is illegal, if out of season and without proper permits. After the animal has been safely removed, take immediate steps to seal any possible entry sites.


Center Publication Number: 233

Rain Gardens

Source(s): Wayne A Gardner, College of Agricultural and Environmental Sciences, Professor – Entomology Department


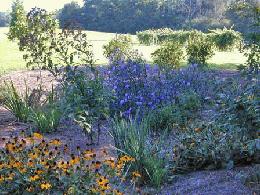
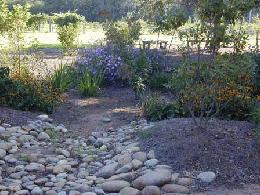
A rain garden was recently added to the theme gardens in the Demonstration Area of the Research and Education Garden on the UGA Griffin Campus. This new theme garden shows homeowners and professional landscapers how to design and manage a rain garden.

garden3 garden5

Rain gardens are designed to capture and absorb stormwater run-off from landscape surfaces. Most of these surfaces are hard and impervious to water, such as sidewalks, driveways, and building roofs.

These gardens may be large, complex bioretention-gardens that collect stormwater from mall roofs and parking lots. This garden is an example of a smaller, home landscape garden that is designed to handle stormwater run-off from the home landscape, roof, and driveway.

Why try to capture and absorb stormwater? Rain gardens help reduce water pollution. Studies have found that 70% of the particulates and other pollution in our streams, rivers and lakes are carried there by stormwater. Incredibly, about half of the pollutants in stormwater are from landscaping and gardening activities like cultivating, fertilizing, pruning, clipping, and applying pesticides.

By capturing stormwater runoff, rain gardens also allow this water to be absorbed into the ground and to return to the water table by natural percolation.

The Rain Garden in the Research and Education Garden also serves as a research area for Rose Mary Seymour of UGA’s Biological and Agricultural Engineering Department. Seymour is collecting data on amounts of water captured by this rain garden following rainfall.

Tony Johnson, horticulturist for the Research and Education Garden, designed and coordinated the installation of the garden. Johnson learned that plant selection is critical to the success of rain gardens. We ask a lot of plants in a rain garden. They must be able to survive flooding for 48 hours, and they must tolerate prolonged periods of dry weather, even drought.

Johnson has already identified several plants that meet these challenges while adding to the beauty of the home landscape. He suggests the following as excellent prospects for rain gardens in Georgia and the Southeast:

American smoke tree, Cotinus obovatus
Joe Pye weed, Eupatorium purpureum
Black-eyed Susan, Rudbeckia fulgida ‘Goldstrum’
Serviceberry, Amelanchier x grandiflora
Chokeberry, Aronia arbutifolia ‘Brilliantissima’
Daylily, Hemerocallis spp.
Louisiana iris, Iris spp.
Swamp hibiscus, Hibiscus coccineus
Clethera, Clethera alnifolia ‘Ruby Spice’ & Clethera alnifolia ‘Sixteen Candles’
Mexican petunia, Ruellia brittonia
Purple coneflower, Echinacea purpurea
Oak leaf hydrangea, Hydrangea quercifolia

If you are homeowner or professional landscaper interested in installing a rain garden, you should visit the Rain Garden at the Research and Education Garden. It combines natural shapes and features with beauty to create an environmentally friendly garden. For more information on rain gardens, click on the links below to view Rose Mary Seymour’s, “Why Create A Rain Garden in Our Landscape?” and “How to Build a Rain Garden”


Resource(s):

Renovation of Lawns

Source(s): Gil Landry, PhD., Coordinator – UGA Center for Urban Agriculture, The University of Georgia.


Renovation of turfgrasses is occasionally necessary in order to produce an attractive, healthy lawn.

Occasionally a lawn will become thin and spotty and, in some cases, large dead areas may appear. These areas are eventually filled in by undesirable plant species (weeds). At this point, the homeowner must decide: (1) if the lawn can be brought back to desired appearance through normal maintenance, (2) if the lawn requires renovation, or (3) if the lawn has to be completely re-established.

First, the cause of the problem must be determined and corrected. Normal decline causes are: (a) improper maintenance practices, (b) use of a grass not adapted to the area, (c) excessive thatch accumulation, (d) severely compacted soil, or (e) disease or insect problems. Your county extension agent can help solve this problem. Once this is resolved, one of the above procedures can be used to improve the lawn. In most cases, renovation is the answer.

Following are the necessary steps in renovation of a home lawn. Lawns with cool-season grasses should be renovated in early fall (August-September), while lawns with warm-season grasses should be renovated in early spring.

Step 1.  Eliminate all undesirable weeds and/or excessive thatch. Weeds can be removed by either chemical or mechanical means, while thatch will require some mechanical means of removal.

Step 2.  Cultivate the soil by aerifying, coring, slicing and/or spiking.

Step 3.  Correct the soil pH and/or salinity (salt accumulation) problem if one exists. If the pH is not suitable for plant growth, it must be changed. Soil test should be taken to determine the pH and fertility level of the soil.

Step 4.  Apply fertilizer as recommended to the area and water. Use a starter fertilizer such as 6-12-12 or 5-10-15 unless soil test shows otherwise. Apply about 20 pounds per 1000 square feet.

Step 5.  If the lawn is overseeded drag, rake or brush the seed down to contact the soil. If the area is planted with vegetative material, place the sprigs in a furrow and lightly topdress.

Step 6.  Whether the lawn is reseeded or planted with vegetative stock, water as soon as possible after planting. Do not allow the newly planted material to become dry. At 3 to 4 weeks after planting, apply 2 to 3 pounds of ammonium nitrate per 1000 square feet to enhance the growth of the new grass. Continue normal mowing practices once the grass reaches 1.5 times its normal mowing height. For more information refer to Cooperative Extension Service Leaflet 263, Renovation of Home Lawns.


Resource(s): Lawns in Georgia

Center Publication Number: 135

Root Rot on Evergreens

Source(s): Nina Eckberg


Root Rot on evergreen, is caused by fungi growing in the root system. The fungi include, but are not limited to: Fusarium, Phytophthora, Pythium, Rhizoctonia or Thielaviopsis (Black Rot)

rot

APPEARANCE

Leaves on an evergreen plant turn yellow to orange with no visible signs of insects or fungal disease. The change of color seems to move from the inside of the plant out to the tips. Sometimes exactly half of a plant will turn yellow, as if sprayed with herbicide. The leaves will remain on the plant for extended periods of time.

HOSTS

Azaleas, boxwood, cedars, junipers and rhododendrons.

SEASON

In the summer (during drought) and fall(during planting season), when gardeners over water their plants!

DAMAGE

When the root system of the plant is examined, the roots are black, mushy and slough away in your hand. There may be a swampy smell to the root ball, indicating rotting vegetation.

WHAT TO DO

Do not water plants everyday! Root systems need water and air to survive. Too much water suffocates or drowns the roots, so allow the soil to drain and slightly dry out between watering. Touch the soil around the base of a plant before watering. If the soil is moist, it doesn’t need more water. If the soil is dry, water deeply (at least 1″ of water) and check again in 3-4 days.

Mulch plants with 2-4 inches of mulching material to slow evaporation of water during dry periods. You will water less often if a plant is mulched properly.

If you suspect a root rot, bring a sample to your local Extension Service for proper diagnosis. The Extension Service will recommend a liquid fungicide as needed. READ THE LABEL of the product you choose.

COMMENT

If a root rot effects more than 50% of a plant root system the plant will have a hard time recovering. Fungicide drenches can control the spread of root rot if the disease is diagnosed early.


Resource(s):

Common Landscape Diseases In Georgia

Center Publication Number: 54

Safe Handling and Storage of Pesticides

Source(s): Paul E. Sumner, Extension Engineer


Whether you are a homeowner, farmer, grower, rancher or commercial applicator, proper transportation and storage are important aspects of safe pesticide use.

Transportation

Pesticides should never be transported inside the passenger compartment of an automobile or truck cab; put them in the trunk or in the back of the truck. Never transport them where they, could come in contact with groceries, livestock feed or other products which might become contaminated.

When transporting pesticides in a truck, see that they are secured to prevent spillage or loss due to sudden starts, stops, turns, etc. Should there be an accident or spill, immediately inform the local police and fire officials of the quantity and name of the pesticide involved. Large spills, particularly of ” Restricted Use Pesticides,” should be reported to the Georgia Department of Agriculture (404-655-4958), CHEMTREC (1-800-424-9300) and/or the manufacturer.

Applicators of pesticides, particularly in heavily populated areas, must take special precautions to secure products, transported to the application site. Allowing containers of pesticides to remain unattended on the back of an open truck is inviting an accident — and a costly lawsuit.

Commercial transporters of pesticides must meet special requirements: vehicles must carry placards, bills of lading, labels of the product, etc. Consult the Georgia Department of Transportation regarding these requirements.

Storage

Nearly three-fourths of all pesticide accidents occur to non-users of the materials. Many of these involve children. In addition, each year there are several cases of livestock and pet poisonings from contacts with improperly stored pesticides. These accidents not only cause human suffering and economic losses, but improper storage is contrary to federal regulations. READ THE LABEL: IT IS THE LAW.

Whether you are a homeowner, producer or applicator of pesticide, there are basic safe storage rules to follow:

  1. Keep pesticides, other poisons, and related materials locked in a cabinet, room or separate building designated solely for the storage of these materials. Metal storage cabinets, such as discarded school lockers, provide excellent storage for homeowners or other users of small amounts of pesticides.
  2. Post the facilities with a sign: “PESTICIDES – POISONS, KEEP OUT”, or similar signs.
  3. Control access to this facility to only one, two, or three highly trusted, responsible and informed individuals.
  4. Never store pesticides where food, feed, seed, fertilizers or other products can become contaminated.
  5. Store pesticides in their original containers. It is the law.
  6. The facility should be reasonably fireproof and well-ventilated. Temperatures should be kept between freezing and 100 degrees F.
  7. Sealed concrete floors, concrete block walls and metal shelves are recommended over wooden structures.
  8. With shelf storage, store dry pesticides on the top shelves, liquids on the lower shelves.
  9. Electrical fixtures should be of the dust-and explosion-proof type.
  10. Provide adequate space for the secure storage of empty pesticide containers until proper disposal of them is possible.

Those businesses with large quantities of pesticides to store should have a separate building for this purpose. In addition to the above features, this building should also include the following characteristics.

  • When feasible, the building should be downwind and downhill from sensitive areas, such as homes, play areas, feedlots, animal shelters, gardens and ground water sources.
  • The building should be located in an area not subject to flooding.
  • A drainage system should be built to collect any tank rinsing water or spoils. This material should be treated as surplus pesticide and must be disposed of properly, according to label instructions.
  • A water supply should be furnished, not only for mixing, loading, tank rinsing and cleanup, but for showers and cleanup for the persons who mix, load and apply the pesticides.
  • Fire detectors and fire fighting equipment should be available.
  • A telephone should be convenient, with all emergency numbers posted.
  • A current inventory of all materials in storage, along with a label of all materials, should be maintained in a secure area away from the storage area. The local fire department should be provided with an updated copy of this inventory.
  • Equip the storage area with all personal protective equipment and materials to prevent accidents and to handle accidents and spills. Activated charcoal, absorptive clay, vermiculite, clay-granule type cat litter or sawdust are good materials to absorb liquid spills.
  • Date and identify all pesticides when they are placed into storage, and store no more than will be needed for one season. Establish a policy of first-in, first-used, so that pesticides do not become outdated.
  • Have your fire insurance carrier inspect your pesticide storage facility periodically — it is intelligent management and may reduce your insurance premium.

Many pesticide storage facilities are inadequate, dangerous and lack security. Plans are available for constructing a safe pesticide storage building. If drains are installed in the building or in the mixing/loading platform out-of-doors this drain water must be captured and not allowed to enter ground or surface water. Copies of this plan are available from the Cooperative Extension Service.

Mixing and Loading

Mixing and loading of pesticides are among the most dangerous tasks involving work with these products, because it is at these times that people are working with open containers of concentrated pesticides.

For this reason, individuals employed to perform these activities should be well-informed of the dangers involved and work under the supervision of a properly certified, licensed applicator whenever handling “Restricted-Use Pesticides.”

Mixing and loading should never be done without a full understanding of the pesticide label or without the use of all recommended personal protective equipment. The label will identify the dangers involved and the precautions to follow. It will also indicate the signs and symptoms of poisoning and recommend first aid practices, should a person be exposed to the product.

Before you begin to mix, load and apply pesticides, and after you understand the label directions, make certain you have taken the following precautions:

  1. Have all the recommended protective clothing and equipment. Double-check that the respirator fits properly and has the correct canister cartridge.
  2. Do not work alone; be sure help is available if you get into trouble.
  3. Make certain that all equipment is functioning properly.
  4. Be certain that materials are available to handle spills.
  5. Know the first aid procedures and make certain that materials and supplies are available.
  6. Know the early symptoms of poisoning for the pesticide you are using.
  7. Have detergent or soap and an adequate supply of water available.
  8. Never eat, drink, smoke, or go the bathroom while working with pesticides, without first washing your hands.

You are now ready to begin mixing and loading. Follow these suggestions:

  1. Reread the label and follow the directions; pay special attention to the warnings and precautions.
  2. Make sure only authorized mixers, loaders and/or supervisors are in the mixing and loading area. No other people or animals should be there.
  3. Work only in a well-ventilated, well lighted area.
  4. Pesticide containers should be in a secure position when opening, to prevent any spillage. Be sure everyone is wearing the proper personal protective equipment (PPE).
  5. Mix and pour concentrated pesticides down low, preferably below waist level. Never pour pesticides at eye level. A spill or splash could be disastrous. Always remove clothing and wash yourself and your clothing thoroughly, immediately (within two minutes), if pesticides are spilled or splashed on you.
  6. Stand with your back to the wind — upwind — so that any fumes or dusts are blown away from you.
  7. Pour the pesticide into water, never water into the pesticide.
  8. If stirring is necessary, use a stir stick, never your hands. 7
  9. Mix and load on a concrete slab where spills can be contained. Avoid mixing or loading near surface water or near a well-head.
  10. Never pour pesticide directly into a spray tank. Always mix and dilute in a small container.
  11. When pouring, stand with your head well above the spray tank, to prevent pesticides from splashing in your face. Protect your eyes with splash-proof goggles.
  12. Never overflow a spray tank. The cleanup could be an all-day, all-night task, costly and dangerous.

After the mixing-loading task has been completed, your responsibility continues:

  1. Securely close pesticide containers immediately after use. Return unused pesticide to its proper storage.
  2. Clean up all spills, no matter how small the amount.
  3. Wash mixing and loading pails, measuring devices and stirring equipment or tools in strong detergent water, rinse in clear water store to air-dry.
  4. Wash your personal protective equipment in detergent, rinse and hang to air-dry.
  5. The wash and rinse water used in steps 3 and 4 can best be disposed of by pouring it into the spray tank. Do not overfill the spray tank, so that there will be room for the rinse water.
  6. Remove your clothing and launder separately with heavy-duty liquid detergent and hot water. DO NOT USE BLEACH as it could cause a dangerous chemical reaction. Line-dry the clothing where it is exposed to sunlight.
  7. Take a hot shower using a detergent-type soap. Do not forget to wash your hair. Put on clean clothing.

Application

When applying pesticides, you are not generally exposed to the same high concentration of pesticide as during the mixing and loading operation. However, the time-length of exposure is much longer, thus the cumulative exposure may be equal to or greater than during the mixing-loading operation.

Pesticide applications are made with everything from hand sprayers and dusters, to irrigation equipment, large airblast grove sprayers and aircraft. Whatever equipment is used, many of the safety precautions are the same. These include:

  1. Read and follow the label. Applications made which vary from label requirements are a violation of federal law.
  2. Use the correct equipment, and make sure it is properly maintained and adjusted. Screens, strainers and nozzles should be clean and functioning properly. Nozzles should be of the right type and properly adjusted and all lines, valves, seals should be checked for leaks.
  3. The application equipment should be accurately calibrated on a regular basis. Whenever you have any suspicion that the equipment is applying an inaccurate amount, recalibrate it. Your operator’s manual should provide information on calibration of the equipment. Additional information is available through your county’s Cooperative Extension Service.
  4. Wear the proper protective clothing and equipment as recommended by the pesticide label.
  5. Check the weather forecast frequently to determine if conditions will be favorable for the application and effectiveness of the pesticide. The National Weather Service provides a continuously updated weather forecast.
  6. Avoid spraying near sensitive areas where drift could damage neighboring crops or the environment. When spraying must I done in these areas, attempt to spray when the air is still, hum is high and any potential drift will be away from sensitive areas.
  7. Lower pressures, proper boom and nozzle adjustments, larger nozzle size and drift reducing additives (if the label permits) will reduce drift.
  8. Do not make field adjustments to the sprayer in a recently sprayed, still-wet area. Move to an unsprayed area.
  9. Never attempt to clean a nozzle, screen or hose by blowing or sucking on it with your mouth. Use small soft-bristle brushes and/or an air pressure bulb for these purposes.
  10. Always empty a tank by spraying the entire contents onto the vegetation or other area for which it was intended. Never drain a spray tank onto the ground. Important: Never mix more than you need!

Resource(s):

Georgia Pest Management Handbook

Center Publication Number: 49
Scary Scorpions

Source(s): Based on information from Dr. Rodney Coleman, Former Extension Entomologist, Cooperative Extension, The University of Georgia College of Agricultural and Environmental Sciences.


Scorpions are fairly common throughout the state. While they seldom sting, their presence around the home is objectionable to many people. Scorpion stings are usually no more poisonous than those of bees or wasps.

scorpion

Description

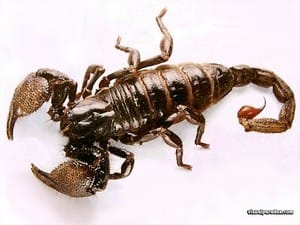
Scorpions are not insects. They are classified as arachnids and, therefore, are related to spiders and ticks. They use their large pincherlike front legs for defense, climbing, courtship and to capture prey. Their stinger is at the tip of a long, narrow tail and is used for defense and killing prey. Adult scorpions reach a length of exceeding 2 1/2 inches. Those found in Georgia are black, brown or gray in color.

Their habits

Scorpions feed on a wide variety of organisms, including insects, spiders, centipedes and millipedes, and even small reptiles. Their vision is very poor, so they often hide in ambush for their prey. They prefer a moist habitat as that is where their prey also resides. Scorpions are commonly found in rock and wood piles, stacks of rubble, in brick or rock walls, crawl spaces or in leaf litter or mulch materials.

Scorpions live from three to five years. The male and female go through a courtship similar to that of spiders, after which the female gives birth to live young. After birth, the young scorpions climb onto the back of the mother and remain fastened by their pincers until after the first molt. The young scorpions are nourished by yolk material stored in their bodies and, contrary to popular opinion, do not eat the body of the mother.

No real danger

Many fantastic superstitions have arisen concerning the scorpion. Probably no other related animal has been the subject of so many folk tales. However, scorpions are usually not aggressive and raise their pinchers and tail to merely scare away intruders.

Scorpions rarely sting man; but when they do, it’s only after provocation. Fortunately, only a few species are deadly. The venom apparently varies in its potency from season to season. Persons stung in the spring, when scorpions first emerge, have more severe reactions because of the larger amount of venon present in their bodies at this time. Also, susceptibility to scorpion poison is extremely variable, even among individuals of the same age. For most people, a scorpion sting produces a sharpe sensation like a bee-sting that lasts for 10-20 minutes. To be safe, all scorpion stings should be treated by a physician.

Control Measures

Remove old boards, cardboard, loose rocks, old mattresses and other debris from near occupied buildings, Use caulking to close small cracks where pests may enter.

For chemical control, apply a household spray labeled for crawling insects. Follow all label precautions Materials should be applied to places where scorpions are found hiding, Apply around baseboards, quarter rounds, and especially where small openings are present around water pipes and other fittings. If scorpions persist, the treatment should be repeated according to label directions.

Recommended Pesticides

carbaryl dust
cyfluthrin spray
cypermethrin spray
tralomethrin spray

Pesticide Precautions

If you use insecticides inside the home:

  • Do not contaminate food, water, utensils, etc. Be sure to keep the solution away from stoves or open flames.
  • Observe all restrictions and precautions on pesticide labels.
  • Store all pesticide in original containers with labels intact and behind locked doors.
  • Apply pesticides carefully to avoid drift.
  • Bury surplus pesticides and destroy used containers so that contamination of water and other hazards will not result

Center Publication Number: 50