Establishing Lawns – Soil Preparation

Source(s): Gil Landry, PhD., Coordinator – UGA Center for Urban Agriculture, The University of Georgia.


There are three distinct aspects of turfgrass establishment. The first, soil preparation, is probably the most important. The second, planting, may involve seeding, sprigging or sodding. The final step is the care and maintenance for two to four weeks after planting.

The key to successful establishment of a home lawn is proper soil preparation. Without this, most lawns will eventually fail. Soil should be prepared the same whether you are planting by seed, sprigs, stolons, or sod. Outlined below are the steps necessary for proper soil preparation.


Take Soil Samples

Base fertilizer and lime applications on the result of soil tests. Contact your county agent for information on how to collect samples.

Clean Planting Site

Remove all the debris from the area to be planted. This includes rocks, bottles, and large roots. Remove all old tree stumps. These will eventually decay and leave depressions in the lawn.

Rough Grading

If extensive grading is being done, remove the topsoil and replace it after the rough grade is set. The rough grading should conform to the final grade after the topsoil is added. A 1-2 percent slope (1-2 foot of the fall per 100 feet) away from all buildings generally gives the best results.

If internal drainage or subirrigation systems are to be installed, this is the best time to do it. Remember, good drainage is a must if a nice lawn is desired.

The subgrade may become compacted during rough grading, especially if the ground is wet. This compacted layer must be broken up by some means. A spring tooth harrow works well on soils compacted lightly, while a small rotavator might be needed for more heavily compacted sites.

Replace Topsoil

Once the subgrade is established, respread the topsoil. Allow for at least 6- 8 inches of depth after the soil has settled. This means placing about 8-10 inches topsoil over the subgrade. Steep slopes or rock outcrops need at least 12 inches of topsoil for proper maintenance. If the existing topsoil is poor, improve it if you cannot purchase new topsoil.

If organic matter is needed, add 1-3 cubic yards per 1000 square feet of lawn area. Materials such as peat moss, shredded pine bark, rotted sawdust (6-8 years) or leaf mold serve well as organic materials. On heavy soils, add 8-10 cubic yards of sand per 1000 square feet of lawn. Mix all of these materials in thoroughly with the native soil to a depth of 6-8 inches.

Add Fertilizer and Lime

Once the topsoil is spread and graded, add fertilizer and lime as indicated by the soil test. Mix the lime thoroughly with the top 3-5 inches of topsoil. The fertilizer should be mixed with the top 1-3 inches of soil or simply applied to the surface. Water the fertilizer lightly prior to planting.

A general recommendation for a starter fertilizer is 20-30 pounds of a commercial grade fertilizer, such as 5-10-15, 6-12-12, 5-10-10, or 7-14-21 per 1000 square feet of lawn. If a soluble source of nitrogen is used, do not apply more than 1 pounds of nitrogen per 1000 square feet. If an insoluble source of nitrogen is used, such as urea-formaldehyde, you can apply 3-5 pounds of nitrogen per 1000 square feet prior to planting.

Final Grading

Final grading and mixing of the fertilizer should be delayed until right before planting time. If this is done too far in advance, some fertilizer may be leached out and the soil may become crusted. On light soils (high sand content), the seedbed should be firmed. This will help prevent drying out of the soil. Once the soil is properly prepared, it is time to plant.

Take care not to destroy the existing trees in the lawn. The cutting of a large percentage of a tree’s roots during soil tillage can severely damage if not kill it. Trees can also be suffocated by deeply covering the roots with soil. If soil is necessary at a tree base, a tree well should be constructed.


Resource(s): Lawns in Georgia

Center Publication Number: 129
Establishing Lawns – Planting

Source(s): Gil Landry, PhD., Coordinator – UGA Center for Urban Agriculture, The University of Georgia.


There are three distinct aspects of turfgrass establishment. The first, soil preparation, is probably the most important. The second, planting, may involve seeding, sprigging or sodding. The final step is the care and maintenance for two to four weeks after planting.

Cool Season Grasses

In Georgia, most cool-season lawns are established by seeding. Always purchase quality seed, that is, one with a high percent germination and purity. This information should be given on the tag. Inexpensive seed often ends up being quite expensive because of low germination and purity. Reputable seed dealers are always willing to help customers select quality seed. See Table 1 below for seeding rates.

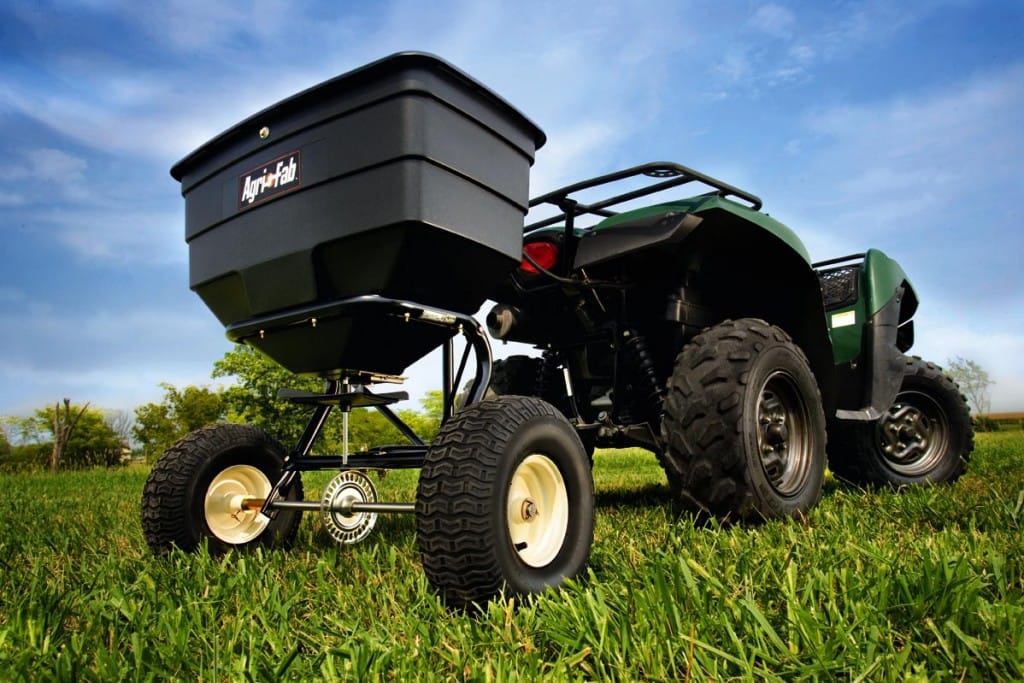
The best way to apply seed is with a mechanical seeder that will distribute the seed uniformly. There are four basic types of mechanical seeders available: (a) drill, (b) gravity, (c) broadcaster, and (d) hydroseeder. For small areas, such as home lawns, the gravity flow or broadcaster work best.

When seeding, divide the seed in two equal parts and then seed in two directions at right angles to each other. Fertilizers and pesticides should also be applied in this manner to insure a more uniform distribution. For some small seed, it may be helpful to mix the seed with a carrier such as dry sand to distribute the seed evenly. If this is done, frequently mix to prevent separation of the seed and sand.

Once the seeds are planted, rake lightly into the soil. On small areas a hand rake works fine. This increases the contact of the seed with the soil, thus increasing the chance of the seed surviving. After raking, roll the seed lightly to firm the soil. Then place a mulch over the soil. A mulch serves two purposes: (1) it helps prevent soil erosion and (2) it helps retain moisture necessary for the seed to germinate. If straw is used, find a source that is free of weed seed. One bale of straw (60-80 pounds) will cover approximately 1000 square feet.

The straw can be left on the lawn to decompose if it is not spread too thick. Peat moss or aged sawdust does not make a good mulch for seeded lawns. These materials compete with the seed for water and resist decomposition. Water the lawn as soon as possible after seeding.

Warm-Season Grasses

With the exception of common bermudagrass and centipedegrass, most warm-season grasses in Georgia are established by planting vegetative plant parts. The seeding procedure is the same for warm- and cool-season grasses. Annual Ryegrass is used as an overseeding to produce green color on home lawns in winter. See Table 2 below for vegetative planting rates.

Sprigging is the placing of grass plants, runners, rhizomes, stolons, or small sod pieces (2-4 inch plugs) in small holes or furrows on the soil surface. Stolonizing is the broadcasting of vegetative plant parts on the soil surface and covering by topdressing or slicing.

To plant sprigs, dig furrows every 8-12 inches and place the sprigs at a 1-2 inch depth every 4-6 inches in the furrows. The closer together the sprigs are, the quicker the grass will cover. After placing the sprigs in the furrow, cover part of the sprig with soil and firm. This can be done with a roller or by stepping on the soil around the sprig. Water as soon as possible after planting.

Broadcasting requires more planting material but will produce a quicker cover. Stolons are broadcast by hand or a mechanical spreader over the prepared seedbed. The stolons are then topdressed lightly with 0.15-0.25 inches of soil or sliced into the soil. Machines with vertical blades for slicing the stolons into the soil are available for this purpose. After topdressing or slicing, roll the lawn to firm the soil around the stolons. Apply water immediately.

Sodding is becoming more and more popular. Quality sod that is free of weeds, diseases and insects should be used. Be sure the soil grade is correct before laying the sod. As soon as the sod is in place, roll, mow if necessary and water.

Relatively new methods of planting are hydro planting and hydroseeding. Sprigs or seed are mixed with water in a large tank and then sprayed under high pressure over the area being planted. The advantage of this method is that the equipment does not have to go over the lawn. This helps prevent compaction, especially in wet weather.

Many zoysia lawns in the south are plugged. While more grass tends to survive when plugged, the rate of establishment is much slower than that or sprigging or stolonizing. Zoysia plugs (2 to 4 inch diameter) should be placed on 6-12 inch centers. The closer the plugs, the faster the cover. Most lawns plugged with zoysia take two years to achieve full cover.

Table 1: Seeding Rates for Lawn Grasses in Georgia
Grass Seeding Rate (lbs/1000 sq.ft.) When to Plant Area of Adaptation
Tall Fescue 5-8 September, October (preferably), or early spring North of fall line
Kentucky Bluegrass 1-2 Same as above North, mountain area
Annual Ryegrass 5-10 September- November All*
Common Bermuda 1-2 (hulled) May-June All
Common Bermuda 3-5 (unhulled) Fall All
Centipede 1/4 -1/2 May-June Central south
Carpetgrass 1-3 May-June Central south
* Annual Ryegrass is used as an overseeding to produce green color on home lawns in winter.


Table 2: Vegetative Planting Rates for Warm Season Grasses
Grass Planting Rate* (bu/1000 sq. ft.) When to Plant Rate of Establishment
Bermudagrass 2-4 May-July 2-3 months
Zoysias 2-4 May-July 1 year
Centipede 2-4 May-June 4-6 months
St. Augustine 2-4 May-June 3-4 months*
* One square yard of sod approximates: 9 sq. ft; about 1 bu. of sprigs; 2000 Bermuda or Zoysia sprigs; 500 St. Augustine or Centipede sprigs; 324, 2-inch plugs; 84, 4-inch plugs.

Resource(s): Lawns in Georgia

Center Publication Number: 130

Establishing Lawns – Care After Planting

Source(s): Gil Landry, PhD., Coordinator – UGA Center for Urban Agriculture, The University of Georgia.


There are three distinct aspects of turfgrass establishment.

  1. The first, soil preparation, is probably the most important.
  2. The second, planting, may involve seeding, sprigging or sodding.
  3. The final step is the care and maintenance for two to four weeks after planting.

Care after Planting

Water newly-planted turf areas regularly. The waterings should be light and often enough to prevent the surface from drying. This usually means daily waterings for the first 2-3 weeks. As the seedlings develop, or as the sprigs or sod begin to take root and grow, decrease the frequency of watering and increase the amount applied each time.

Spreader_AF

The grass should be mowed when it reaches 1.5 times its recommended mowing height. Do not mow young grass when it is wet. See the table below – “Mowing Height for Lawn Grasses in Georgia” for more information.

Newly-planted turfgrasses should be fertilized according to soil test recommendations. In the absence of these recommendations, and in order to obtain rapid cover, monthly apply a complete fertilizer (contains N, P and K) at the rate of one to two pounds of nitrogen per 1000 square feet. Proper fertilizer application is also important and is discussed in factsheet “Fertilization of Turgrasses”.

Newly-planted areas are likely to become weed infested. Weeds should be controlled by frequent mowing and proper fertilization and watering. If chemical weed control is necessary, consult the Weed Control in Lawns bulletin.

**** Mowing Height for Lawn Grasses in Georgia ****
Grass Cutting Height (inches)
Tall Fescue 2-3
Bluegrass 2-3
Common Bermudagrass 1-2
Hybrid Bermudagrass 0.5-1.5
Zoysia 0.5-1.5
Centipedegrass 1-1.5
Carpetgrass 1-2
St. Augustine 2-3
Ryegrass 1-2

Resource(s): Lawns in Georgia

Center Publication Number: 131

Entomosporium Leaf Spot

Source(s): Jacob G Price


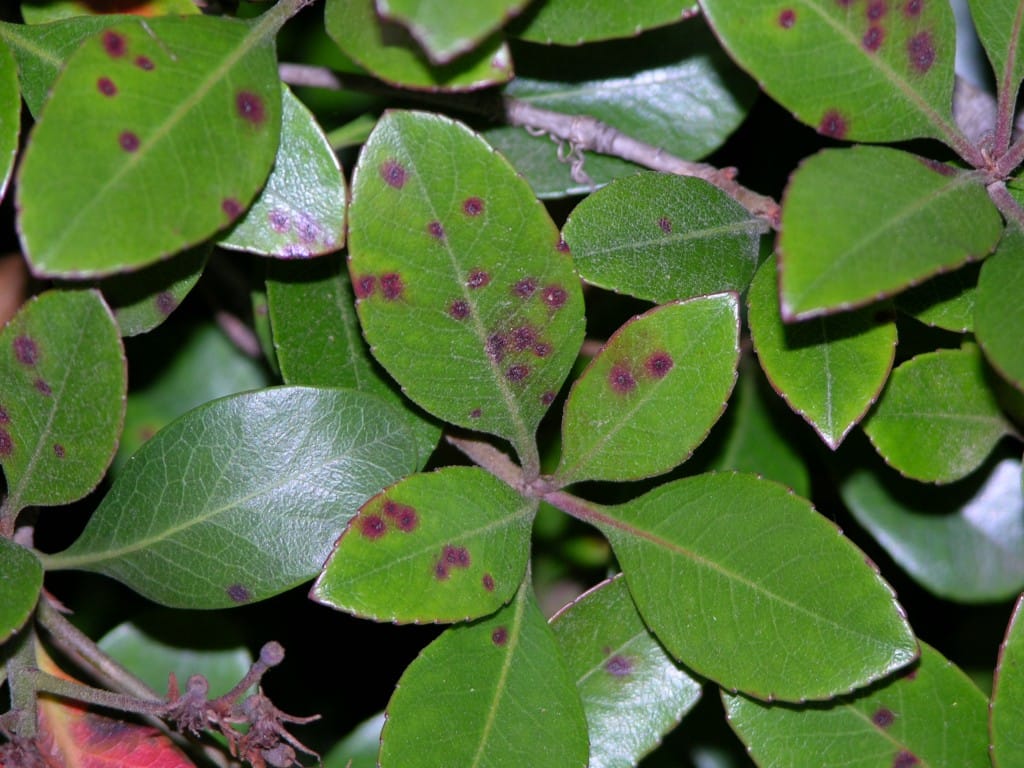
Fungal leaf spots are abundant throughout Coastal Georgia landscapes. Leaf spots can reduce shrubs appeal while also compromising plant health. Red tips, Indian Hawthorne, and Bradford Pears are commonly affected.

Description of Leaf Spot

Small reddish leaf spots initially. As spots age, center is grayish with a purple border. Leaf spots may coalesce causing severe leaf blight. Severely infected leaves drop prematurely. Over time severely infected plants can die.

Entomosporium Leaf Spot

Favorable Environment for Leaf Spot

This disease is promoted by poor air circulation and prolonged periods of leaf wetness.

Irrigating late in the day or early evening may increase disease severity. Irrigation intended for turfgrass often wets foliage of shrubs, making the problem worse.

Control of Leaf Spot

For Photinia (red tips), prune plants to improve air circulation. Increase plant spacing and avoid wetting foliage. Apply protective fungicide applications when the leaves emerge in the spring and continue at 10-14 day intervals throughout the growing season. Two labeled fungicides for this problem are chlorothalonil (Daconil) and propiconazole (Banner Maxx). Red tips are very vulnerable to entomosporium leaf spot. Fewer fungicides applications may be needed with pear and hawthomes.


Resource(s): Common Landscape Diseases In Georgia

Center Publication Number: 73

Eastern Tent Caterpillar

Source(s): Jim Howell, Ph.D., Entomologist, The University of Georgia


Ah, the harbingers of Spring have arrived! The Atlanta Braves are playing ball, azaleas and dogwoods are blooming, robins are on the windowsill – and tent caterpillar nests are appearing in our wild cherry trees.

Eastern tent caterpillar eggs are timed to hatch when the cherry buds unfurl, and their rapidly growing silken nests make them an excellent sign for the warming that is just around the corner.

Identification

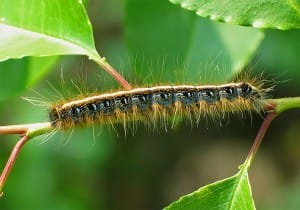
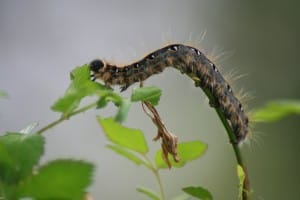
Older larvae are generally black, with long brown hair and a white stripe down the middle of their backs. Along the midline is a row of blue spots with brown and yellow lines. At maturity, the caterpillars may reach a length of 2 1/2 inches. Adults are reddish-brown, with two white oblique stripes on each forewing.

Biology

Adult moths emerge in May and early June and lay egg masses that resemble chocolate-colored collars that encircle the smaller limbs of their host. Each egg mass is about 1 inch long. Eggs overwinter and hatch in mid-March of the following year, at the same time the cherry buds unfurl. The appearance of new, tender leaves is like the ringing of a dinner bell.

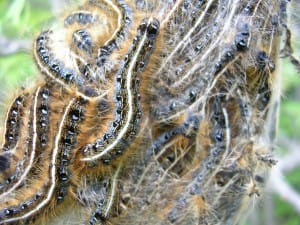
From each case, several hundred tiny feeding machines emerge, and for four to six weeks they hungrily strip the trees of their leaves. The larvae are gregarious and upon hatching they gather in the forks of the limbs. Usually one of these tents or “colonies” is made of insects hatching from several different egg masses.

From this mass of silk, the developing larvae move outward to feed on developing leaves. They produce a fine thread of silk that is laid down wherever they crawl, and in a few days, well-defined pathways can be seen leading from the nest to various feeding sites in the tree.

Most of the larvae return to the tent at night or during rainy weather and the nest gradually becomes larger and larger as silk accumulates. Most of the leaf is consumed, leaving only the mid-vein.

About three weeks later, the adult moths emerge, mate and lay their eggs, which stay on the trees until the following spring, when the process begins again.

Though the nests are most commonly seen in the forks of wild cherries, this pest can be found in other ornamental, shade and fruit trees, especially apples. While not a serious pest in the natural forest, this insect can be a blight to homeowners because the infestations reduce the beauty and esthetic value of shade trees and other hardwoods in the landscape.

Damage

The large silken masses are unsightly in the forks of trees. In addition, about four to six weeks after hatching, full-grown larvae will crawl away from their nests and accumulate on the sides of homes, on driveways and sidewalks and on various woody ornamentals in search of pupation sites.

At this time, homeowners express concern about possible damage to other plants. But by now, the larvae are finished with their feeding and will do no damage to plants on which they are found. Their white cocoons are usually spun on tree trunks or nearby objects.

The caterpillars are primarily a nuisance and do not usually pose a danger to the overall health of larger, well-established tree. Young fruit and ornamental trees may be damaged, however.

The larvae finish their feeding at a time of vigorous leafing activity, and though the trees are often stripped of their leaves, they usually produce a new flush of foliage within two or three weeks.

Control

Usually, no controls are necessary. But should caterpillars attack young trees and for aesthetic preservation, the nests, along with their accompanying larvae, can be removed and destroyed. In addition, the egg masses can be clipped from the limbs in late June to prevent nests from developing the following spring. For chemical controls, explore the “Georgia Pest Management Handbook“.


Center Publication Number: 176

Eastern Lubber Grasshopper

Source(s): Jennifer Davidson


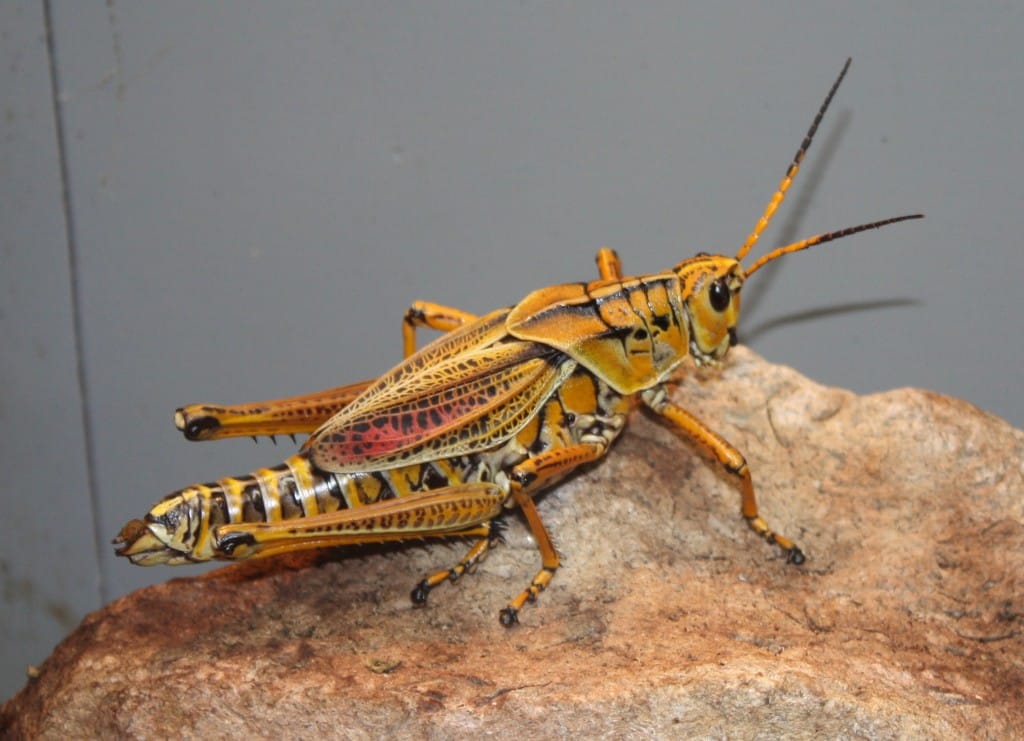
The colorful Eastern Lubber Grasshopper is one of the most common grasshoppers in Georgia. The Eastern Lubber grasshopper sometimes occurs in large enough numbers in Georgia to cause damage to plants in the garden and landscape.

Description

A large, distinctive grasshopper, the Eastern Lubber, or Georgia Thumper (Romalea microptera (= guttata) can be easily identified in the landscape. The adults are black, red, and yellow but colors vary depending on the phase of growth. The fully grown size of the females and males are about 6.0 and 8.0cm, respectively. The adult winds are yellow with black dots and are half the length of the abdomen, therefore, useless for long-distance flying.

Eastern_Lubber_Grasshopper_012

Lifecycle

Lubbers produce one generation per year, laying masses of about 50 eggs in soil excavations about 5 cm deep. Each female lays one to three separate masses of eggs around May in Georgia. The insect goes through incomplete metamorphosis, growing through successive stages after molting, called instars. Five juvenile instars, each typically lasting 15-20 days occur. Juveniles (nymphs) stay together around a safe food source, until molting again. In the fall, the females insert their eggs to overwinter in the soil.

Defensive Abilities

The Eastern lubber grasshopper uses its bright color to warn predators. The lubber contains toxic substances known to induce sickness or death in birds and mammals. The lubber can secrete a foamy spray from its body, while hissing loudly. They can also vomit plant material to deter predators. This is known as “tobacco” spit.

Control

Mechanical methods, such as hand-picking or shoe-stomping, are the primary control of these grasshoppers, especially if allowed to grow to adult size. Chemical control is difficult as the adult exoskeleton is difficult to penetrate.


Resource(s): Insect Pests of Ornamental Plants

Reviewer(s):

  • Ellen Bauske, Program Coordinator, UGA Center for Urban Agriculture, The University of Georgia College of Agricultural and Environmental Sciences.
  • Randy Drinkard, Technical Writer, UGA Center for Urban Agriculture, The University of Georgia College of Agricultural and Environmental Sciences.

Center Publication Number: 256

Easter Lily

Source(s):

  • Bob Polomski, Extension Consumer Horticulturist.
  • Al Pertuit, Extension Floriculture Specialist, Clemson University.

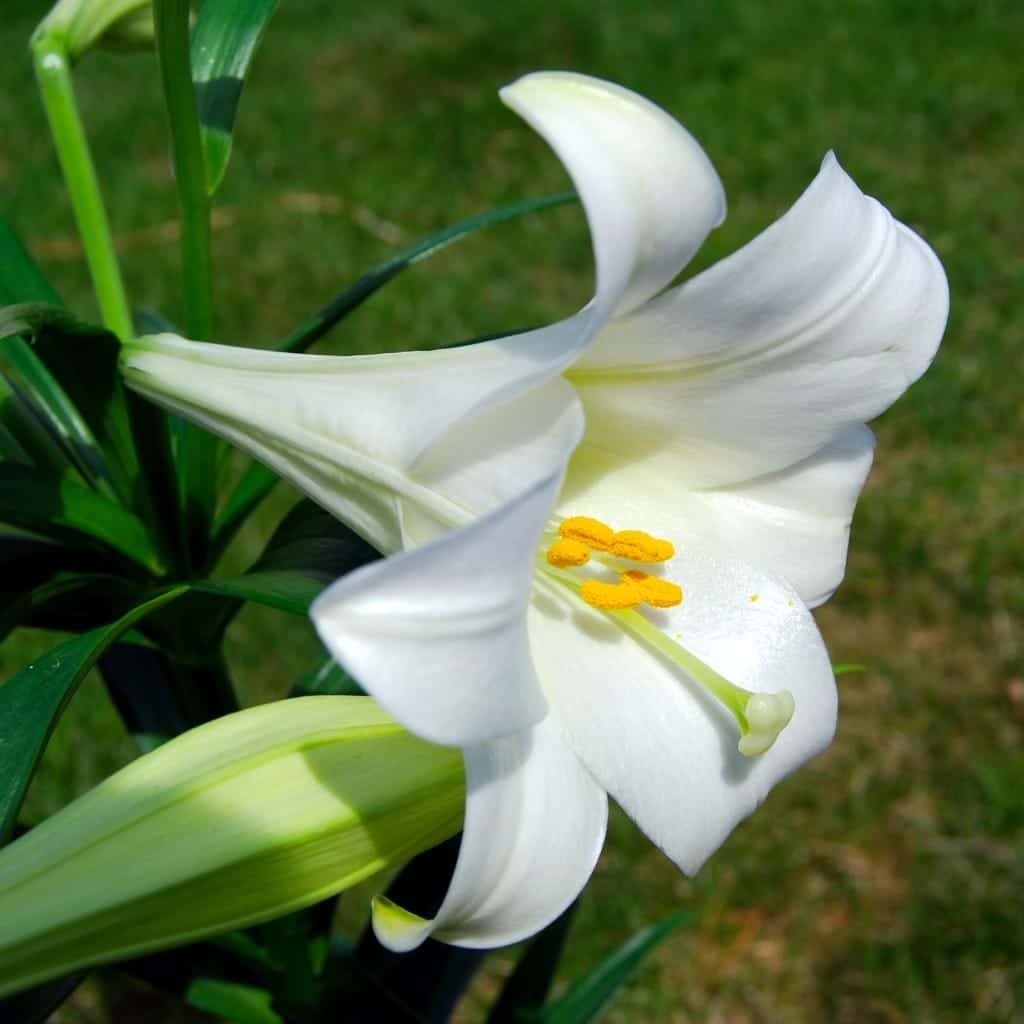
The white, trumpet-shaped flowers of the Easter lily (Lilium longiflorum) have become the traditional time-honored symbol of beauty, hope and life during the Easter season. Potted flowering Easter lilies can be grown indoors and planted in the garden with the onset of warmer temperatures.

When purchasing a potted Easter lily, select a high quality plant. Select a well-balanced plant that looks attractive from all angles. The rich, green leaves should be dense and plentiful from the top down to soil level. Look for a lily with one or two open or partly opened flowers and three or more unopened buds. The puffy buds will open up within a few days, while the tighter ones will open over the next several days.

Be wary of Easter lilies displayed in paper, plastic or mesh sleeves. The protective sleeves are used for shipping and should have been removed upon arrival at the store. While the packaging may seem convenient, the quality of the plants will deteriorate if they are left sleeved too long. Also avoid waterlogged plants, especially if the plant looks wilted. This could be a sign of root rot.

In the home, place your Easter lily near a window that receives bright, indirect natural daylight. Avoid direct sunlight. Easter lilies prefer somewhat cooler temperatures. Ideally, the daytime temperature should be 60 to 65 °F with slightly cooler night temperatures. Avoid placing plants near drafts, and avoid exposure to excess heat or dry air from appliances, fireplaces or heating ducts.

Keep the potting medium moist. Water the plant thoroughly when the soil surface feels dry, but avoid overwatering. If the pot is wrapped in decorative foil, be careful not to let the plant sit in trapped, standing water. Remove the plant from decorative pots or covers and water until it seeps out of the pot’s drain holes. Repeat this several times. Allow the plant to drain for a few minutes before putting it back into its decorative cover.

As the flowers open and mature, remove the yellow anthers before the pollen starts to shed. This gives longer flower life and prevents the pollen from staining the white flowers. When a mature flower starts to fade and wither, cut it off to keep the plant looking attractive.

After the last flower has withered and has been cut away, the Easter lily can be planted in the garden after the danger of frost has passed. Prepare a well-drained garden bed in a sunny location amended with organic matter such as compost. Good drainage is the key for success with lilies. To ensure adequate drainage, create a raised garden bed by moving soil to the top a few inches higher than the surrounding soil level. Also, adjust the soil pH to 6.5 to 7.0.

Plant the Easter lily bulbs 6 inches deep from the base of the bulb to the top of the mulched surface, assuming at least a 2-inch layer of mulch. Plant them 4 to 6 inches apart. The hole should be wide enough so the roots can be easily spread out. Work the soil in around the roots, and water them in immediately after planting.

Lilies like their “feet in the shade and their heads in the sun.” Mulch with a 2-inch layer of compost, pine straw or shredded leaves. Mulching helps conserve moisture in between waterings, suppresses weed growth, keeps the soil cool and provides nutrients as it decays.

As the leaves and stems of the original plants begin to turn brown and die back, cut them back just above a healthy leaf on the stem. Wait until the leaves and stems have turned brown before removing them. New growth will soon emerge. It is unlikely that a second flowering will occur later in the summer. Easter lilies, which were forced to flower under controlled greenhouse conditions in March, will flower naturally in June or July the following and subsequent years and will reach a height of 3 feet or more.

In the fall, when the lily stalks have matured and turned yellow, you can cut them back to soil level. When they are completely dry, the stalks can be pulled out easily.

During the winter months, maintain a generous layer of mulch. Carefully remove the mulch in the spring to allow new shoots to come up. Fertilize with a complete fast-release fertilizer such as 8-8-8 when the new shoots emerge and monthly until flowering. Conversely, a slow-release fertilizer can be applied just once during the growing season when new shoots emerge in the spring. Apply the fertilizer to the soil around each plant about 2 inches from the stem and water it in.


Center Publication Number: 83

Earthworms in Lawns

Source(s): University of California


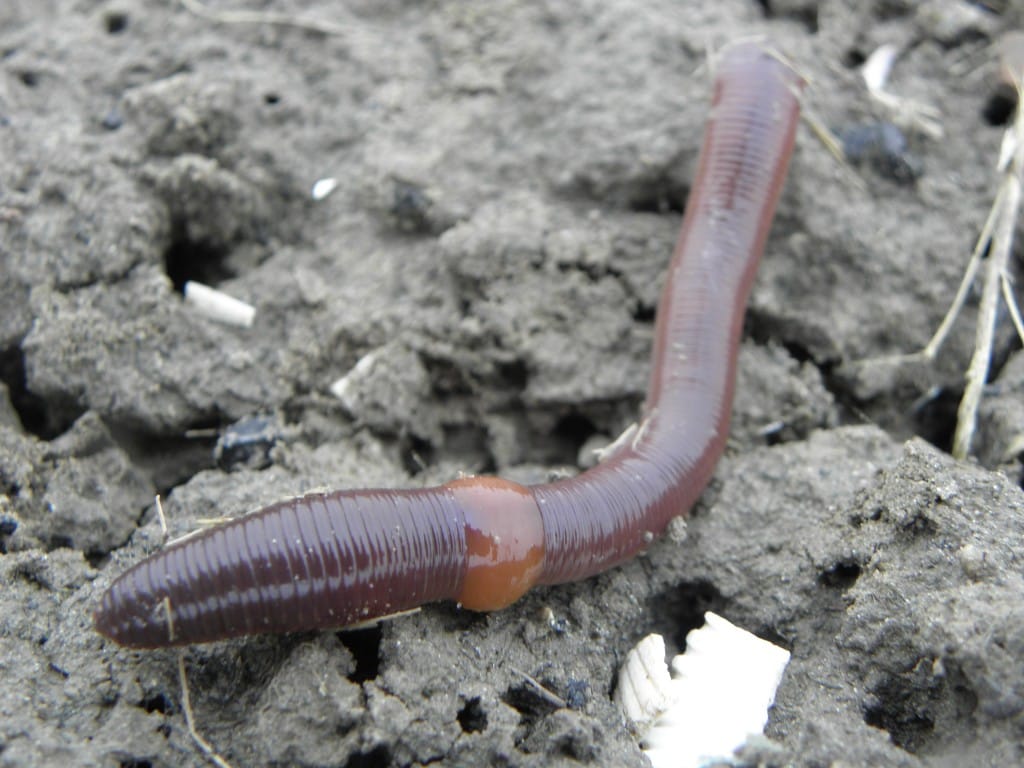
Earthworms encompass a large group of soil dwelling worms in the phylum Annelida. The most common species found in turf are in the family Lumbricidae including the nightcrawler, Lumbricus terrestris. These worms are brownish-red and grow up to a few inches long. Their bodies are cylindrical with about 150 segments. In turfgrass, earthworms are primarily seen at night or when they are driven out of the soil by watering. Where high populations of earthworms are present, small mounds, or castings of fecal matter, are deposited on the soil or lawn surface.

Hosts

Earthworms may be found in soils under all turfgrass species.

Earthworms in Lawns

Damage from Earthworms

Earthworms are not pests of turfgrass and do not feed on turf. Earthworms swallow soil as they burrow and feed on microorganisms and partially decomposed organic matter in the soil. Their role in a lawn is primarily beneficial. Thatch buildup has been associated with reduced earthworm populations. Burrowing helps to mix some of the nutrients in the soil together as well as decompose organic matter in the soil. Earthworm activity improves aeration, increasing water and nutrient movement through the soil. Earthworms deposit castings when they ingest soil and leaf tissue and emerge from the soil surface to remove fecal matter. Castings are rich in nutrients and organic matter and can provide some benefits to turfgrass plants. However, when casting piles become large, they may be considered unsightly and over time may make the lawn lumpy. Occasionally, moles may burrow in lawns with high earthworm populations to feed on them.

Monitoring of Earthworms

Look for small mounds or castings on the soil or turfgrass surface. Earthworms often rise up to the soil surface or sidewalk after a rain or irrigation.

Management of Earthworms

Rake castings to remove them. Power raking with a thatching rake adjusted so the teeth will drag through mounds but not down to the turf crowns will be more effective than hand raking. Adjust your irrigation schedule so the top layer of soil dries out between irrigations. This will drive worms deeper into the soil. Turf mowed at the higher end of the recommended height may hide castings. Earthworms have some natural enemies such as ants, centipedes, birds, snakes, toads, carabid beetles, and nematodes. Do not apply pesticides to control earthworms.

Are you concerned about a bumpy, rough area in your lawn? Does a close inspection of your lawn reveal a miniature replica of the Blue Ridge Mountains ? Such areas can be annoying, difficult to mow and even dangerous for anyone walking or running across them. What causes these bumps? And, more importantly, how do you get rid of them?

There can be several reasons for bumpy lawn conditions. Sometimes the repeated freezing and thawing conditions of winter and early spring move the soil up and down. In other cases, older and more established lawns become rough and uneven over time as the turfgrass gradually thins out. Thinning lawns can be caused by shade, insect damage, and poor maintenance practices. Re-establishing a healthy, thick turf will help improve this situation.

Another possible cause of bumpy and rough lawns is the presence of earthworms. In such cases, it is the movement of earthworms in the soil and the castings that they leave behind on the soil surface that cause the roughness. Castings are the result of the ingestion and excretion of soil and plant litter by the worms. You may also notice that the activity of earthworms is greatest in the spring and fall when soil moisture conditions and temperatures are conducive to their activity.

The problem of earthworm “damage” to turfgrass areas is a complex one. On one hand, a population of earthworms is usually an indicator of healthy turfgrass. On the other hand, the bumps that sometimes occur as a result of earthworm activity are unsightly and can make it difficult to mow your lawn without scalping the bumpy areas. These spots may also be a safety concern if you have trouble walking over them.

In a lawn, earthworms work as natural aerators. They turn over the soil in a steady and methodical manner without any real disruption to the turfgrass. Their holes improve the movement of water and nutrients into the soil and make them more available to the lawn. In addition, earthworms are some of the best decomposer organisms that exist in the soil. They decompose thatch and, by doing so, help recycle nutrients and make them available to the grass again.

Generally speaking, it is desirable to have a healthy population of earthworms in your lawn. If earthworm activities become problematic for you, however, there are a few things you can do. The best techniques to alleviate earthworm “damage” include basic, good lawn care practices. These practices are detailed in UGA Extension Bulletin #773, “Lawns in Georgia.” Good lawn care practices include the following: a basic fertilization schedule, aeration of the lawn and over-seeding to fill in thin patches.

Another basic lawn care practice that can help control the bumpiness caused by earthworms is proper irrigation. Generally, earthworms only become a nuisance when the soil is extremely moist and they must surface for air. This is why they are often seen in the spring as the soil thaws and soil moisture is high. Irrigating less frequently and deeply during the growing season will keep earthworm populations deeper in the soil profile so that they are not creating bumps and castings on the surface. On the other hand, frequent and shallow irrigations can encourage earthworms to stay near the surface. It is also important to keep in mind that earthworm populations are harmed by the use of certain lawn care pesticides and there is not any pesticide products labeled for their control. If you use these products, understand that that harm may be done to earthworm populations.

Drought Damages Stately Trees

Source(s): Kim Coder


The trees that line our city streets and properties have endured decades of stress from:

  • heat and cold,
  • root-crimping sidewalks,
  • smog,
  • insects and disease.

picture-beech4

Unfortunately, many older trees may have met their match in this year’s severe drought.

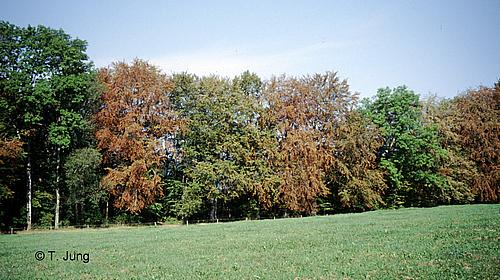
Arborists are warning the intense drought will likely do the most damage to our grandest trees. “There is a public perception a lot of times that those are just untouchable, so nothing can hurt them,” said Kim Coder, professor of tree health care at the University of Georgia’s Warnell School of Forest Resources. “It’s actually the opposite. The old trees are much easier to stress out and damage than younger trees.”

It’s too early to tell how extensive the loss will be. Steady rain over the next few months would ease trees’ suffering. “But if we remain in a droughty cycle, this spells disaster for a lot of these trees,” Coder said. In addition to the drought, a late spring freeze and waves of 90+ degree scorchers this summer has made this a stressful year for trees.

The scope of this year’s damage won’t become clear until May. Dr. Coder also warned that an ice storm or cold front in the next few months could send weakened limbs tumbling. And spring rains could make trees more likely to topple. Roots shrink away from the soil in a drought. When it finally does rain, winds can cause them to pull out of the ground.

For some trees, the drought may spur a decline over two or three years. That decline could be aided by:

  • ambrosia beetles
  • root-rot fungus
  • mistletoe.

In urban areas, the drought just makes a tree’s life harder. Concrete and asphalt stress trees by confining roots and branches as they reach for water, light and soil. Many cities have passed tree ordinances to stop people from removing trees.

Homeowners should be thinking about replacing trees as there is likely to be a large-tree loss from this year’s drought. Fall and winter are the right time to plant new trees, even if it’s not clear when their older neighbors are going to succumb. Watering restrictions make planting somewhat difficult, but reused or “gray” water from the house should be enough for a new tree.

Here are a few things tree lovers can do to help their trees survive:

  • no heavy fertilizer or pesticides use,
  • add mulch 2 to 4 inches deep,
  • do not overwater.

Resource(s): Landscape Plants for Georgia

Reviewer(s):

  • Maria E. Abreu, CEA- Gwinnett County, The University of Georgia College of Agricultural and Environmental Sciences.
  • Chuck Cornwell, Program Assistant- Forsyth County, The University of Georgia College of Agricultural and Environmental Sciences.

Center Publication Number: 255

Don’t Move Mealybugs Inside

Source(s): Jim Howell, Ph.D., Entomologist, The University of Georgia


Citrus Mealybugs

Winter approaches, and with the onset of cooler temperatures, we can finally forget about insect pests until next year. Right? Time for the bugs to either die from the cold, or find some protected retreat until Spring. Or is it?

Don't Move Mealybugs Inside

Some insects thrive indoors and love to take up residence in our homes during the winter months. When we bring our frost-sensitive plants inside, we often times bring in insect pests as well. These insect pests are more than ready to enjoy the protection that our homes provide. One of the most common plant hitchhikers is the citrus mealybug.

Identification

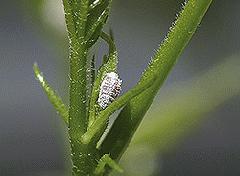
Adult female citrus mealybugs are oval, segmented and about 1/5 inch long, with white, waxy secretions, giving the insects a “mealy” appearance as if covered with fine flour. They also have waxy lateral and terminal filaments of various lengths. Under a hand lens these little sapsuckers look like they’re freshly battered, rolled in flour and ready for the skillet! This “mealy” covering protects the insects from excessive heat and water loss. Mealybugs are usually mobile and may move around very slowly on the stems and leaves of their host plants.

Life History

Citrus mealybugs lay their eggs in a white powdery/waxy mass. An individual may deposit 300 to 600 eggs in this mass and will die soon after the eggs are laid. Time to hatch will vary with temperature, but indoors in a warm environment, the eggs may hatch in as little as one to two weeks. Immature stages develop their powdery covering soon after hatching. They move around on the plant before settling down and are especially active in warm, dry weather. Then, they insert their mouthparts and suck plant juices from their host plant. Population size varies, but under proper conditions, mealybugs can accumulate in large numbers and may kill the plant. This species thrives on a variety of hosts, including but not limited to, African violets, amaryllis, begonias, citrus, coleus, cyclamen, dahlias, dracaenas, ferns, ficus, poinsettias and philodendrons.

Damage

Mealybugs damage their host plants in several ways. Removing sap, or plant juices, weakens the host plant, and the injection of a toxin found in the mealy bug’s saliva is responsible for distortion and yellowing, as well as flower and fruit drop. Mealybugs also produce large amounts of honeydew – a sugary excrement that coats leaves, stems, flowers and fruit. This sugary coating may cause formation of a black sooty mold that degrades the plant’s appearance, and in large quantities can inhibit photosynthesis.

Control

Mealybugs are difficult to control. On houseplants, remove mealybugs with a cotton swab dipped in alcohol or fingernail polish remover. Also, you can wash the insects off in a steady stream of water or wipe them away with a wet cloth. Monitor your plants for a few weeks in case some were missed. Recommended insecticides can also be used to eliminate mealybug infestations; however, heavily infested plants should be discarded.


Resource(s): Insect Pests of Ornamental Plants

Center Publication Number: 231