The Five Step Felling Plan – Step 3 – Plan Your Escape Route

The Five Step Felling Plan - Step 3 - Plan Your Escape Route

You need a safe, clear escape route when felling a tree.

90-15-5 Rule

90% of the accidents during felling occur within 15 seconds after the tree moves and within 5 ft of the trunk. This is called the 90-15-5 rule.

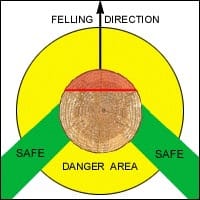
Within the radius of the tree there are two high danger zones and two safer retreat routes. The first and largest high danger zone occupies a half circle from the center of the tree going outward in the direction of the fall. The second high danger zone is a quarter-circle area in the direction opposite the felling direction. You can be hurt in this area if the trunk jumps the stump, sets back, or the tree barber chairs.

Escape Route

Your escape route is in the 45-degree angles between these danger zones. Your retreat distance should be a minimum of 20 feet from the falling tree. Clear away all obstacles – such as debris or brush – that might slow you down or trip you up. You should be able to make your escape without turning your back on the falling tree.

Once you’ve identified your escape path, communicate your plan of work and retreat route to others on the work site. Discuss potential hazards; co-workers may have observed something you missed.

If the escape route is so important, why wait till the third step of the felling plan? The escape route is determined by the direction of tree fall. You will need to determine the height of the tree, identify hazards, measure lean, and assess your available equipment before you can fully determine the felling direction. If you change the felling direction for any reason, you need a new escape route.
This guy knows how to clean up his escape route.

Site Assessment: The Tree

Take a Good Look at the Tree

Take a Good Look at the Tree

Safety isn’t just a slogan, it’s a way of life.


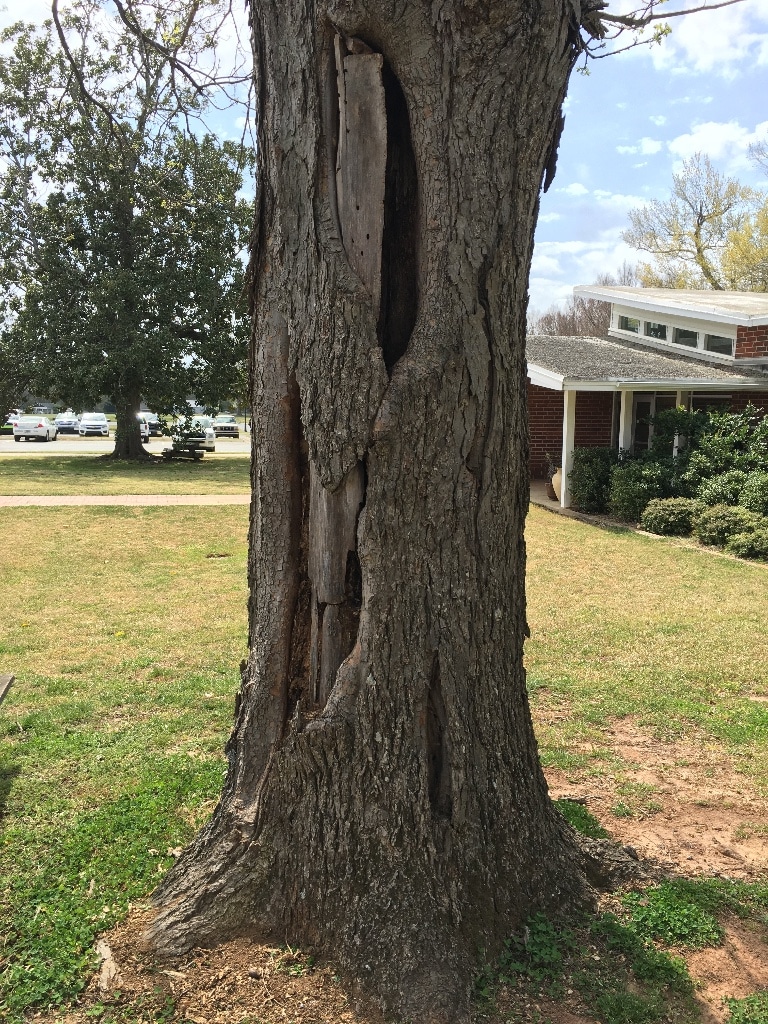
Before you cut or climb a tree, take time to assess the tree for hazards. Put your hard hat on and take a good look at the tree. Some tree dangers are readily visible, but others can be hiding inside the tree. Danger signs may be subtle, so make a thoughtful inspection of the tree from the ground on up to the top of the crown or canopy.

Inspect the Tree

Make sure you can see the tree clearly.

Pull all the leaf litter and/or mulch away from the base and the root flares. Then remove all vines from the area and the trunk so you can do a clear, visual examination.

Inspect the tree for weaknesses at the base. These are signs and symptoms of root collar decay:

  • Loose and dead bark
  • Conks or mushrooms
  • Crack in the lower trunk
  • Sap flow from lower trunk
  • Abnormal root flares, diminished, or loss of root flares.
  • Soil mounding or grade changes
  • Cracks in the soil from ground heaving

Look for cracks, cankers and cavities in the trunk. Strike the base of the tree with a rubber mallet. If this produces a dull sound, the tree is rotten.

Look up into the canopy and among the limbs. Look for fungi on branches and identify dead, broken and/or lodged branches. These are potential falling hazards known as “widow-makers.”

Beware of the Resident Wildlife

Cavities may host more than rot: They may also be nesting sites for wildlife, including slumbering bats, defensive birds, and stinging insects. Noise, droppings, stains on the bark, and insect or animal activity are indications that some critter calls the tree cavity home. Squirrels, birds, and bats may roost in limbs, as well.

Consider the Tree’s Environment

Environmental conditions and surrounding trees should be considered. In wet conditions, saturated soil can lead to root destabilization and trees prone to uprooting. Root pruning caused by construction can increase the chances a tree will fall. Removal of surrounding trees that exposes trees to strong winds can also weaken trees. Check out the video below.


Eerie Footage of Earth Breathing in Nova Scotia 2015

Have you seen this earth breathing video? It is all over the internet and there are many silly explanations offered. This one has it right.

Chainsaw Sculpture

Chainsaw Sculpture

Work Safely for the Ones You Love

Bears carved from logs are a popular first project for novice chainsaw sculptors (see video below). With some angle cuts, imagination, and a few finishing tools, you can give your honey a Valentine’s gift right from the heart(wood).

Several manufacturers offer chainsaws specifically for carving or sculpting. Adaptations like lighter weight and low vibration enhance precision, and the dime tip bar allows for detailed shaping and carving.

Alternatively, conversion kits are available to outfit your regular chainsaw with a dime tip carving bar, a ¼” pitch carving chain, and the sprocket necessary to run it. This video will show you how.

While chainsaw sculpting is artistic expression, the tool dictates gearing up with all PPE.

Since art is in the eye of the beholder, however, it might be a good idea to accessorize your Valentine’s creation with jewelry, chocolate, or flowers for an extra measure of safety.

This is how you carve the perfect gift!

Saw Safety Holiday Demonstration

Saw Safety Holiday Demonstration

Safety never takes a holiday, but you do, enjoy.

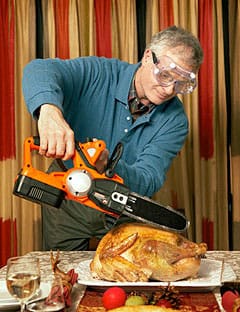
Ah, the joys of Thanksgiving: friends and family, favorite foods, football, and a couple of days off work. But saw safety never takes a holiday. Chances are, someone will hand you that miniature power saw – the electric knife – and ask you to carve the turkey. This video will help you carve that bird with style.

Here’s wishing you a safe and Happy Thanksgiving!

Alton Brown demonstrating electric knife features and how to carve a turkey.

Eye and Face Protection

Eye and Face Protection

Do not think because an accident hasn’t happened to you that it can’t happen.

What happened when the tree feller didn’t wear his safety goggles?

He turned a blind eye to saw safety.

As the chainsaw blade bites into the tree, bark, wood chips, and tiny bits of the metal blade explode into the air. Your face and eyes are nice, soft targets for all this flying debris. While a faceguard with a mesh screen protects your face, it isn’t enough to protect your eyes from injury. Neither are eyeglasses or sunglasses. Flying objects can shatter the lenses of regular eyewear, increasing the chances of eye injury.

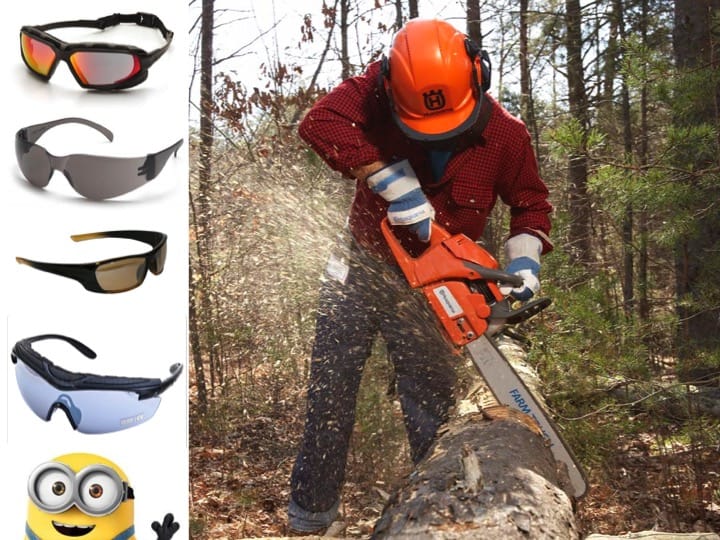
Safety glasses or goggles with side protection or wrap-around lenses deflect threats that come at the eyes from both the front and the side. There are safety glasses and goggles that fit over prescription eyewear. Alternatively, you can have safety eye wear made to your vision prescription, even if you wear bifocals.

Whether you wear prescription or off-the-shelf safety glasses, to make sure you can see clearly, select models that:

Always inspect your faceguard and safety glasses before each use. Replace PPE that has weak or frayed straps, or cracks, chips, or damage to protective shields or lenses.

Your eyes face many dangers…

Threats to eyes and face from chainsaw use

Potential injuries to eyes and face from chainsaw use

Chainsaw kickback Cuts, lacerations, loss of vision
Sawdust Irritation, corneal scratches
Flying wood chips Scratches, splinters, corneal abrasions, loss of vision
Flying metal particles from saw blade Splinters, infection, granulomas, loss of vision
Twigs and branches Scratches, punctures, corneal abrasions, loss of vision

Can’t find the perfect eyewear? Keep looking, there is a style and fit for everyone.

Every month, 23,000 people suffer from eye injuries. Don’t let anyone on your team be one of them.