On Thursday, June 27th, a bipartisan group of Congressional leaders introduced the Farm to School Act of 2019 (H.R. 3562, S. 2026). The bill, which is co-sponsored by Georgia’s own David Perdue, will expand funding and opportunities for farmers and educational institutions through the USDA Farm to School Grant Program.
The Farm to School Act would:
Increase annual funding to $15 million and increasing the grant award maximum to $250,000.
Advance equity by prioritizing grants that engage diverse farmers and serve high-need schools.
Fully include early care and education sites, summer food service sites & after school programs.
Increase access among tribal schools to traditional foods, especially from tribal producers.
The Farm to School Grant program has turned away approximately 80% of qualified applicants due to lack of funds so this new bill comes at a good time. The farm to school movement is truly a grassroots effort. Georgia’s Farm to School Network is made up of several collaborative partners working on school nutrition, farmer opportunity, and school gardens.
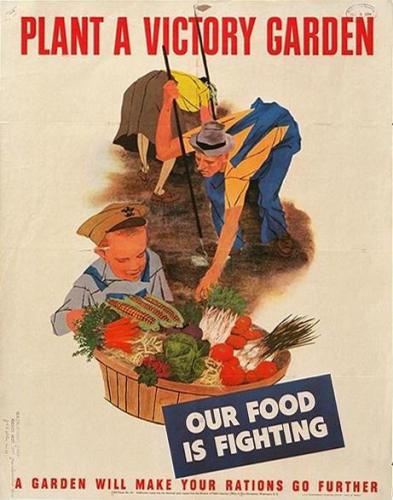
Around the July 4th holiday it is fun to think about our collective American history. Gardens have always been a part of that. The Victory Garden movement during World War II is fascinating.
A shortage of farm labor developed during World War II that made it difficult to get crops harvested. Add to that the gasoline and rubber shortages which made it difficult to get the crops to the market. In response the US government started promoting Victory Gardens, encouraging people in more urban environments to grow food crops.
It is estimated that 20 million Americans did their gardening duty and produced 9-10 million tons of food. This equated to roughly half the vegetables grown in the US at that time. This initiative also freed up canned goods for the troops.
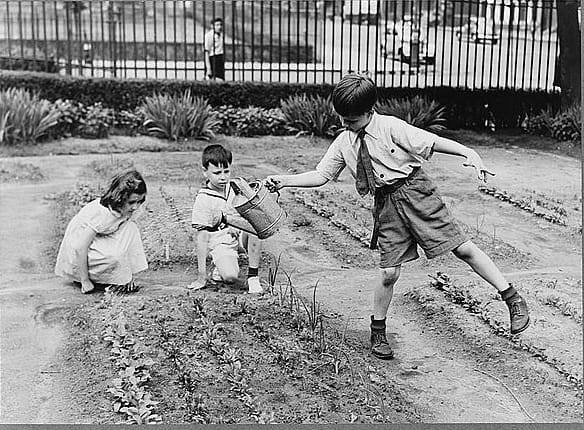
Schools even got involved creating school Victory Gardens.
A school Victory Garden in New York. Photo from the Library of Congress.
Businesses jumped on board this promotion. One popular Coca-Cola advertisement stated, “There is a Victory Garden in almost every back yard this summer, growing food and vitamins for the family. The owners are so proud of their vegetables as of their specimen roses or dahlias. Friends in work clothes come over to admire and compare crops. They eat tomatoes right off the vine and crunch carrots fresh from the earth.” The advertisement goes on to say that serving Coca-Cola is the correct hospitality in a Victory Garden.
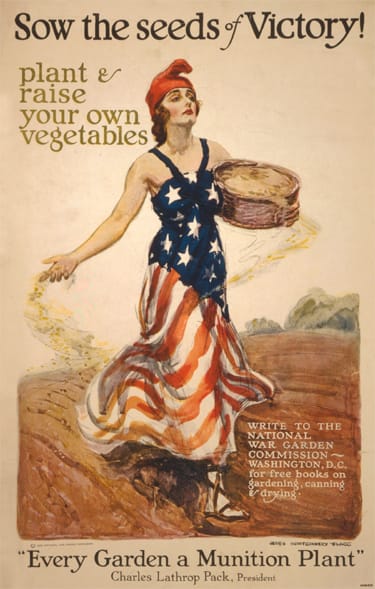
The US government encouraged Victory Gardens during World War I as well but the movement wasn’t as massive. This Department of Agriculture and Commerce promotion from that time is almost comical. Who is this woman suppose to be? Notice the expression on her face and her very toned arms. Who gardens in sandals? She is going to have alot of thinning to do if all those seeds germinate.
I would like to have a copy of the books advertised at the bottom of the poster: Write to the National War Garden Commission ~Washington, D.C. for free books on gardening, canning, and drying.
After World War II the interest in home vegetable gardening waned. It seems people were interested in peacetime activities and conveniences, including purchasing vegetables at the market.
Vegetable gardening is a large part of our American heritage. From colonial kitchens to victory/war gardens to community gardens to a garden at the White House. It is great to be a part of it.
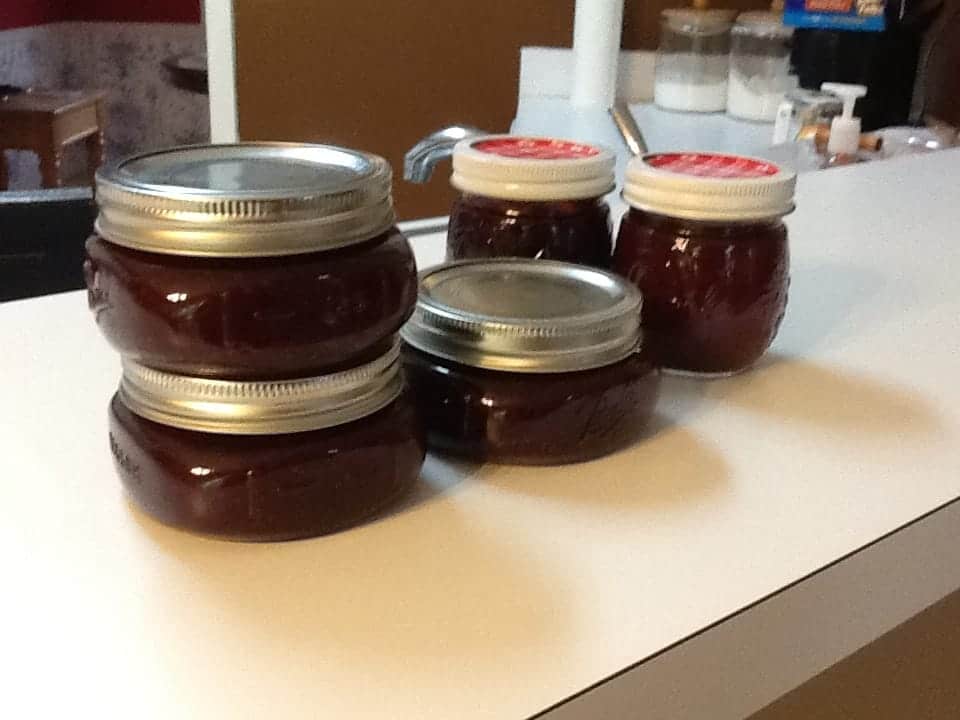
Several of you have asked me to re-run this post about making strawberry jam. The strawberries are plentiful around Georgia this year and I made jam myself this weekend. Actually, Cindee says what I make is really spreadable fruit because I don’t use pectin. Cindee is the expert. Enjoy your strawberry crop and have fun making jam!
Applications are now open for the 2019 Golden Radish Award, Georgia’s premier farm to school award. Presented by Georgia’s Departments of Education, Agriculture, Early Care and Public Health, University of Georgia Cooperative Extension, and Georgia Organics, the Golden Radish Award is given to school districts and Local Educational Agencies (LEAs) who are doing extraordinary work in farm to school. Awards will be given at the Mercedes Benz Stadium on Sep. 17, 2019.
Is your district planning to apply? Ask your school nutrition director, curriculum coordinator, and superintendent if they are planning to apply for the Golden Radish and share this information with them:
• Applications are due on June 28, 2019.
• Platinum, Gold, Silver, Bronze, and Honorary Radishes will be awarded to recognize school districts/LEAs with varying levels of farm to school programs. In addition, the Outstanding Award will recognize the district/LEA with an outstanding farm to school program in 2018-19.
• The online award application is user friendly, has save and return capability, and allows for multiple collaborators.
• Educators and staff in Golden Radish Award districts are eligible for reduced price farm to school professional development and training opportunities throughout 2019-20.
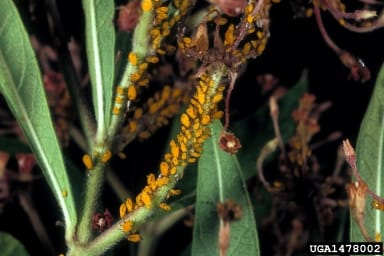
Do you have aphids in your garden? If so, are they a problem? Spring when many plants have succulent, new growth is prime aphid time.
Aphids, also called plant lice, are soft-bodied, pear shaped insects with tail-like appendages known as cornicles. Most aphids are about 1/10th inch long and can be several colors: green, black, pink, brown. If you have trouble identifying your pest, contact your local UGA Extension agent.
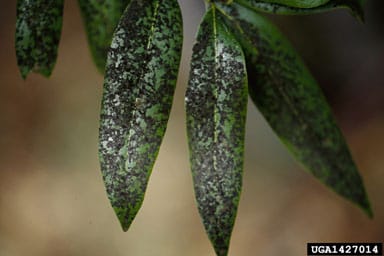
Aphids use “piercing-sucking” mouthparts to suck the juices out of tender plant parts, secreting a sticky substance known as honeydew. Ants are attracted to honeydew and will often protect the aphids making it. Black sooty mold grows well on honeydew and is difficult to remove from
the leaves. This sooty mold makes photosynthesis almost impossible on the leaves affected. All this means that aphids can be a problem to the community gardener.
Aphids are a danger to plants in three ways.
They can:
weaken a plant making it susceptible to a secondary infection
cause curling of leaves and damage to terminal buds
carry and spread plant viruses
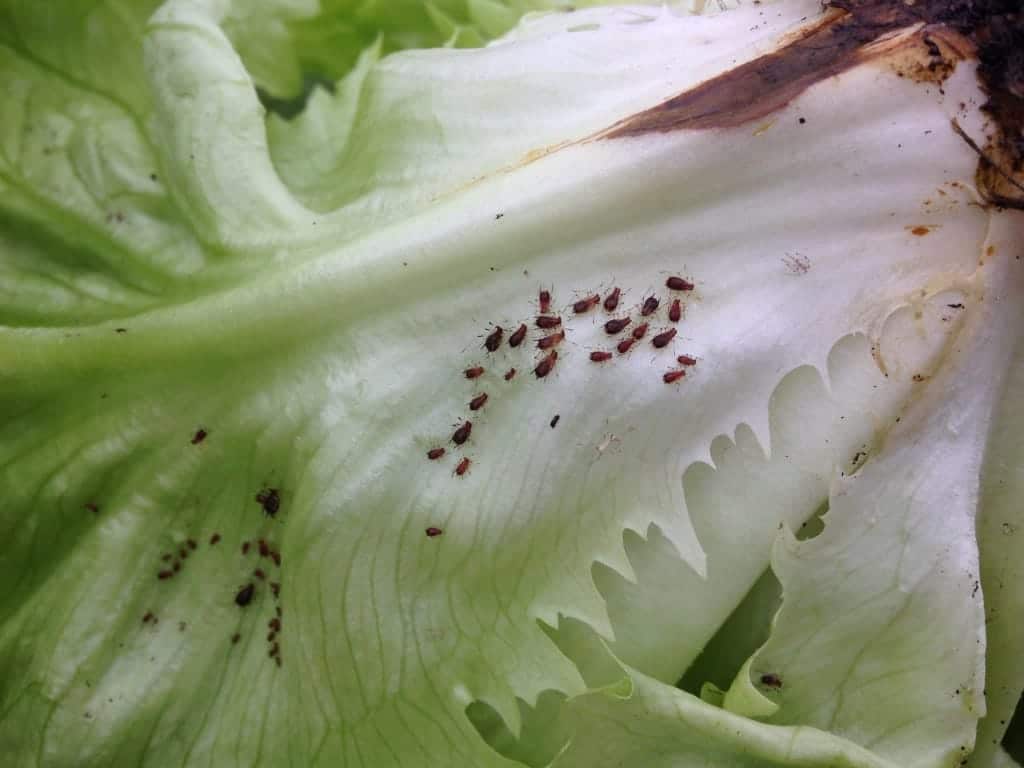
Right now our gardens are full of leafy, new plant growth and as the temperatures warm up, check the underside of
Aphids on lettuce
leaves and terminal buds for aphid pests. Look for those tail-like appendages. (Some people call them tailpipes!) Also pay attention to ant trails. They may lead you to the honeydew making aphids.
Since aphids tend to congregate as a group, you can try removing the one or two leaves where you find them. Sometimes a good spray with the hose is enough to remove the insects. If not, insecticidal soap is a good choice. Sometimes I can just wipe them off with a wet paper towel.
Beneficial insects are nature’s way of controlling aphids. So avoid applying any chemical insecticide that could harm those beneficials. Some of the natural predators include lacewings or lady beetles (lady bugs). You can actually purchase lady beetles from insect distributors but once you get them you can’t control where they fly.
Now that your seeds have germinated the fun begins! When most of the seedlings have germinated and look strong, think about removing the top dome. You can do this gradually by placing it askew on the seed tray for a day or two before totally removing the top.
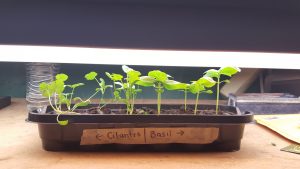
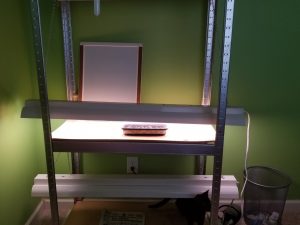
It is important to keep the light just above the seedlings and to move it as the seedlings grow. If the light is too far from the seedling, the seedling will become “leggy” as it grows towards the light.
Keep the light source close to the seedlings.
At this stage the seedlings are very fragile. When you need to add water, add it between the pellets. The flow of water can actually displace the seedling and/or damage the stem. Also watering from the bottom will help your roots grow longer. You want to avoid diseases such as damping off, so let the seedlings dry out before re-watering.
Fungus is your enemy here.
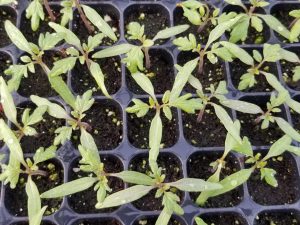
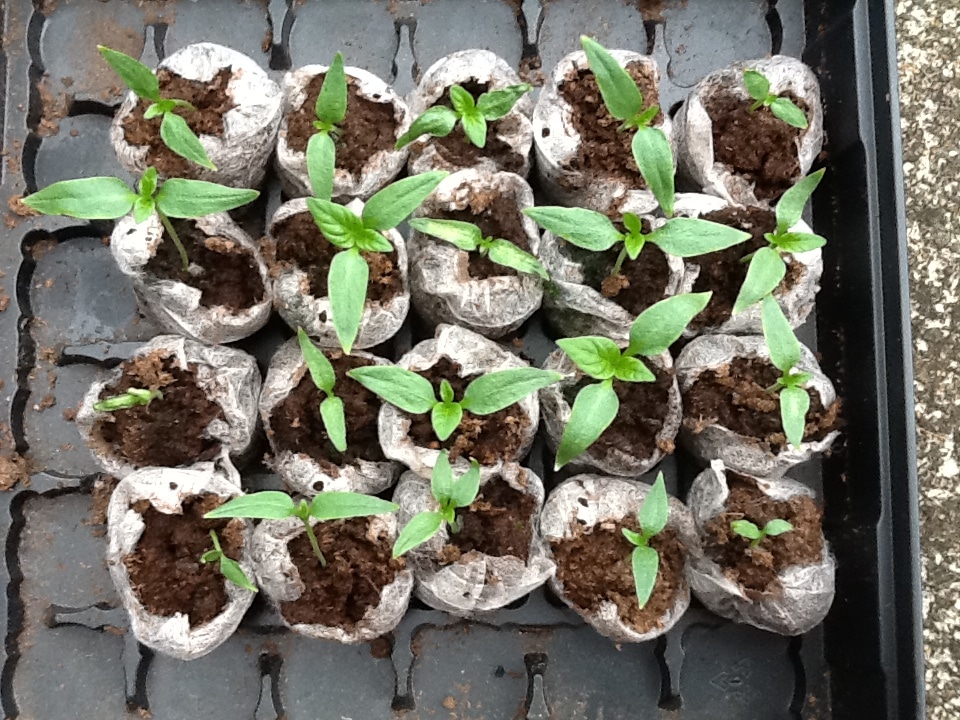
As the seedlings put on a few true leaves, they will outgrow the pellet and will need to be repotted in a larger pot with soil. After repotting you can keep them under the lights until the weather cooperates for transplanting in the garden.
As the seedlings get closer to that point, run your hand across the plants moving the stems slightly. The goal is to toughen the stems a bit so that they will be able to handle wind outdoors.
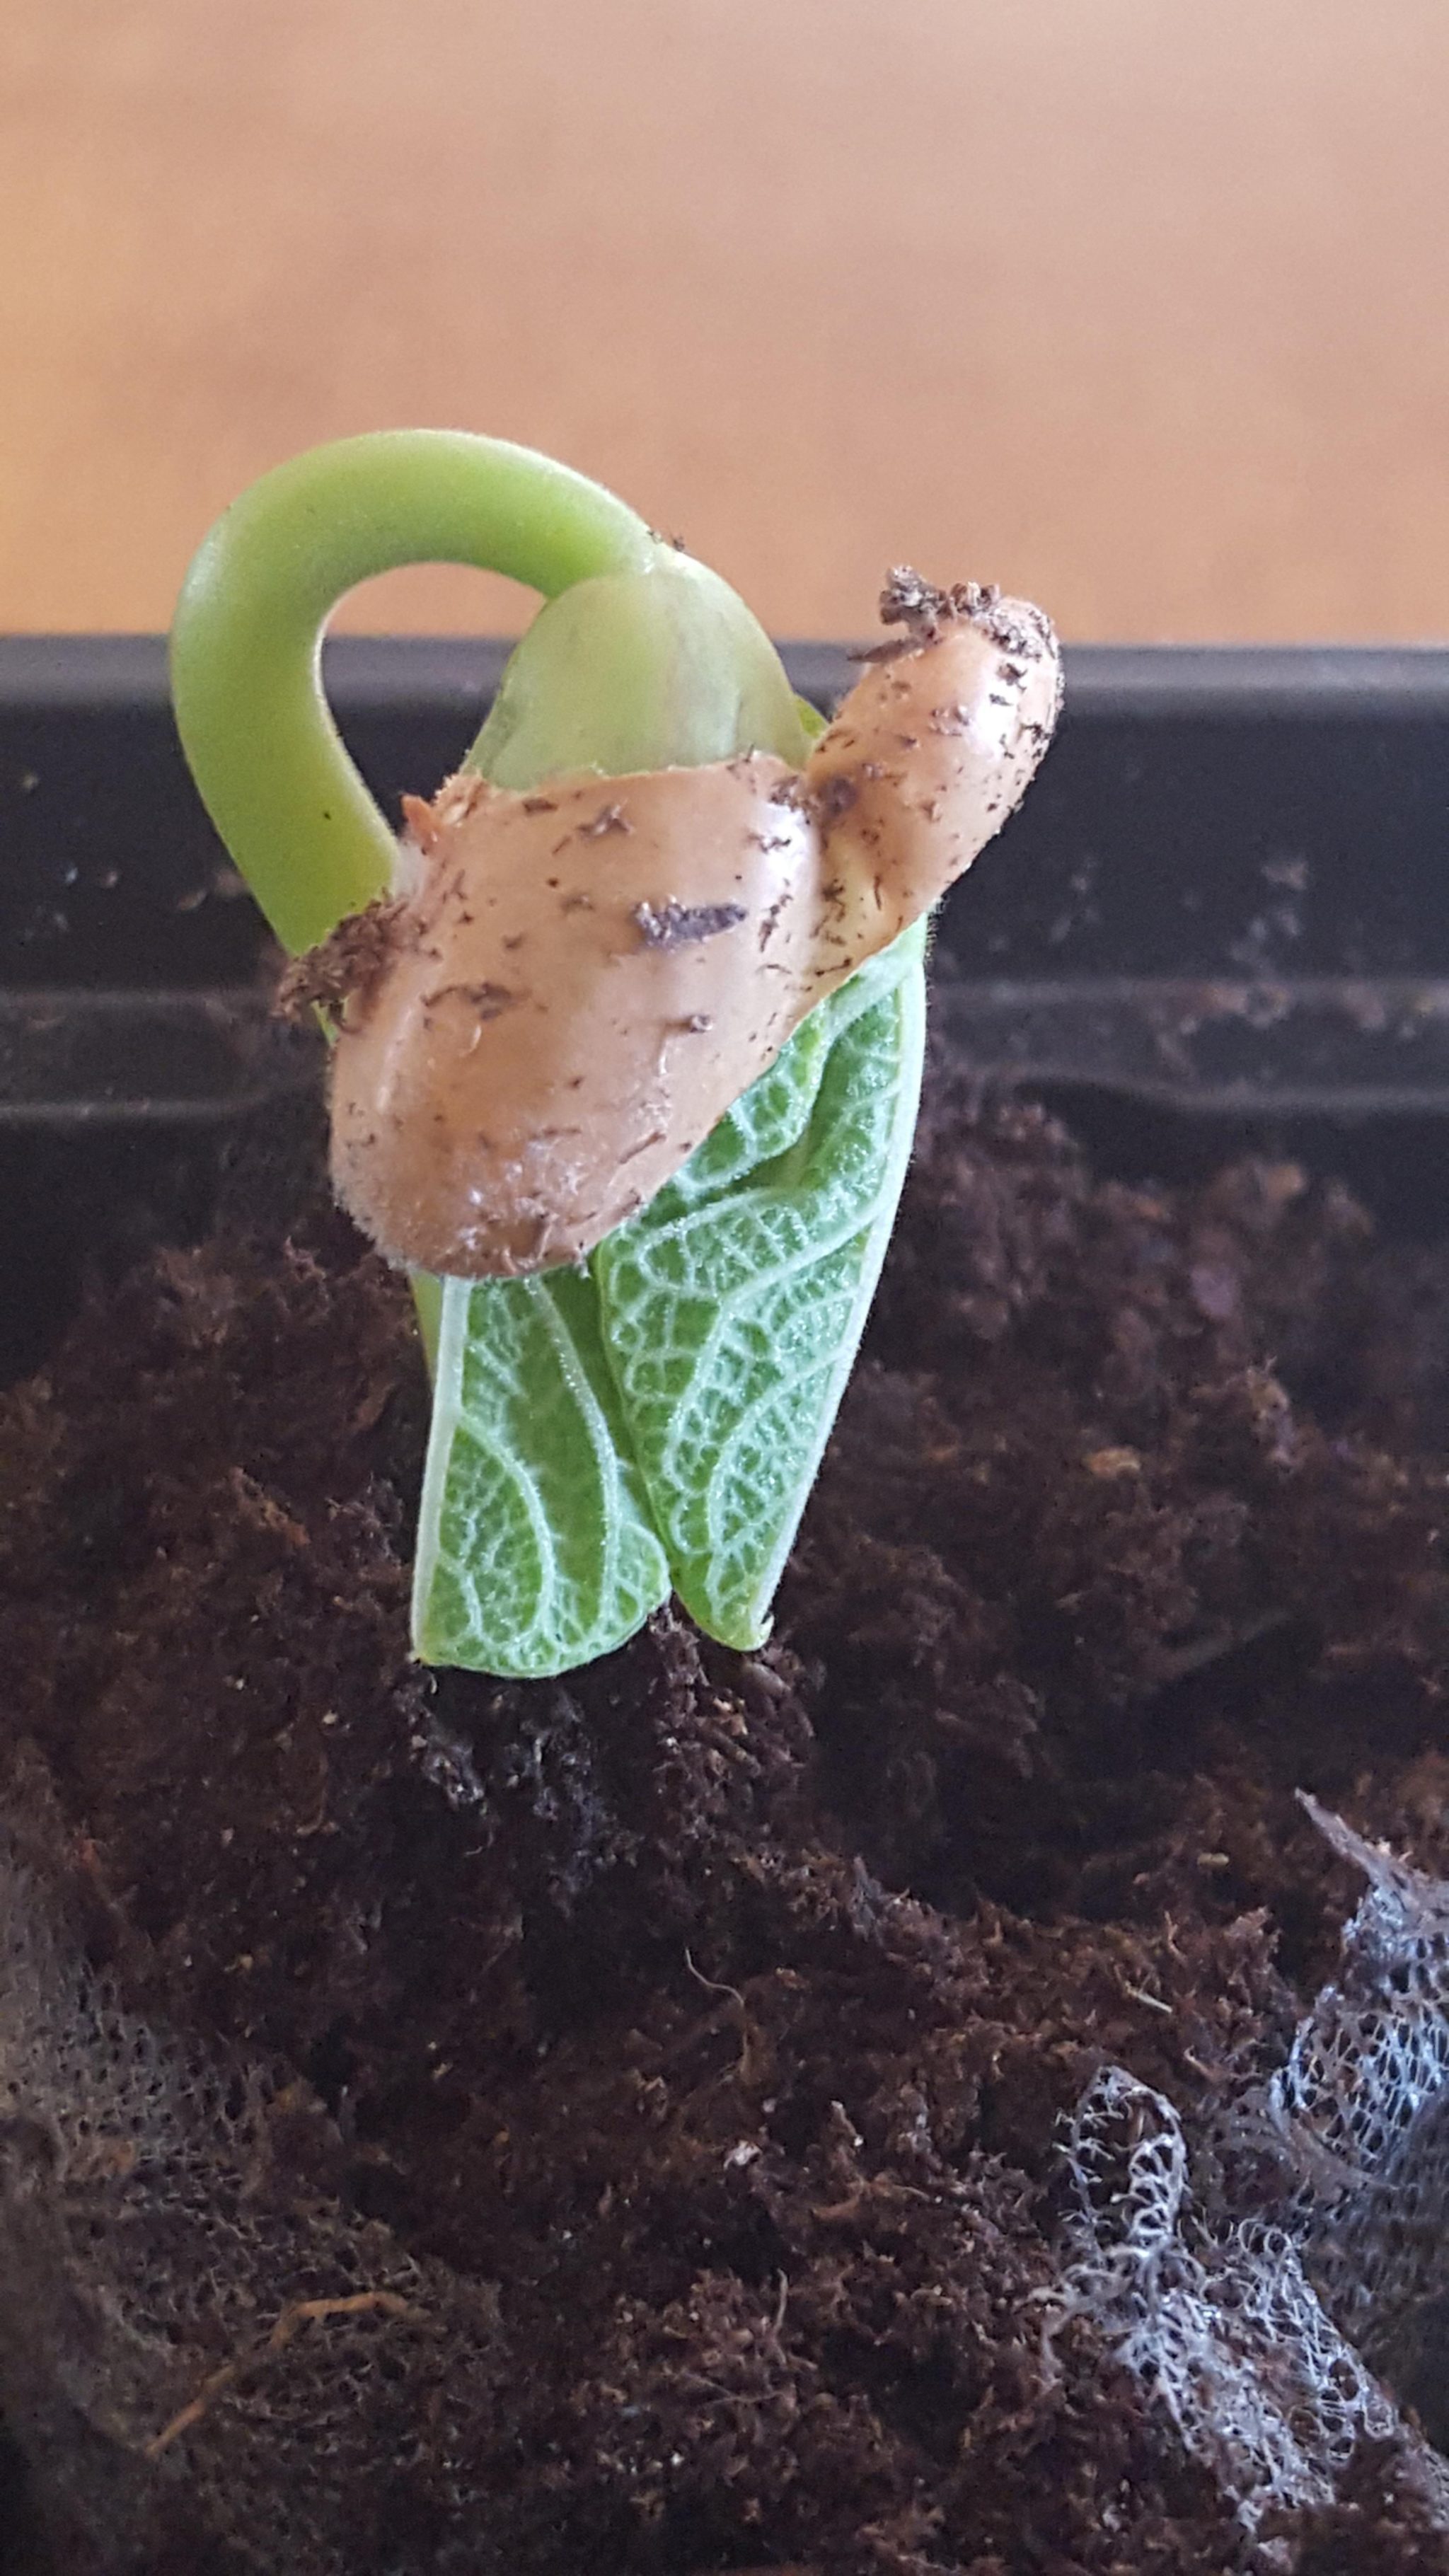
These seedlings are a bit leggy but they can still be good producers. Hardening-off is an important step.
When the weather is ready for transplanting you will need to harden off the transplants. If you take plants that have been living in a cozy, protected environment and move them into a place with full sun and wind they will suffer. You can avoid this by moving them out slowly. The first few days place them outside in the shade just for the day. Next, put them outside in the shade for the day and night. Then move them into full sun for a few hours. Finally, they are ready to be put in the ground. This type of hardening-off is the ideal way. You may not have all the time for all of these stages, but do the best you can. Your plants will reward you!
All of this rain has me very excited about getting back to our seed starting project.
I have one note about seed starting media. If you choose to purchase bagged media for starting seeds indoors, do not choose something with fertilizer in the mix. This will be too strong for seedlings. There are plenty of bagged mixes specifically for seed starting so choose one of those.
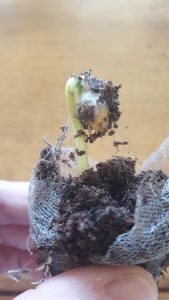
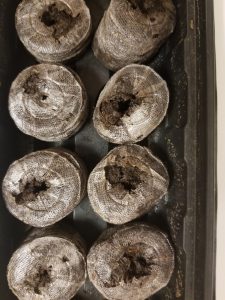
We are ready to expand our pellets. Notice the seed pellets are fully expanded with no standing water:
Seed pellets are not too wet but moist all the way through.
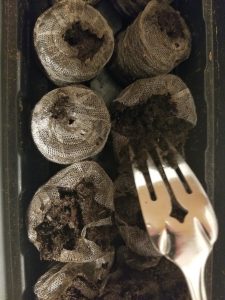
Next, take a fork and open up the top a bit and fluff the media. I like to take this time to make sure that the moisture is uniform all the way through with no dry spots:
Fluff the planting media with a fork to ensure uniform moisture.
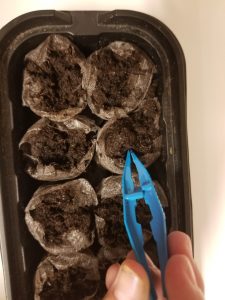
Now you are ready to plant your seeds. If you are mixing seed types in one tray, make sure that they will emerge and grow at about the same rate. I like to use plastic forceps to exactly place the seed where I want them. Some seeds, like lettuce and herbs, are very small and easily lost in the tray. Know how deeply to plant the seeds. Most of the ones you will probably plant just need to be lightly covered with the planting media.
Plastic forceps can be your best friend!
It is worth the effort to do some research on your seed types. For example, cilantro seeds don’t germinate easily when exposed directly to light. Also, there are some seeds that just do better planting directly into the soil, beans and corn are good examples.
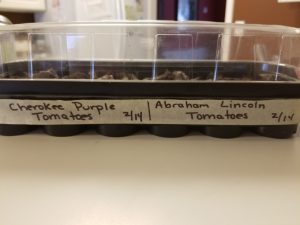
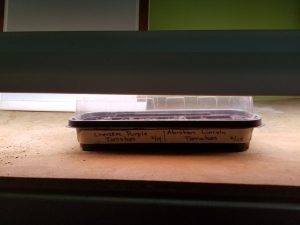
At this point it is a great idea to label your seed tray. Sharpie markers on masking tape work well. The tape sticks to the tray but can be removed later. Do not be tempted to label the lid. You will be removing the lid later and you don’t want to forget the original orientation. Finally, put the lid on the tray, making sure it fits tightly.
Do not forget to label your seed trays.
Do not place your seed tray near a window and hope for the best. You will be disappointed. You will not get enough light for healthy seedlings and the temperature fluctuation at the window will be problematic.
Use a light system. The system does not have to be complicated. I have a light fixture with florescent bulbs attached to a structure with moveable chains. This setup was originally housed in a bathroom tub but it is now in my grown daughter’s bedroom. Very simple. You need the chain to move the light so it stays just above the seed tray. To produce robust seedlings you need the light no more than an inch or two above the tray. This will be imperative as the seeds germinate and grow.
If you are germinating seeds in a place that is reasonably warm you do not need a heating mat. Those were designed for outside greenhouses and places like Michigan. By using a heating mat when you don’t need one, you risk drying out your planting media.
So far this is pretty simple, right? If you have any questions or concerns you can comment or email me at beckygri@uga.edu. Send photos! Next week we will discuss seedling care.
Over the next few weeks we are going to talk about seed starting. I did three in-depth posts last year and I am going to rerun them this year by request. Spring is coming….
Just flipping through one garden seed catalog I found 89 varieties of tomatoes, 21 varieties of cucumbers, 20 varieties of eggplant and 26 varieties of sweet peppers, including three types of lunchbox peppers. Compare that to the different types of vegetable plants that you would find at your big box retail store. Add some variety to your life and try starting your own seeds!
The rule of thumb is to start your warm-season seeds 6-8 weeks before planting time so over the next weeks we are going to explore indoor seed starting in-depth. For beginners, follow along with me as you start your first seeds. For seasoned seed-starting veterans, you may pick up a trick or two. I also encourage you to share your experience through the comments.
Let me begin by writing that there are many effective ways to start seeds indoors. I am going to share with you the way that I like to do it. I have been starting seeds indoors for decades and I have found a way that works best for me. You may find a different way that works best for you and that is terrific. I look forward to learning from you all as well.
To start, I like these re-useable plastic trays. They are easy to store and come in many sizes. I have friends who save their old plastic milk jugs and trim them down for seed starting; that works well for them.
These trays are easy to use for seed starting.
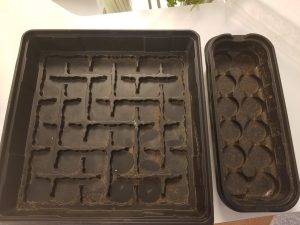
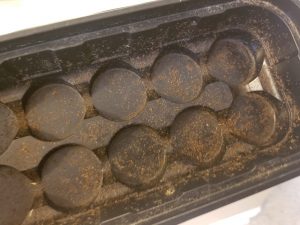
Any plastic trays MUST be disinfected before adding soil media and seed. I use a solution of 9-parts water to 1-part bleach. This step is important to eliminate any pathogens that have been overwintering on remaining soil particles. Starting with clean trays is an important step towards healthy seedlings. Don’t skip it.
These soil particles could hold pathogens. Disinfect those trays!
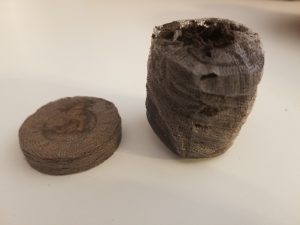
I like to use the peat moss discs for my planting media. As a bonus, the peat moss contains properties that discourage fungal growth. This helps prevent the disease damping off which is a real problem for seedlings.
The pellets expand with the addition of water.
These pellets are readily available and are easy to store. Add water and the pellets expand. I use warm water to create a favorable environment for the seeds. It is important here to not oversaturate the discs with too much water. Too dry is better for the seeds than too wet. Too wet means that the seeds could rot or disease will become a problem. You want the planting media to be just damp. If you can wring water out of the media, it is too wet. If this happens you can let the discs sit outside the tray for a few hours so that they can dry out a bit. You will get the hang of how much is too much as you practice.
Okay, gather your seed starting equipment, and play around with the pellets. Next week we will talk about planting the seeds.
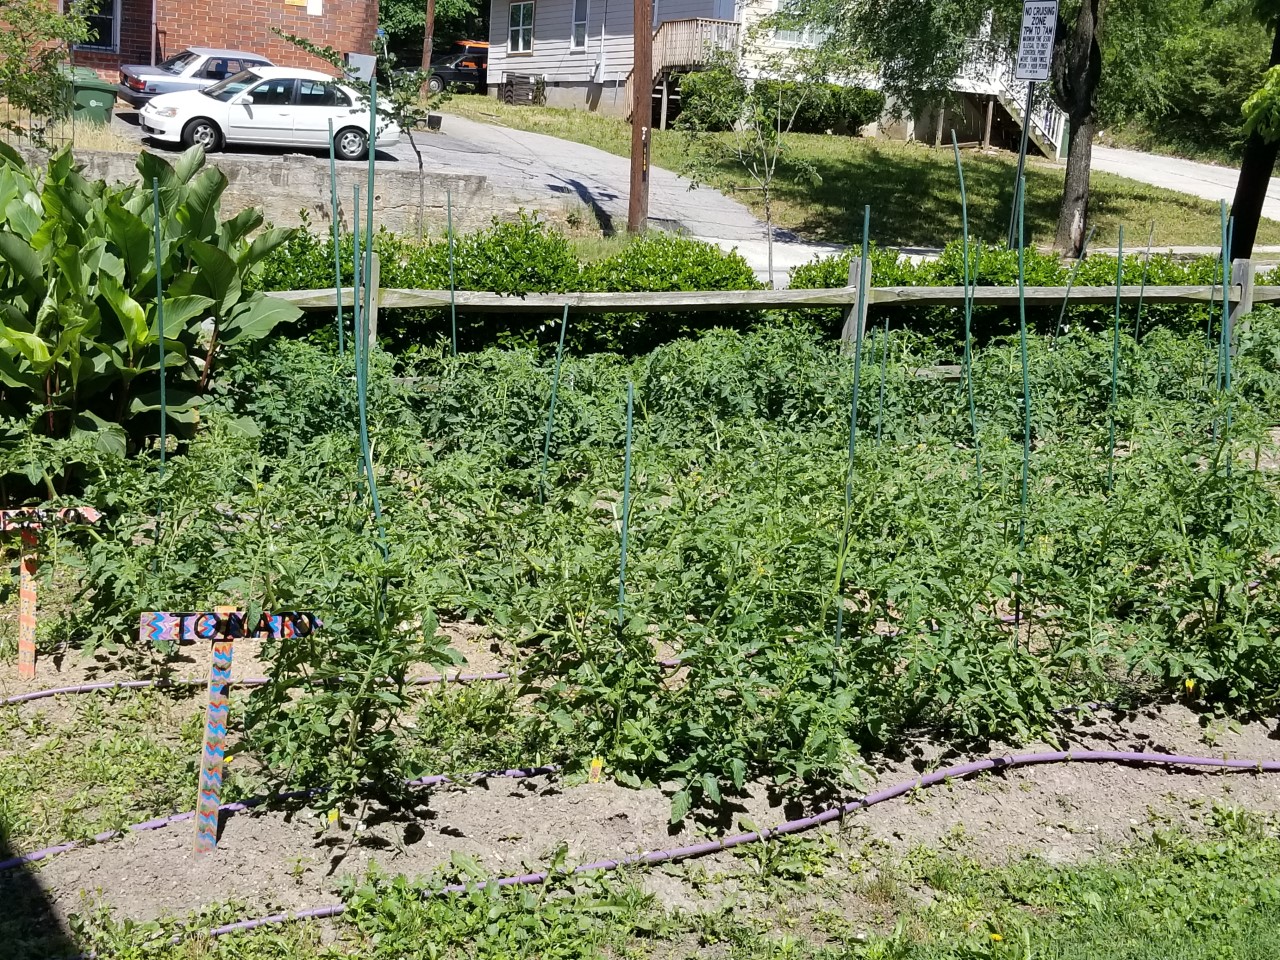
The #1 crop grown in community gardens is tomatoes. I don’t remember visiting a community garden where I didn’t see tomatoes in the summer. I understand! There is not much better than a tomato from the vine warmed from the sun. BUT, growing tomatoes in the same space year after year creates disease and pest problems.
Over the next few weeks we will be exploring some food crops not typically grown in the community gardens. I am hoping that we can provide some options for that tomato garden space.
To get you ready to embrace new plant options, take a minute to view this video on tomato diseases!
I am often amazed at the number of community garden plots that remain empty during the fall, cool-season growing time. Many times the plots are simply abandoned with warm-season crop debris mixed with growing weeds. Why aren’t these spaces full of edible leafy greens?
After speaking with many of these gardeners and garden managers, my anecdotal research reveals that gardeners are simply tired. I have heard it many times. They have spent many summer hours in the garden and they want a break. They associate a garden with tomatoes, squash and cucumbers instead of lettuce, onions, and broccoli. It is a shame because cool-season growing is often superior to summer gardening.
1. Pest and disease pressure is lessened.
2. The hot outdoor working conditions are over.
3. We can grow many types of vegetables in the cool-season garden.
On the other end of the spectrum I have met gardeners who plant a cover crop in the summer, purchasing their tomatoes and cucumbers at the local Farmers Market. They would rather take the summer off and do their planting in the cool-season.
I would like to challenge you to garden a bit differently in 2019. Try growing something new, grow in a different season, or expand your garden knowledge. Over the next several weeks we are going to explore these topics to have you all prepared to challenge yourself in the coming year.