Carefulness costs you nothing. Carelessness may cost you your life.
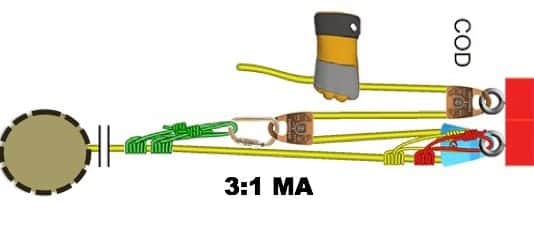
Mechanical advantage (MA) can turn a strong man into a superman. Better yet, you can control the force, getting just as much as you need. This is not the case when pulling with a skid steer or truck. Skids and trucks can quickly generate forces that break trees and gear. Human power, amplified by MA can provide the control needed to do your job safely.
Pulleys with multiple sheaves (wheels) will allow the production of more force. The bell-shaped Prusik minding pulley is the workhorse for lifting, hauling, and tensioning heavy loads. When combined with a Prusik knot they allow the rope to pass when it is pulled and to grab when it is released.
Most people can pull their own body weight. A 200 pound worker named Joe can pull 200 pounds. With pulleys, he can increase that.
To determine the amount of force applied in a simple system, count the ropes at the moving pulley.
In this figure, the worker has a 3:1 MA. There are 3 ropes pulling at the moving pulley. The fourth rope (in the hand) is a redirect because it is not attached to the moving pulley. This system would allow Joe to pull about 600 pounds.
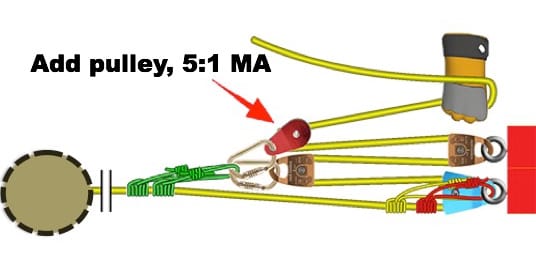
Add one pulley and create 5:1 MA. There are 5 ropes on the moving pulley. Now Joe is pulling roughly 1000 pounds.
What would Joe be pulling with this rigging?
You got it! 800 pounds.
This is a short and very helpful video from ISA about MA.
I have been asked to re-run this wonderful post from seed starting expert, Amy Whitney, of Cobb Extension. It is time to start your indoor seeds. Amy gives us all the details….
What you’ll need:
Seeds
Planting medium
A container with a clear lid
Light source
Time
Which seeds can I start now?
Seeds that are good to start ahead of the usual spring planting typically are those that have a long time-to-maturity, like tomatoes, peppers, and eggplants. Other seeds to start indoors include many kinds of greens.
Will any potting mix work?
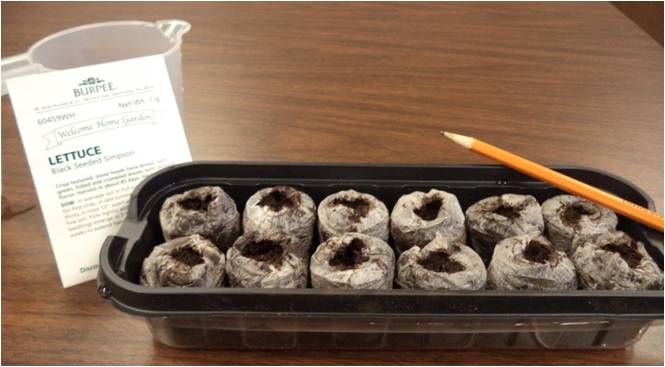
Seed tray the pellets made of peat moss. The pellets expand with the addition of water. – photo by Amy Whitney
Regular potting mix is not the best choice; instead, choose a seedling starter mix. Such a mix will be finely textured, so that small seeds don’t wash too deep down into the mix. Also, it should be sterile (or nearly sterile), so the damping-off fungus that attacks seedlings is less likely to strike. Seedling starter mix can be purchased in small bags to use in your own containers or as flat pellets of either peat moss or coconut coir that inflate as they absorb water.
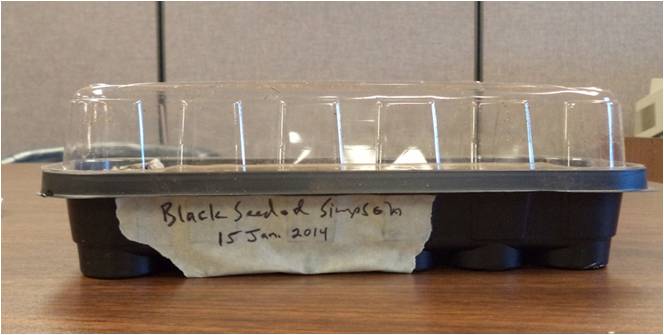
Why does the container need a lid?
Jiffy seed tray with lid. Labeling your seed trays with the type of seed planted and date of planting is helpful.- photo by Amy Whitney
Seeds need to be kept evenly moist but not soggy. If seeds are too wet, they tend to rot rather than germinate, and if they are too dry they won’t germinate, either. The lid helps moderate moisture levels in the container. The lid should be clear to let light in for the growing seedlings. As the seedlings grow taller, the lid will need to be removed.
If the seedlings are in a very sunny window, the “greenhouse” lid may allow too much heat to build up inside the container. Check your seedlings to make sure the young plants don’t end up being cooked under the lid!
Trays and flats especially designed for starting seeds can be purchased at most garden supply stores, but “clamshell” type containers that previously may have held salad greens from a grocery store can also work, after a few holes have been made in the bottom half to allow excess water to drain away.
How much light will my plants need?
After germination has occurred and seedlings have pushed their seed leaves up above the soil level, a strong light source will be needed. A very sunny window is good, but more hours of light would be better. A fluorescent light kept a couple of inches above the tops of the plants for 14-16 hours each day can help provide the needed light.
This sounds easy. When can I start?
You can count back the correct number of weeks for your seeds from the last expected frost date in your area. As an example, a seed that should be started 6-8 weeks before the last frost in an area with an average last frost date of April 10 should be started between February 11th and 25th. Most seed packets include the information about when to start seeds indoors.
Your seed-starting flats or containers will also need to be kept at an adequate temperature range for best germination results. The good news is that the same temperatures that work for most humans, 65-75 degrees F, are also good for seed germination and seedling growth!
As the seedlings mature, they will need to be transferred to more-roomy accommodations (new pots!) with fresh potting mix, to encourage further growth and development.
For additional information and expanded explanations of the above steps, check out UGA’s new guide to seed starting, “Starting Plants from Seed for the Home Gardener” by Horticulturists Sheri Dorn and Bodie Pennisi. UGA’s “Home Garden Transplants,” by UGA Horticulturists Wayne McLauren, Darbie M. Granberry, and W.O. Chance, is another great source of helpful information. Of course, your local UGA Extension Agent is always ready to help!
Amy is a Horticulture Program Assistant for Cobb Extension. She loves seed saving and saves seeds from a heirloom tomato given to her by a guy she met at a seed rack in Home Depot many years ago. Amy will talk plants with anyone! Thanks again Amy. Great information.
Carefulness costs you nothing. Carelessness may cost you your life.
This technique will work every time and it is easy to explain to new workers. It uses gravity to position the bar.
Turn the chainsaw upside down. Loosen the side cover nuts. Turn the chain tensioner screw clockwise to tighten the chain.
Tighten the chain until the bottom edge of the drive link touches the edge of the bar rail and then turn 1/4 turn beyond that. Retighten the side cover nuts and flip the saw back over.
Tightening Your Chainsaw
Phillip Kelley, lead instructor and operations manager of North American Training Solutions demonstrates this chain tightening technique.
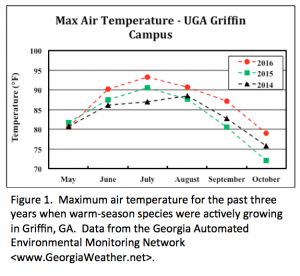
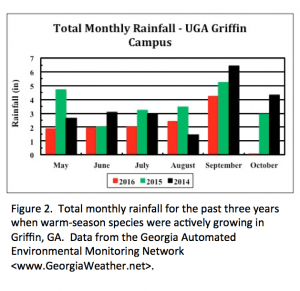
Dr. Clint Waltz, Extension Turfgrass Specialist with the University of Georgia, reports that hot temperatures and low rainfall in the fall of 2016 likely sent warm-season turfgrasses into winter dormancy with depleted carbohydrate reserves. During “normal” circumstances warm-season turfgrasses accumulate and store carbohydrates from late summer through early fall. Last year, non-irrigated turfgrasses likely suffered drought-induced dormancy and transitioned to winter a weakened condition. With insufficient energy accumulated in root systems, a thin canopy and a two- to four-week delay in the green-up of warm-season grasses might be common this spring.
What can be done to improve the green-up and growth of warm-season turfgrasses this spring?
1) AERIFICATION – Core aerification in late April to mid-May. This will improve air exchange and water infiltration to stimulate root and shoot growth. Performing hollow-tine aerification that removes 1/2 inch diameter soil cores to a 3 or 4 inch depth is the recommended approach.
2) TIMING OF FERTILIZER – Withhold the application of nitrogen fertilizer until soil temperatures at the 4-inch depth are consistently 65 degrees and rising. Visit www.Georgiaturf.com to find lawn calendars that include fertility recommendations for each species. Soil temperature data from the Georgia Automated Environmental Monitoring System can be found at www.Georgiaweather.net.
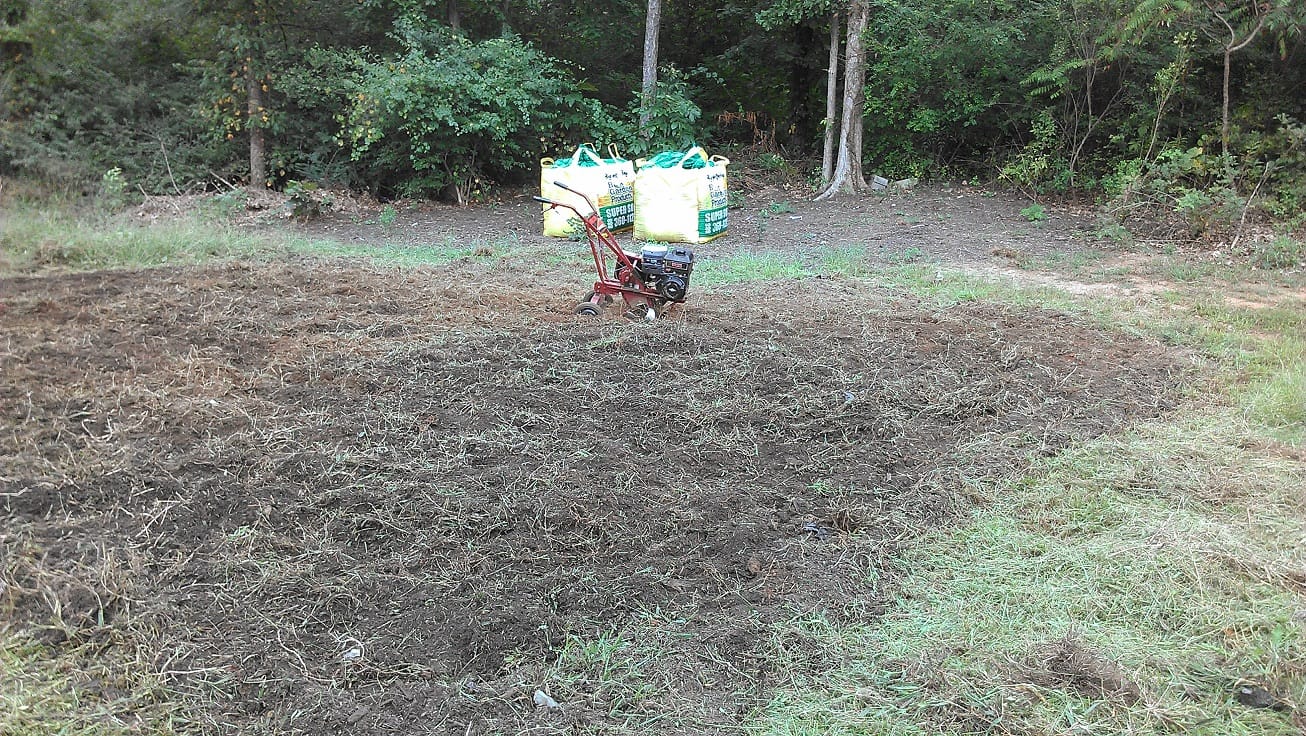
3) SOIL TESTING – Collect a soil sample and submit for testing to ensure that soil Ph, phosphorous, and potassium levels are within the recommended ranges for optimum growth. Contact your local UGA Extension Agent about submitting a soils sample to the UGA Agriculture and Environmental Services Laboratory or call 1-800-ASK-UGA1.
Restoring carbohydrate reserves this spring is an important step in preparing turfgrasses for a healthy growing season. Read the full article by Dr. Clint Waltz at www.Georgiaturf.com.
Gardeners like to read. We like to read about what to plant, what NOT to plant, what others grow….. This week I thought it might be fun to look at some literature that isn’t so instructional so I am highlighting a couple of books I have enjoyed.
How Carrots Won the Trojan War
The first is by Rebecca Rupp and it is called How Carrots Won the Trojan War. This is a wonderful collection of fun stories about vegetables. Did you know that kale is historically been used as food for livestock? Not being a big fan of kale, that one doesn’t surprise me. Or that Madame Pompadour, a favorite mistress of King Louis XV, served him a dish of asparagus as an aphrodisiac? It is still known today in France as “Asperges a la Pompadour.” Last one, historically cabbage was considered food for the wealthy and not the lowly commoner. Thank you, David Knauft for this fun recommendation.
Seedfolks
Those of you who work in community gardens will appreciate this gem of a book, Seedfolks by Paul Fleischman. Fred Conrad, of Atlanta Community Food Bank fame, recommended it to me. Community gardens are about so much more than growing food. They are about building neighborhoods and friendships. This book describes the blending of people, cultures, and vegetables!
So it is your turn. Georgia gardeners, what are you reading?
Bears carved from logs are a popular first project for novice chainsaw sculptors (see video below). With some angle cuts, imagination, and a few finishing tools, you can give your honey a Valentine’s gift right from the heart(wood).
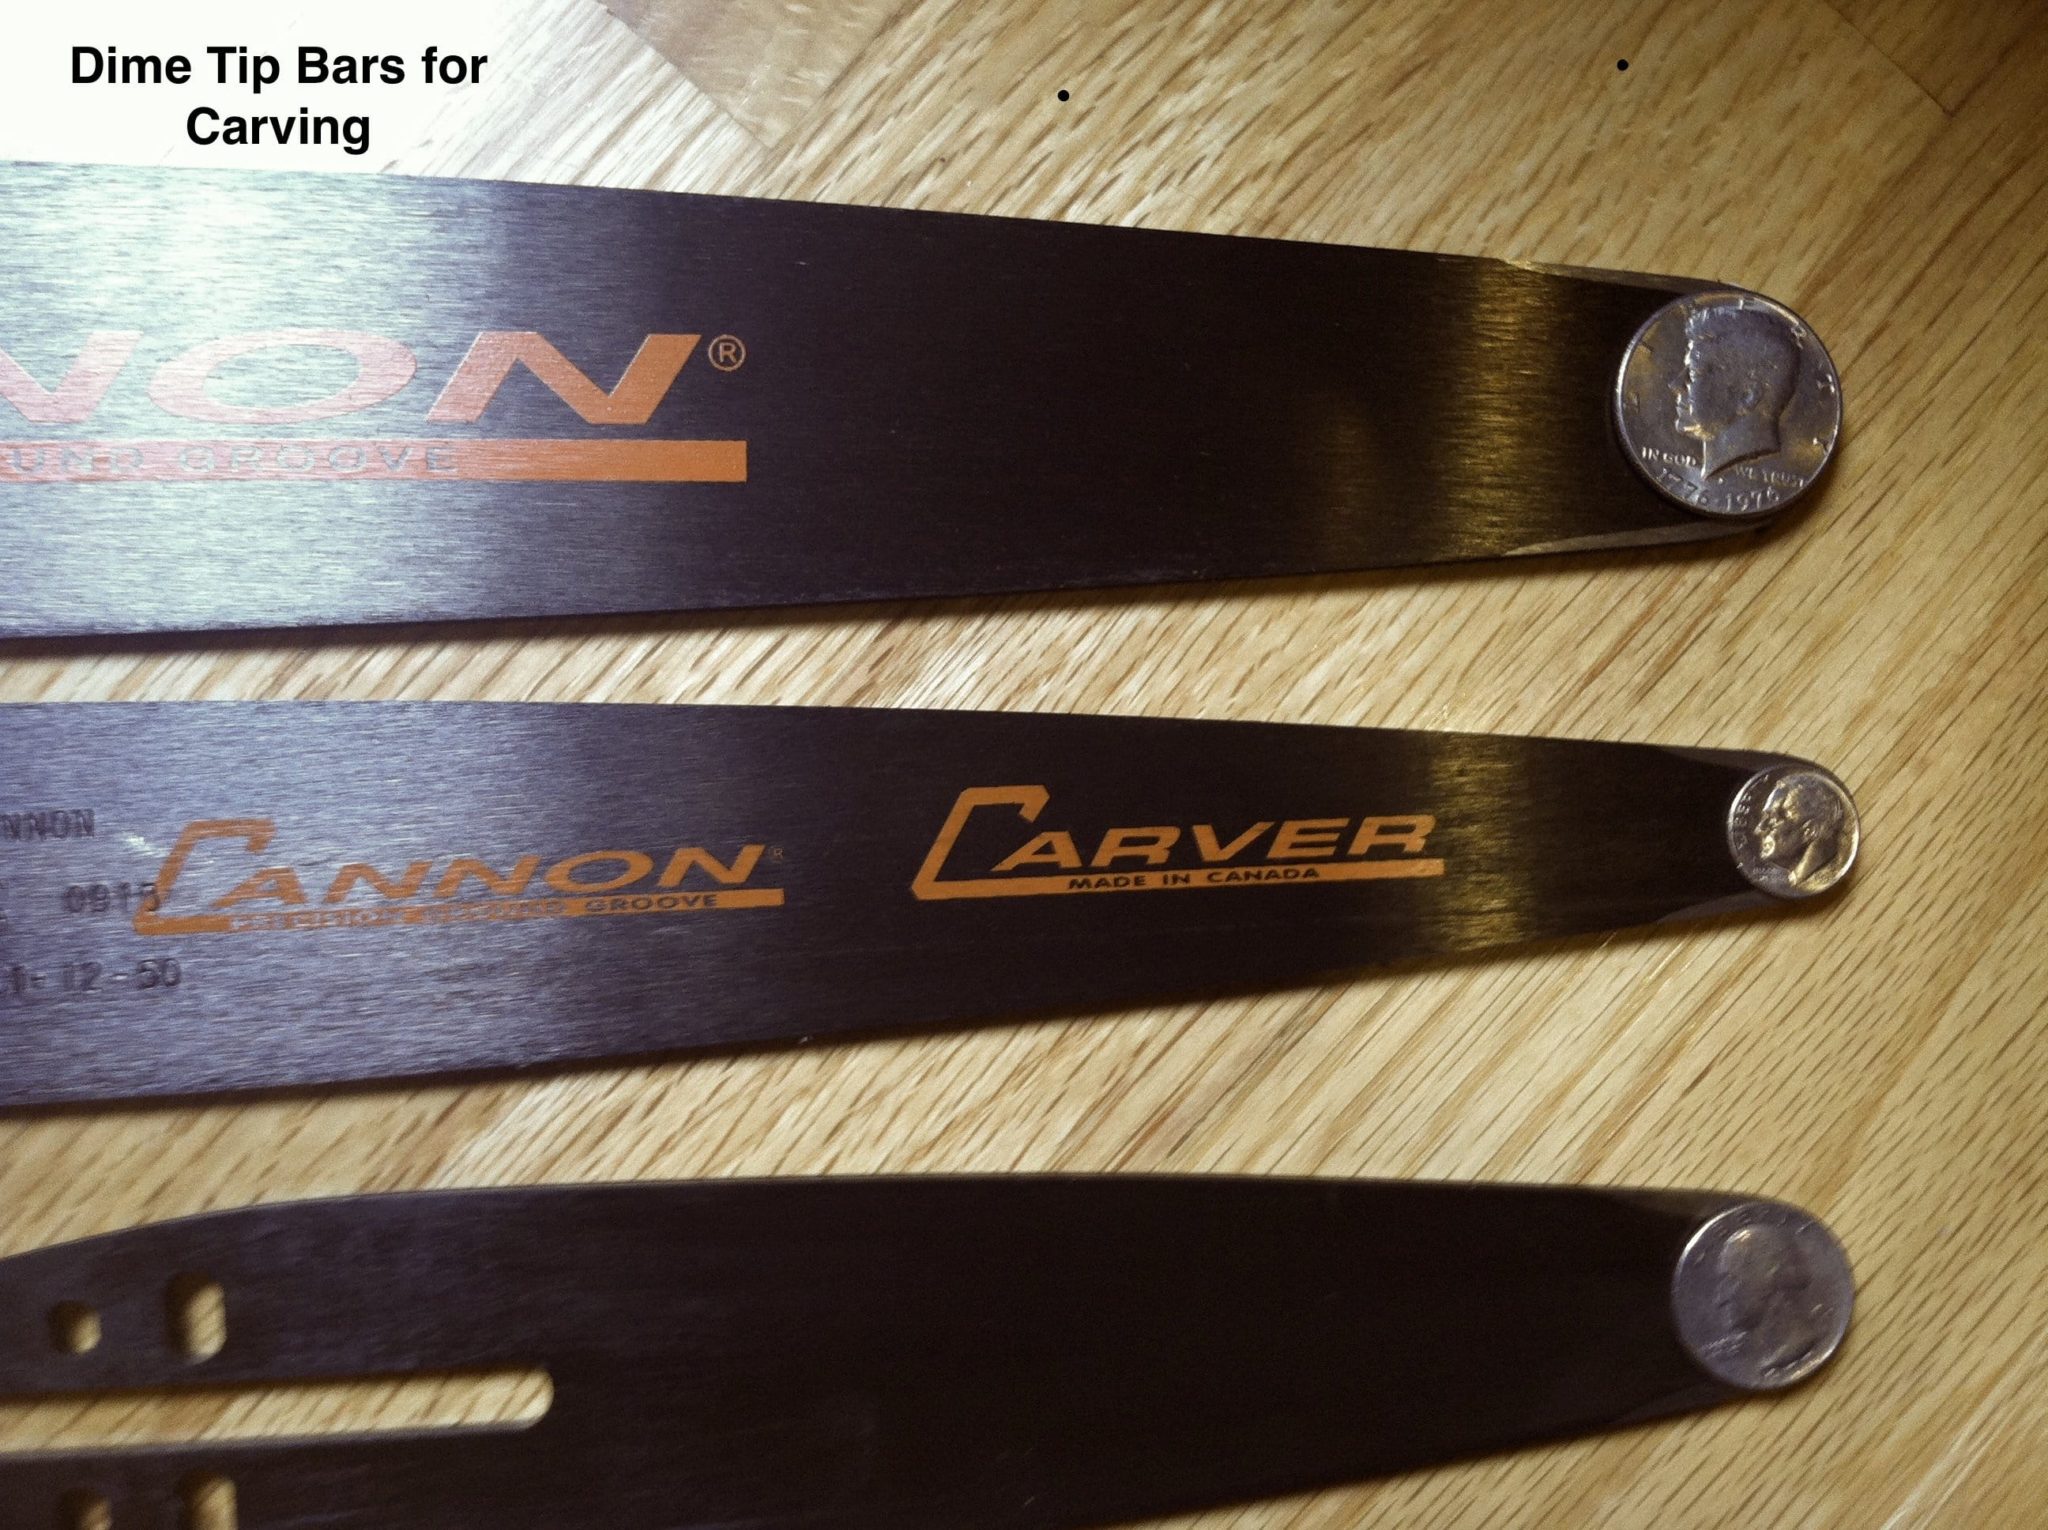
Several manufacturers offer chainsaws specifically for carving or sculpting. Adaptations like lighter weight and low vibration enhance precision, and the dime tip bar allows for detailed shaping and carving.
Alternatively, conversion kits are available to outfit your regular chainsaw with a dime tip carving bar, a ¼” pitch carving chain, and the sprocket necessary to run it. This video will show you how.
While chainsaw sculpting is artistic expression, the tool dictates gearing up with all PPE.
Since art is in the eye of the beholder, however, it might be a good idea to accessorize your Valentine’s creation with jewelry, chocolate, or flowers for an extra measure of safety.
Since we have had ample rainfall and moderate temperatures in Georgia, it is the perfect time to think about cool-season food gardening. We are fortunate enough to have Paul Pugliese of UGA Extension give us some tips! Paul writes….
Late January and early February are great times to plant cool-season vegetables. Many gardeners gave up on planting a fall vegetable garden last year due to the exceptional drought conditions. However, the great thing about living in Georgia is that we have a second window of opportunity in late winter to plant a number of cool-season vegetables.
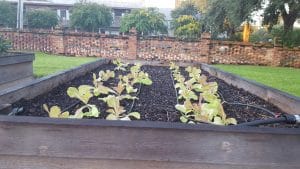
Lettuce in the Trustees Garden, Savannah, Georgia
Cool-season vegetables include beets, broccoli, Brussels sprouts, cabbage, carrots, collards, kale, lettuce, mustard greens, onions, English peas, Irish potatoes, radishes, spinach, Swiss chard and turnips. You can even start planting asparagus roots, asparagus is a perennial plant that takes two years to mature and start producing harvestable spears.
Most cool-season vegetables, if planted around the first week of February, will be ready to harvest around early April or May, depending on the variety. By the time you harvest these cool-season vegetables, you can turn the garden over for planting your summer vegetables at the ideal time.
Cool-season vegetables are generally very fast growing and are easily planted by direct seeding into the soil. There is no reason to purchase or grow transplants this time of year, since the soil moisture and weather conditions are ideal for seed germination. Transplants are more often used in fall planting, since it’s usually too hot and too dry in late summer or early fall for cool-season vegetables to grow from seed.
Most cool-season vegetables are medium to heavy feeders, which means they will require around 20 to 30 pounds of 10-10-10 fertilizer per 1,000 square feet of garden space. Ideally, this fertilizer should be divided into two or three applications (i.e., 10 pounds of fertilizer at planting and at four- to six-week intervals). Because most cool-season vegetables grow close to the ground and have direct contact with the soil, avoid using fertilizer sources such as animal manure that could increase the chance of contamination by foodborne pathogens.
It’s also a good idea to do a soil test to determine your soil pH and how much lime you need to apply, if any, to adjust the soil pH. (For more information about submitting samples to the University of Georgia for soil testing, call your local UGA Cooperative Extension office.)
A pH of 6.0 to 6.5 is recommended for all vegetables except Irish potatoes, which require a pH of 5.0 to 6.0. If you decide to grow Irish potatoes, dedicate a separate garden space solely to them due to their unique pH requirement.
As with all vegetables, try to select a garden site that receives at least eight to 10 hours of sunlight a day. Select a location that is conveniently located near your home and a water supply. The soil should have a good texture and be well drained. Most of the leafy greens and some of the cole crops – those in the Brassica family – can also be grown in containers due to their smaller size.
Adding a mulch of wheat straw, leaves, compost or pine straw will help conserve soil moisture, control weeds and reduce cultivation. Apply enough mulch to have 2 to 4 inches after settling. Newspaper can also be used as a mulch. Place newspapers two to three layers thick around plants. Apply 3 inches of straw or compost on top of the newspaper. Avoid using hay bales for mulch, since most hay fields are sprayed with herbicides for weed control that could carry over into your garden and kill your plants.
For more information on seeding rates, recommended varieties and row spacing, check out UGA Extension publications “Vegetable Gardening in Georgia” and “Home Gardening” online at extension.uga.edu/publications. More detailed information on home gardening potatoes, lettuce, broccoli, cauliflower, asparagus, Swiss chard, Brussels sprouts and rutabagas can also be found on the publications website.
Paul Pugliese is the ANR agent for Bartow County Cooperative Extension. He has extensive experience in vegetable gardening as he grows all types of vegetables on his farm in Cartersville, Georgia.
Weeds can be a major pest of lawns and recreation fields, competing for resources and sunlight while detracting from their natural beauty.
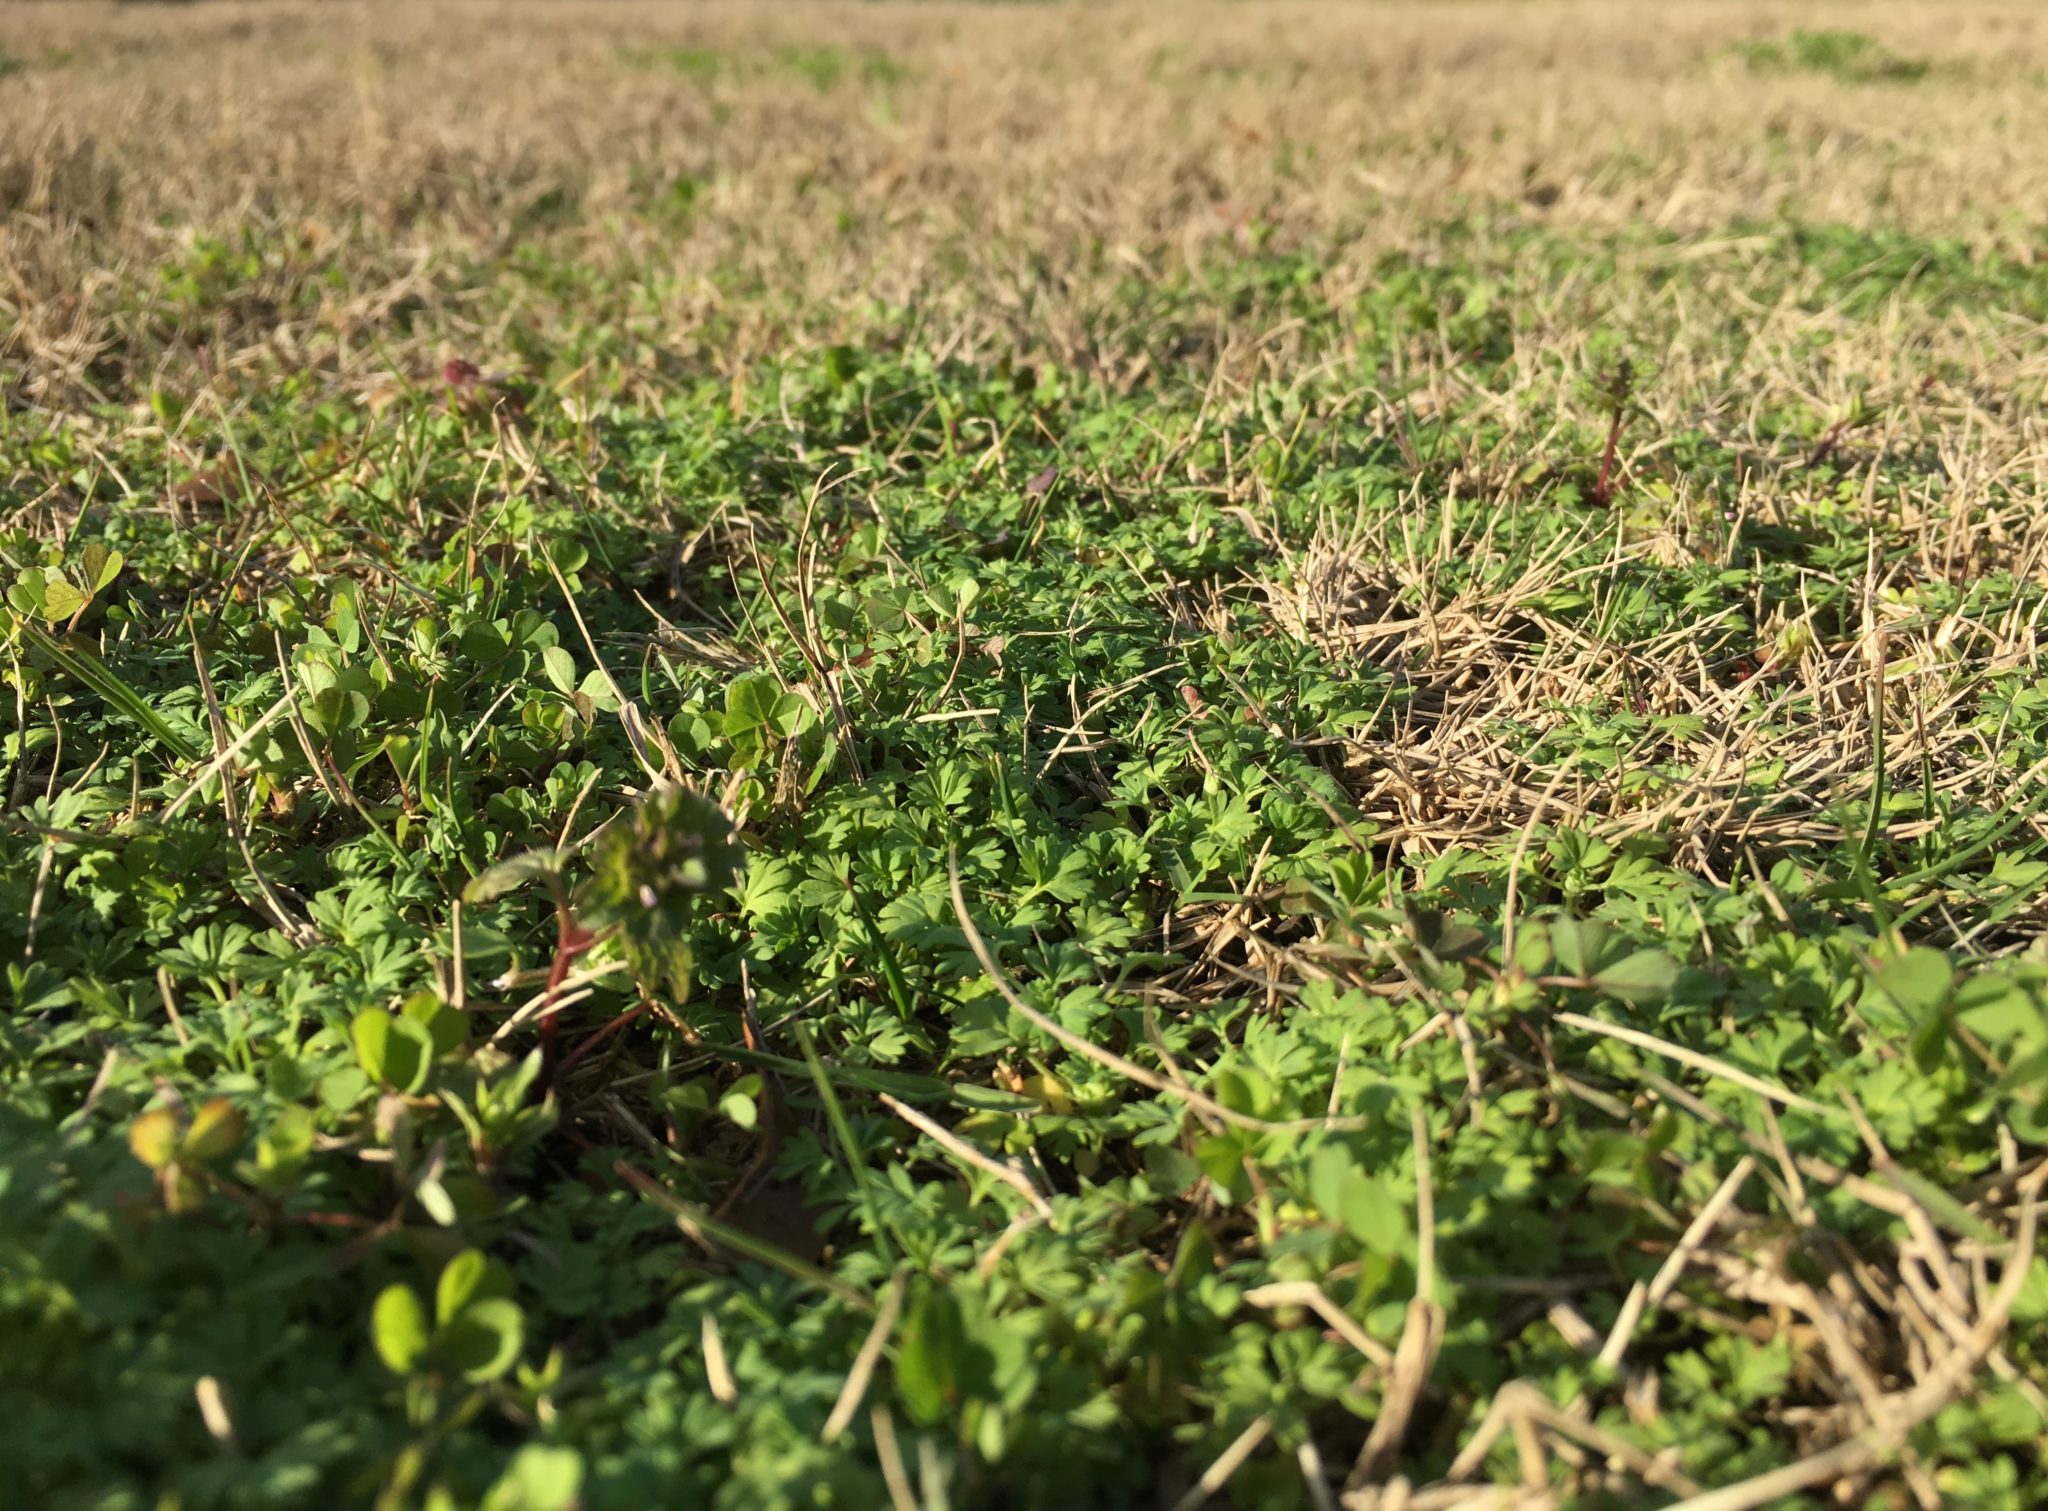
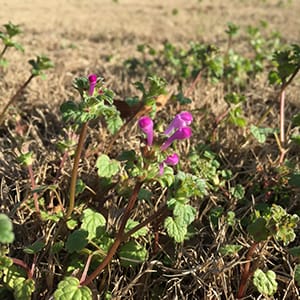
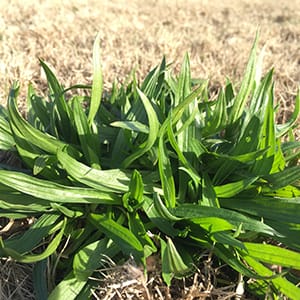
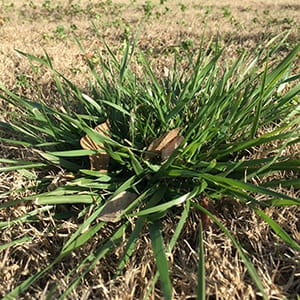
If your spring checklist includes lawn weed management, now is the time to take a closer look at the tiny mat of weed seedlings forming in mid-winter (Jan-Feb.), especially during spells of mild weather and precipitation. The winter-weed inventory is likely to include a mix of early-stage cool-season annual and perennial weeds such as chickweed, henbit, clover, annual bluegrass, burweed, and wild garlic. One advantage of mid-winter weed scouting and management is that many weeds are in the early growth stages and can be effectively controlled by herbicide treatments. In addition, warm-season turfgrasses such as bermudagrass and zoysiagrass are dormant and less susceptible to herbicide injury than during spring green up. Mid-winter is an excellent time to scout for cool-season weed species and get an early jump on management while conditions are favorable.
Below are examples of lawn weeds commonly observed in mid-winter:
Selective control of broadleaf and grassy weeds in turfgrass can be an effective strategy in mid-winter using the appropriate postemergence herbicide product(s). It should be noted that during the winter months the visible effects of certain herbicides may be masked by cool weather (the weeds may be dead and not know it yet!) Mature perennial weeds such as dandelion, clover, and undesired patches of tall fescue can be effectively spot-treated during mid-winter using selective and non-selective herbicides. It is essential to select products appropriate for the particular species or turfgrass when selecting herbicides. St. Augustinegrass and Centipedegrass are particularly susceptible to certain herbicide injuries, even during the winter months. Combination products containing fertilizer and herbicides may be appropriate for weed control in cool-season turfgrass species such as Tall Fescue during the late winter. However, combination products containing nitrogen fertilizer are NOT recommended for warm-season grasses during the winter months. Applying nitrogen to dormant warm-season grasses in mid-winter does not provide benefits to the turfgrass and promotes the development of diseases such as large patch.
Remember, turfgrass and weed identification is essential to determining the appropriate herbicide product, timing, and application rate. There are no miracle products or “one size fits all” solutions to weed control. Herbicide recommendations are based on many factors including the turfgrass species, weed species, temperature range, and environmental factors. For assistance with turfgrass and weed identification, contact your local UGA Extension Agent at 1-800-ASK-UGA1.
Carefulness costs you nothing. Carelessness may cost you your life.
You’ve seen the movies, the good guy (or bad guy) tosses his burning cigarette into a pool of gas, igniting a fire. The fire burns up to the gas tank, which explodes into flames, eliminating the bad guy (or good guy). Nice way to end a movie, but not likely.
A cigarette doesn’t burn hot enough to ignite gas. Gas, both in fume or liquid form, ignites between 500 °F and 540 °F. A cigarette at its hottest (when the smoker draws on it) is between 450 °F and 500 °F.
Gas ignition with a cigarette is improbable. The cigarette just isn’t hot enough to start a gas fire.
However, a match or a lighter burns very hot, well over 1000 °F. That is more than hot enough to ignite liquid gas or fumes! Since you have to light a cigarette before you can smoke it, don’t smoke while you are handling fuel or fueling your saw.
We aren’t sure if these are good guys or bad guys blowing up, but this made us laugh (it is accurate too, the lighter does them in). Enjoy!
To round out our series on soil health we are fortunate enough to have information from Dr. Jason Lessl on soil testing. Jason writes…
Basic Soil Testing
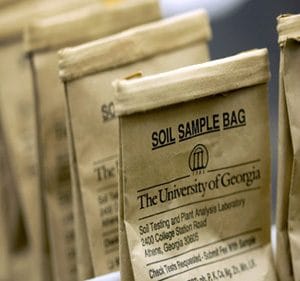
One of the most fundamental, but often overlooked aspects to any successful vegetable garden, flower bed, landscape, or lawn is good, fertile soil. Getting your soil tested by a laboratory is the best and most accurate way to assess your nutrient and pH levels which are vital components of maintaining your soil. The University of Georgia Soil, Plant, and Water lab offers such services (www.aesl.ces.uga.edu). When you send a soil sample to a lab, you will receive a detailed report of soil nutrients levels along with crop-based recommendations on how to fix any potential deficiencies. The steps required to submit a soil sample are simple and can be achieved through a few items commonly found household items. You can start by contacting your local county extension office to acquire soil bags and get information on how to submit your samples. Locate your county office here: http://extension.uga.edu/about/county/index.cfm or call 1-800-ASK-UGA1.
Soil testing is available at your local UGA Extension office.
When to soil test?
Soils can be tested any time during the year, although it is typically best to take samples in the Fall/Winter. This is the time of year when most plants are dormant and the soil is most accessible. If pH adjustments are necessary, it is also the best time to apply amendments as it can take several months for them to take effect. Lime (to raise pH) and sulfur (to lower pH) reacts slowly and, if possible, should be mixed with the soil at least two to three months before planting.
Soil from a community garden in Woodstock.
How often do I test my soil?
For intensely cultivated soils (i.e. vegetable gardens), an annual soil test is recommended. Otherwise, for lawns and ornamental areas, after medium to high fertility levels are established along with the appropriate pH, sampling should be done every two to three years.
Steps in Soil Sampling
Recommendations about when and how to apply nutrients are only as good as the soil sample submitted for analysis. To obtain a representative soil sample, the following steps are useful:
Map out the entire property. This will help in record keeping and ensure that the soil sample is representative of the entire area. Divide areas such that each soil sample represents one general plant type. For example, separate vegetable gardens, blueberry bushes, ornamentals, fruit trees, lawn, etc. If you have specific problem spots, sample those areas separately.
Use clean sampling tools and containers to avoid contaminating the soil sample. Collect samples with any digging tool you have available (hand trowel, shovel, soil probe, etc.).
Slightly damp soil is the easiest to work with if you can wait for those conditions. Clear the ground surface of grass, thatch, or mulch. Push your tool to a depth of 6 inches (4 inches for lawn areas) into the soil. Push the handle forward in the soil to make an opening then cut a thin slice of soil from the side of the opening that is of uniform thickness, extending from the top of the ground to the depth of the cut. Repeat this process in a zigzag pattern across your defined area, collecting 8-12 samples to mix together. For trees, take soil samples from 6-8 spots around and below the leaf canopy. Take about a pint (~2 cups) of the mixed soil (after removing large rocks, mulch, sticks, and roots) and fill the UGA soil sample bag. Be sure to label the sample clearly on the bag. If the samples are wet, spread the soil out over clean paper and let them air dry. Otherwise, take your samples to your local extension office for submission. Once the lab has received your soil, it will take 2-3 business days to get your report.
Dr. Lessl is a program coordinator for UGA’s Soil, Plant, and Water Lab. He understands the importance of the garden ecosystem as he is studying to become a new honey bee keeper this April! Thanks, Jason, for being part of healthy soil month!