Growing Asparagus: A Luxury Vegetable

Source(s): Jacob G Price


Asparagus is one of the luxury vegetables. It is also one of the earliest spring crops.

Yet few people in the south grow it, and that’s a shame. Maybe they just don’t think it’s worth all that soil preparation.

It does take a bit of extra effort and time to get asparagus started. But think about the long-lasting reward. What other vegetable can you plant once and harvest annually for up to a quarter century.

True, you can’t cut any spears the first year. And you have to limit the take the second time around. After that, though, asparagus lasts, and lasts, and lasts.

Asparagus can be planted in the spring or fall. The Extension Service recommends January, 15 to March 14, or during the months of November and December.

Planting

  1. Open a furrow 14 inches deep and 18 inches wide. Keep the topsoil and discard the subsoil. In areas where topsoil is shallow, bring in additional topsoil from another area.
  2. Spread a two inch layer of compost, manure, peat moss or well-rotted leaves in the bottom of the furrow.
  3. Add four inches of topsoil.
  4. Next add 10 pints of 5-10-15 or eight pints of 6-12-12 fertilizer and 10 pints of agricultural limestone for each 100 ft. of row. Mix thoroughly.
    Use proportionately less fertilizer and lime in shorter rows.
  5. Now add two inches of topsoil over the prepared mixture.
  6. Place the crown or roots (use only one-year-old crowns) 12 to 18 inches apart in the furrow and cover with three inches of topsoil.

Secrets to a Good Harvest

Do not harvest any spears for the first two years after planting. This helps the plants establish a good root system.

In the third season, pick spears over a four week period.

By the fourth season, you should be able to extend the harvest to eight weeks.

As the weather warms in early spring, be prepared to cut young asparagus stalks every third day. During peak production, you may have to cut up to twice a day.

Asparagus plants can be productive up to twenty years! Happy growing!

Best Cultivars

Choose rust disease resistant ones such as Jersey Giant, Mary Washington and Waltham Washington.


Resource(s): Vegetable Gardening in Georgia

Center Publication Number: 77

Ground Covers for Difficult Sites

Source(s):

  • David S. McKenzie, 1989, Complete Manual of Perennial Ground Covers, Prentice Hall. ISBN-0-13-162058-4.
  • Allen Lacy, 1993, Gardening with Groundcovers and Vines, HarperCollins, ISBN 0-06-016913-3.
  • Allan M. Armitage, 1989, Herbaceous Perennial Plants, Varsity Press, ISBN 0-942375-00.

Ground covers are a great choice to plant where grasses won’t grow because of too much shade. Areas too narrow for shrubs or difficult to mow are perfect for these low-growing plants. Many need very little water. Their wide-spreading habits will cover large areas in an attractive green foliage. Some groundcovers even give you attractive blooms in addition to their low-maintenance needs.

Botanical Name Common Name Site Conditions

Hedera helix English Ivy Shade, dry or moist
‘Glacier’, behaved controllable form
Juniperus spp. Spreading Juniper Sun, shade, dry
Liriope spicata Creeping Border Grass Sun, shade, dry
Liriope muscaria Mondo Grass Sun, shade
Pachysandra terminalis Japanese Spurge Shade, moist or dry
‘Silver Edge’ variety
Vinca Minor periwinkle Shade, moist or dry
‘Aureovariegata’, behaved form

Full Sun Lovers

Achillea spp Yarrow Dry
Ajuga reptans Carpet bugle Wet or dry
Carex Var. Jap. Sweetflag Wet
Delosperma cooperi Handy Ice Plant Dry
Dianthus spp. Pinks Dry
Euonymus fortunei Winter creeper Moist or dry
Gelsemium sempervirens Carolina Jessamine Dry
Hypericum calycinum St. Johnswort Dry
Iberis sempervirens Evergreen Candytuft Dry
Ipomoea ‘Blackie’ (annual) Blackie Sweetpotato Dry
Lantana spp. Lantana Dry
Liriope muscaria variegata Variegated Liriope Moist or dry
Phlox subulata Thrift Creeping Phlox Dry
Rosmarinus officinals Rosemary Dry
Sedum spp. Sedum Dry
Trachelospermum asiaticum Asiatic Jasmine Dry
Verena spp. Verbena Dry

Shade and Partial Shade Lovers

Ajuga reptans Carpet Bugle Moist or dry
Ardesia crenata Coralberry Moist or dry
Carex morrowii Var. Jap. Sweetflag Wet
Cephalotaxus Japanese Plum Yew Dry
Chrysogonum virginanum Green and Gold Moist or dry
Convallaria majalis Lily of the Valley Dry
Euonymus fortunei Wintercreeper Mosit or dry
Gelsemium sempervirens Carolina Jessamine Dry
Hedera colchica Persian Ivy Moist
Hemerocallis spp. Daylily Moist or dry
Hypericum calycinum St. Johnswort Dry
Iberis sempervirens Evergreen Candytuff Dry
Liriope muscaria Border Grass Moist or dry
Nandina domestica cvs. Dwarf Nandina Moist or dry
Ophiopogon japonicus Mondo Grass Moist
Pachysandra terminalis Japanese Spurge Moist or dry
Pittosporum tobira ‘Wheeler’s’ Dry
Trachelospermum asiaticum Asiatic Jasmine Dry
Vinca major Big Leaf Periwinkle Moist or dry

Resource(s):

Center Publication Number: 19

Ground Bees

Source(s):

  • S. Bambara, Extension Entomologist, North Carolina State University, North Carolina Cooperative Extension Service.
  • R. Brandenburg, Extension Entomologist, North Carolina State University, North Carolina Cooperative Extension Service.
  • J. Baker, Extension Entomologist, North Carolina State University, North Carolina Cooperative Extension Service.

There are many common species of solitary bees which nest in individual holes in the ground. The bees range in size from 1/2″-3/4″, and may be a variety of colors such as blue, green, copper or metallic red. They may belong to one of several groups of bees, such as the membrane bees, digger bees, sweat bees, leafcutter bees and mason bees or other groups (Colletidae, Andrenidae, Halictidae, Megachilidae) and may occur across the state.

Introduction

Females excavate nesting tubes during the evening hours which reach six or more inches in depth. Tubes are lined with a water-proofing secretion for protection from moisture. Small mounds of excavated soil may appear around each nest opening. When bees are numerous, many holes may be in close proximity, creating a “city-like” aggregation. Each hole belongs to a separate tube. During the day, the active females collect pollen and nectar to carry back to the nest to form a “ball” 1/8″-1/4″ in diameter. A single egg is laid upon the pollen ball in March, April, or early May.

After hatching, the larva feeds on the pollen and develops within the tube until it reaches adulthood in the fall. The adult remains in the borrow throughout the winter until emergence from the ground in March or April. At this time, mating takes place and bee activity begins to pick up as the nesting cycle resumes. Though adult bees feed on nectar, none store honey, as such. Solitary, ground nesting bees play a vital role in ecological systems, especially in pollination of crops and wild plants, and they should not be destroyed casually.

Damage

Ground nesting bees generally prefer nesting in areas with morning sun exposure and well drained soils containing little organic matter. Tunnels are excavated in areas of bare ground or sparse vegetation and damp soils are avoided. Damage to lawns and turf is usually minimal and control is often sought because the bees are perceived as a danger or annoyance.

Solitary bees rarely sting and there is no mass attack as might be found with honey bees. Outdoor activities, including lawn mowing, can often be continued with no problem. However, with very large aggregations, one may prefer to avoid the area for 4-6 weeks while the nesting is taking place.

Pest Management

Cultural control methods include heavy watering or irrigation with a lawn sprinkler during the nest-building period to discourage nesting behavior. Tilling of soil to destroy tunnels may help a little, but establishment of dense turf is probably the best discouragement to further nesting. Applications of heavy organic matter could be included as a soil amendment, if practical, when tilling the soil. If the soil or location is not conducive to a healthy lawn, using ground covers or heavy mulches may be an alternative solution. Mulches may be used on bare patches caused by heavy traffic where grass will not grow.

Chemical Treatment

If chemical treatment is desired, the following insecticides may be used by the homeowner. Mix the desired chemical with the appropriate amount of water and spray enough to wet soil at and around nest openings.

Chemical Formulation Treatment Rate

carbaryl (Sevin) 50% wettable powder (50WP) 8 oz./1000 sq. ft.

Recommendations for the use of chemicals are included in this publication as a convenience to the reader. The use of brand names and any mention or listing of commercial products or services in this publication does not imply endorsement by The University of Georgia Cooperative Extension nor discrimination against similar products or services not mentioned.


Center Publication Number: 201

Green June Beetles

Green June Beetles

Source(s):

  • Patricia P. Cobb, Professor Emeritus, Entomology and Plant Pathology, Auburn University.
  • Kathy L. Flanders, Extension Entomologist, Associate Professor, Auburn University.

Damage caused by green June beetle grubs, Cotinis nitida L., has been increasing in Georgia landscapes, home lawns and other established grassy areas. Although green June beetle grubs prefer to feed on decaying organic matter, they can chew the tender roots of grass plants. Damage to turf and pasture is primarily mechanical because grub tunneling and movement in the soil uproot grass plants, which then dry out and die.

Description of Green June Beetles

Green June beetle adults are velvet green with orange or rust stripes along the outer margins of the wing covers. Beetles may be 1/2 to nearly 1 inch long. Peak beetle flights begin during late June, thus the common southeastern name, June bug. Fully-grown green June beetle grubs, commonly called grub worms, are also familiar sights. Green June beetle grubs are most abundant in sandy or sandy loam soil rich in organic matter.

Green June beetle grubs are different from most grub species in the southeastern United States in that they come out of the ground at night and move from one place to another. Green June beetle grubs crawl on their backs with their legs in the air. This movement easily distinguishes them from most other grubs in the soil. When disturbed the grubs curl up into a C-shape, typical of the grubs in their family, the Scarab beetles. Grubs of some related beetles, called Euphoria, or bumble flower beetles, also crawl on their backs. They might occasionally be confused with green June beetle grubs; however, bumble flower beetles are not known to cause extensive damage to turfgrass or pastures.

Green June beetles have one generation each year. The grubs overwinter in the soil. They may become active during warm winter days. Fresh mounds of trails of pulverized soil indicate fresh grub activity. Grub activity increases as the spring weather becomes consistently warmer.

Grubs pupate in cells in the soil during late April and May and remain in the pupal stage for 2 or 3 weeks. Newly emerged adults remain in the soil for an additional week or two. In most years, green June beetles leave the soil beginning in late May and continue through early August. Peak flights usually occur from June through July.

Behavior of Green June Beetles

As adults, green June beetles feed on fruits such as apples, peaches, and figs. Usually, they prefer to eat over-ripe or decaying fruit. Occasionally, adult green June beetles feed excessively and cause economic damage to grapes and small fruits.

Female beetles fly over the grass surface early in the morning and settle into the grass just after daybreak. Male beetles fly during mid to late morning. Female beetles produce substances that attract the males to them. After mating, the female green June beetle flies close to the turf or grass surface, selects a site (preferably moist, organic soil), and digs several inches into the soil. The female beetle constructs a walnut-sized ball of soil in which she lays 10 to 30 eggs. Eggs are nearly round, about 1/16 inch in diameter. Each female may lay as many as 75 eggs during a 2-week period. Eggs hatch in about 2 weeks. Newly hatched grubs are about 3/8 inch long. Young grubs begin to tunnel through the soil in search of food (organic matter). They typically come to the surface to feed.

In turf, the grubs usually leave small mounds of soil around the mouth of each tunnel. By August, grubs are large enough for mounds to be seen on short mowed turf and by mid-September on taller grass. In pastures, grubs leave trails of pulverized soil as they tunnel near the surface.

A small amount of green June beetle tunneling can help aerate the soil and be beneficial; however, extensive tunneling can be harmful. Tunneling loosens the soil and creates a spongy layer about 2 inches deep in heavy infestations. Tunneling disrupts the contact between the plant roots and the soil. This interferes with water up-take causing the plants to die.

Grubs are capable of pruning the roots of plants, particularly when the grubs occur in high numbers. In pasture situations, grazing cattle easily pull the plants growing in the loosened soil out of the ground. Weeds quickly colonize the bare patches created where a plant dies or is pulled out. Birds, armadillos, and skunks dig grubs out of turf and pastures, often causing even greater damage in the process.

A large, dark-colored wasp, Scolia dubia, is often seen flying low over grassy areas infested with green June beetle grubs. The insect, sometimes called the blue winged wasp, attacks green June beetle grubs, and is, therefore, beneficial. This wasp is blue-black in color, slightly longer than an inch. The rear half of the abdomen is brown and fuzzy, with two large yellow spots. The female wasp goes down into the soil to find green June beetle grubs. When she finds one, she stings it, causing it to be paralyzed, then lays her eggs. The wasp larvae hatch and consume the green June beetle grub. In Alabama, wasp adults are most prevalent in August and September. Under some circumstances, this insect, and some microbial pathogens, will control a green June beetle infestation.

Management on Turf of Green June Beetles

On turf, green June beetle control is site specific. In some cases, the grubs do such a good job of aerification that control is considered to be undesirable. This is especially true on rapidly growing, well-established bermudagrass that is not closely mowed. However, green June beetle mounds are usually not tolerated on highly visible areas such as highly maintained lawns or golf greens. Sod producers need to guard against this pest because the tunneling weakens the structural strength of the sod.

The following are steps for successful control on turf:

  1. Be sure you have green June beetles. Green June beetles are not the only animals that make mounds on turf. Mole crickets make mounds during the spring and fall on infested turf, primarily in the southern half of Georgia. Earthworms also make mounds, the particles of which are distinct pellets. To determine which animal is creating mounds in an area, use a mixture of 1 or 2 tablespoons of lemon-scented dish detergent in 1 gallon of water. Pour the solution over 1 or 2 square feet of the infested area. Wait a few minutes, and observe what comes out of the ground.
    • You can also verify the presence of green June beetle grubs by digging up with a shovel several samples at least 1 foot deep and 1 foot square. Sift through the soil to find any insects.
    • Identifying GJB activity (as opposed to ants, mole crickets, etc.) can be tricky, but look for tunnels about the size of your finger (bigger than a pencil, for large grubs) going straight down from the center of the mound of dirt. The tunnel will be open if it’s where the grub came up, or covered if it’s where it went back down into the ground. Soapy water will not bring the grubs up reliably, but it will get mole crickets and earthworms up. Digging is the most accurate method but also the most trouble.
    • Watch for bird feeding in turf areas, especially starlings and robins. Bird activity is a good indicator of turf insect infestations. Also, watch where green June beetle adults fly during the summer.
  2. Decide whether turf damage is severe enough or unsightly enough to justify treatment.
  3. Consider control options. The insecticides recommended for grub control in The Georgia Pest Management Handbook will control green June beetle grubs.
    • Any of the pyrethroids, and Sevin, are effective for controlling the grubs, at any size, if applied late in the day. Because the grubs come up and wallow around in the materials, they work on even mature grubs very well.
    • In most years, the best time for grub control is August through October. Treatments during early spring will probably give a lower percentage of control. Often, a second application is required.
    • If soil is dry, irrigate before treatment.
    • Make applications late in the day because grubs move to the surface during the evening.
    • Treat all infested areas. Otherwise, grubs may later move back into treated areas.
  4. Keep a history of the site. Mark a landscape map with previously infested areas. This can help in locating new infestations.
  5. Remove dead grubs if necessary. Following an insecticide application, grubs emerge from the ground the next evening and die on the turf or soil surface. Decaying grubs not only smell bad, but also may result in slick playing surfaces on athletic turf. Usually, you can remove dead grubs from athletic fields or other frequently trafficked areas with a turf sweeper such as the ones used on golf courses.

Resource(s): Insect Pests of Ornamental Plants

Reviewer(s): Will Hudson, Ph.D., Extension Entomologist, The University of Georgia.

Center Publication Number: 214

Gray Leaf Spot in Turf

Source(s): Alfredo Martinez-Espinoza


Susceptible Turfgrass

St. Augustine grass is most commonly attacked by gray leaf spot but it also attacks perennial ryegrass, Bermuda grass, centipede grass, bent grass and various species of fescue. Gray leaf spot is especially severe on new St. Augustine lawns.

Symptoms

The symptoms of gray leaf spot vary depending on the grass cultivar. On St. Augustine grass, gray leaf spot first appears as small, brown spots on the leaves and stems. The spots quickly enlarge to approximately ¼ inch in length and become bluish-gray in color and oval or elongated in shape. Mature lesions are tan to gray in color and have depressed centers with irregular margins that are purple to brown in color. A yellow border on the lesions can also occur. In cool-season turf grass, the symptoms are similar to those of melting-out.

Conditions Favoring Disease

Gray leaf spot is favored by daytime temperatures between 80ºF to 90ºF and night temperatures above 65ºF. It is also found in areas with high nitrogen levels and that are stressed by various factors, including drought and soil compaction. This disease is most severe during extended hot, rainy and humid periods.

Management of Gray Leaf Spot

  • Avoid medium to high nitrogen levels during mid-summer. Use fertilizers with slow-release nitrogen sources.
  • Irrigate turf deeply and as infrequently as possible to avoid water stress.
  • Allow water to remain on leaves for only a short period of time. Water from 10 pm to 10 am.
  • Reduce thatch by vertical cutting.
  • When possible, plant turf grass that is resistant to gray leaf spot.
  • Avoid using herbicides or plant growth regulators when the disease is active.
  • Fungicides are available to control the disease. Consult the current Georgia Pest Management Handbook.

Resource(s):

Grasscycling: Feed Your Landscape, Not the Landfill

Source(s): Gil Landry, PhD., Coordinator- The Center for Urban Agriculture, The University of Georgia.


Georgia’s landfills are filling up and closing at an alarming rate, and citizens everywhere are recycling to help them last longer. Grasscycling, the natural recycling of grass clippings by leaving them on the lawn when mowing instead of bagging them, is proving to be a simple and effective way to save landfill capacity while saving you time, work and money in the landscape.

Grasscycling Saves Time

A study in Texas found that grasscycling meant an extra mowing per month but required 35 minutes less time per mowing. After six months of grasscycling, homeowners who took part in the study have saved an average of seven hours of yard work.

Grasscycling Does Not Cause Thatch

In the early 1960s, it was commonly believed that grass clippings were a major part of thatch and that removing clippings would slow thatch development. However, research later determined that thatch buildup is caused by grass stems, shoots and roots. The clippings are rapidly decomposed and valuable nutrients are released into the soil.

Proper Mowing

Proper mowing is the key to successful grasscycling. This includes cutting the grass at the recommended height, maintaining a sharp mower blade, mowing when the grass i dry, and mowing often enough to remove no more than one-third of the plant height. If tall fescue, for instance, is being kept at two inches, it should be mowed when it reaches three inches. This generally requires mowing every five days instead of every seven days. If the grass becomes too tall between mowings, raise the cutting height for the first mowing and then gradually lower it with later mowings until the proper height is reached. During stress periods, such as summer drought, raise the cutting height but continue mowing often enough to avoid excess leaf removal.

All mowers can grasscycle and no special equipment is needed. However, many lawnmower manufacturers sell mower attachments that chop clippings into smaller pieces and improve a mower’s grasscycling performance.

Mowing Heights
Centipedegrass 1 to 1.5 inches
Common bermudagrass 1 to 2 inches
Hybrid bermudagrass 0.5 to 1.5 inches
Tall fescue 2 to 3 inches
St. Augustine grass 2 to 3 inches
Zoysiagrass 0.5 to 1.5 inches

Proper Fertilization

A fertilization program should be based on turfgrass needs, soil tests, maintenance practices, and desired appearance. An analysis of your soil can be obtained through your local county Extension office. In the absence of a soil analysis, two widely used fertilizers for turf are 16-4-8 and 12-4-8. Six pounds of 16-4-8 per 1,000 square feet of lawn area or eight pounds of 12-4-8 per 1,000 square feet will provide the recommended rate of one pound of nitrogen per application. The table below will provide suggested application frequencies for these fertilizers. A dark green well-fertilized turf is attractive, but it also requires more frequent mowing and irrigation. If turf growth is too fast for your mowing frequency, you may need to reduce the amount of fertilizer applied by one-third to one-half. On well-established and well-maintained lawns, lower rates are often adequate.

Water Management

Established lawns often need irrigation to maintain good color and growth. Turf grasses generally require more water in hot weather, but may also need water in cool periods. Grasses in need of water appear dull bluish green and leaf blades begin to fold or roll. Lawns should not be watered until these moisture stress symptoms are seen. To save water and avoid turf diseases, the best time to water is between sunset and sunrise. Apply enough water to soak the soil to a six to eight inch depth. This is usually equivalent to one inch of rainfall or 600 gallons of water per 1,000 square feet.

Grasscycling is a proven and effective method of lawn management. It also provides an environmentally important opportunity for all Georgia citizens to participate in curbside waste reduction.


Resource(s): Lawns in Georgia

Center Publication Number: 91

Fruits for Coastal Georgia

Source(s): Dave Linvill


The coastal counties have great weather, but growing fruit can be challenging. Below is a list of some fruits that are often tried in the region and a recommendation. The sole criteria for the recommendation (except where noted) is successful fruit production. Some of the fruiting plants listed require substantial pesticide use to achieve quality fruit and are so noted. Though varieties are suggested, this is not an exhaustive list and many other varieties not listed my produce fruit. Take the time to research specific varieties before you make your purchase. Regardless of the variety, all fruit plants need full sun and are best located near a water source.

APRICOTS – Do Not Recommend

Too hot and too many insect & disease problems.

APPLES – Marginal

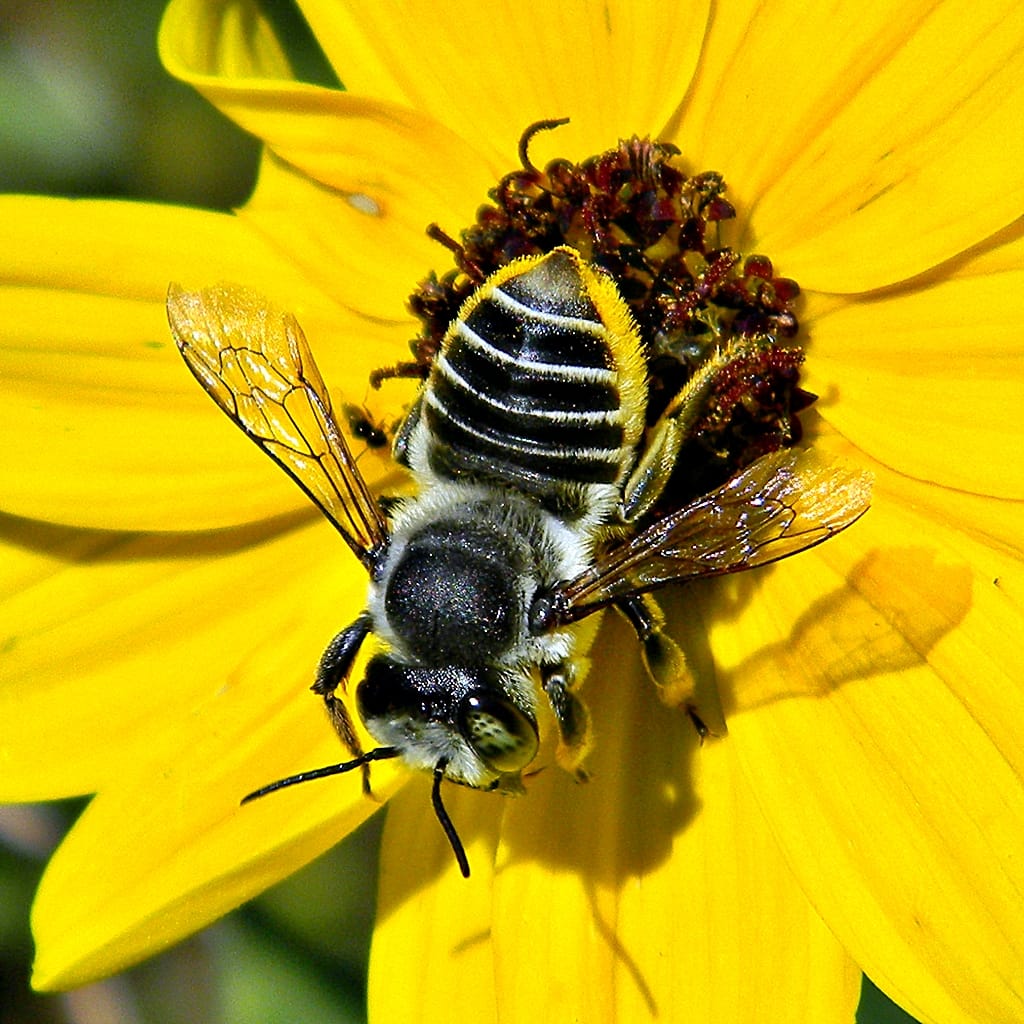
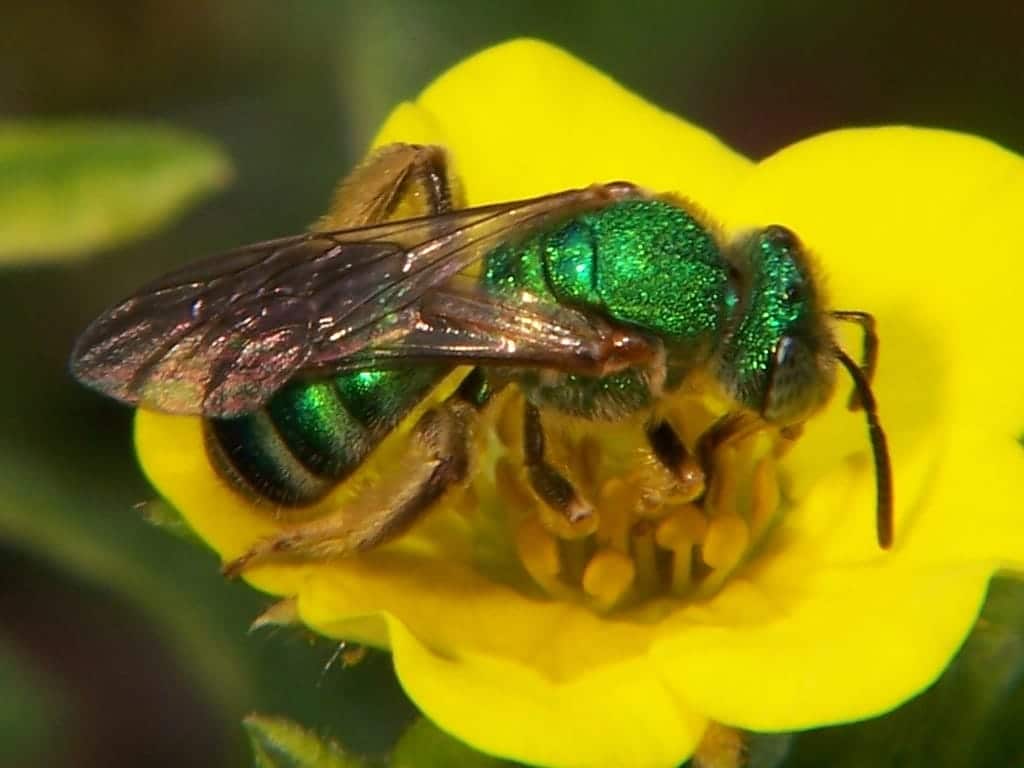
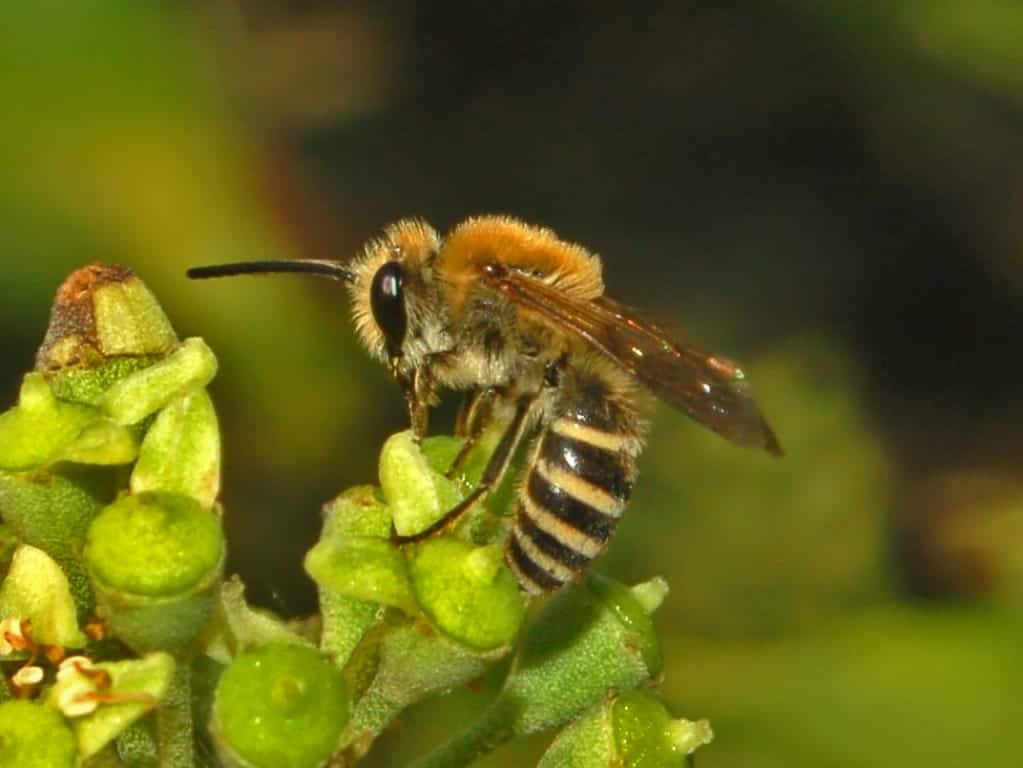
Not many apple varieties will grow in Coastal Georgia due to chill hour requirements and successful fruit production requires substantial pesticide use. It may be advisable to plant other fruits in your yard and buy your apples. Most apple varieties are self sterile and need another variety of apple for pollination to take place. There is a severe shortage of honeybees in the Savannah area so cross pollination could be a real problem. These varieties are will produce fruit: Anna and Dorsett Golden

More information

AVOCADOES – Do Not Recommend

Avocadoes must be grown in frost free areas and will not grow well if at all in Coastal Georgia.

BANANAS – Marginal for fruit, Recommended for foliage.

Bananas look great but will not produce fruit every year. It takes and average of 14 months to produce a bunch. If adequately protected from winter cold, bananas will produce fruit the second year. Bananas are generally insect and disease free and do not need to be sprayed. Bananas benefit from heavy fertilization. Recommended varieties: Dwarf nawa (sometimes spelled nawah) and Kandrian.

More information

BLACKBERRIES – Recommended

Blackberries are easy to grow and produce large and prolific fuit. They spread vigorously and can be kept in their allotted space by mowing. Blackberries are semi-erect and need to be pruned to about waist height or they will flop over. A couple of fungicide and insecticide spray are helpful. The life span of a blackberry patch is only about seven years due to viral . Blackberries are easy to grow and the fruit are large and prolific. Some varieties need to grow on trellises.

  • Kiowa – very thorny but has the best taste in my opinion
  • Natchez – no thorns

More information

BLUEBERRIES – Recommended

The beautiful rabbiteye blueberry is native to Georgia and is generally the best type of blueberries for home gardeners. Southern highbush blueberries require high organic matter soil (at least 3 percent) and are very prone to attack by deer and birds because they ripen early in the season. Rabbiteye blueberry plants seldom require spraying for insects or diseases. Blueberries grow in an acid soil so a soil test is highly recommended. The most important thing to remember about starting rabbiteye blueberries is to plant more than one variety for cross-pollination. Cross-pollination is necessary for fruit set. Make sure the 2 or more varieties you select bloom about the same time. Varieties: Vernon and Brightwell ( early bloomers), Powderblue (midseason). I think you need to suggest more David.

More information

CHERRIES – Do Not Recommend

Although fruit tree catalogs indicate that Bing (and other similar types) Cherries will grow in Coastal Georgia, fruit production is elusive at best and the trees do not thrive. Rigid pest control is an absolute necessity for even marginal success. Barbados cherries will not survive our cold winters.

FIGS – Recommended

Order fig plants only from reputable nurseries in the Southeast and never purchase or attempt to grow the kinds of figs grown in California. They require pollination by a tiny wasp that cannot survive under Georgia’s climatic conditions. The only types recommended in Georgia are the common ones that produce only female flowers and set fruit without cross-pollination. Root-knot nematodes are the leading killer of fig trees in South Georgia. Recommended varieties:

  • Alma,
  • Celeste,
  • Brown Turkey.

More information

GRAPEFRUIT – Recommended

Grapefruit do quite well and do not have a lot of insect or disease problems. Varieties:

  • Marsh (white) and
  • Rio Red

More information

KIWI – Marginal

Kiwifruit require careful attention to water management. Irrigation is a must in growing kiwifruit to keep the vines from dying the first year. They are the most drought sensitive fruit grown in Georgia, but they are also one of the most sensitive to overwatering. Kiwifruit grow best on a soil such as a sandy loam or sandy clay loam with good internal drainage. Raised beds are suggested in areas with marginal soil drainage at any time of the year. Kiwifruit need a strong trellis and require a significant amount of pruning. Male and female vines of commercial kiwifruit must be planted to produce fruit. Usually one male is planted for every eight female vines. Kiwi is also sensitive to nematodes. Varieties: Hayward (don’t forget a male pollinator)

More information

KUMQUATS – Recommended

Kumquats are the most cold hardy of the commonly grown acid citrus fruits and require little if any pesticides. The kumquat may be eaten fresh (peel and all) or used in making jellies, marmalade and candies. Hybrids are also available. Varieties: Nagami, Marumi, Meiwa.

LEMONS – Recommended

Can get scaled and a dormant oil spray in the spring is beneficial. Lemons do not have a lot of insect or disease problems.

  • Meyer – is the standard
  • Harvey – may have a little more cold tolerance

More information

LIMES – Marginal

Although limes will grow here – most of the time it gets too cold for them so therefore I am not recommending limes. Lime hybrids are a possibility and have same qualities as tangerines.

  • Eustis – is similar to a lime but is actually a limequat

More information

LOQUAT – Recommended

I have a loquat tree along my fence line. It is in partial to deep shade and provides me with lots of fruit even though I don’t fertilize or water it. Loquats have few pest problems. Occasional fire blight can usually be controlled by the prompt removal and burning of diseased parts.

  • Advance
  • Bartow
  • Fletcher Red
  • Hardee

More information

MELONS – Recommended (pay attention to variety)

The typical watermelon (Charleston Grey) will not do well in Coastal Georgia, other varieties do. Semi-rigid pest control is necessary for high-quality fruit.

Watermelon

  • AU-Producer (Crimson Sweet type),
  • Carolina Cross (Jubilee type, used for giant watermelon production),
  • Allsweet (oblong dark green striped melon with dark red flesh, excellent quality), and
  • Minilee & Mickylee (icebox types, striped and grey (light green)), and
  • Sugar Baby (not recommended – disease prone)

Cantaloupe

  • Athena

Specialty melons

  • charentais,
  • crenshaw,
  • casaba,
  • Christmas melon,
  • honeydew,(these generally don’t have the best disease resistance, but the colors and shapes are quite different)

MUSCADINES – Recommended

Muscadines are ideal for backyard gardens because you can successfully grow them with a minimum spray program. The best wine I ever had was made from muscadines but they are also eaten fresh and used for preserves. A strong trellis is needed. Like blueberries, muscadines are disease and insect resistant.

  • Cowart
  • Dulcet
  • Scuppernong

More information

ORANGES/TANGERINES – Marginal

We get a little too cold for most oranges. It is very possible to loose your oranges and possibly your tree if temperatures get low enough. Scale can be a problem. Some citrus need to be cross pollinated from another variety of citrus for pollination to take place.

  • Tangerines – Dancy, Ponkan (best choice for cold weather)
  • Tangerine hybrids – Orlando (tangelo)
  • Satsumas – Owari, Silverhill (best orange choice)
  • Navel – Washington, Dream (questionable due to cold temperatures)
  • Sweet Orange – Ambersweet (questionable due to cold temperatures)

More information

PEACHES – Recommended

Dormant trees must receive a given number of hours at temperatures below 60°F in order to break dormancy properly, flower, set and develop fruit. The current method of assessing chill unit accumulation is to count the number of hours of temperatures below 45°F that are received between October 1 and February 15. Savannah had 820 hours in 2008-2009 year, 670 hours in the 2007-2008 year and only 694 hours in 2006-2007 year. Rigid pest control is necessary for high-quality fruit. A spray program should begin with dormant sprays and be carried through the growing season. Trees are susceptible to tree bores and need to be protected most of the year with pesticides. I believe yellow versus white flesh peaches and clingstone versus freestone peaches are just a matter of personal choice.

  • Early May – Gulfcrest, Sunsplash, Florida Crest,
  • Mid May – Flordaking, Gulfking
  • Late May – Gulf Prince, Sunfire,
  • Early June – White Robin

PEARS – Recommended

Certain varieties are self-fruitful; that is, they can pollinate themselves. If you want only one pear tree, select a self-pollinating variety. Other pear varieties require cross-pollination. If you plant varieties that require cross-pollination, be sure to plant varieties that bloom at the same time. A gardener who produces the best quality fruit controls diseases and insects. Semi-rigid pest control is necessary for high-quality fruit. Fire blight is a disease that you should learn to recognize if you plan to grow pears. Only fire blight resistant varieties should be considered.

  • Baldwin, Orient (general purpose)
  • Kieffer (preserves)
  • Spalding (fresh)
  • Shinko (Asian – fresh)

More information

PERSIMMONS – Recommended

Semi-rigid pest control is necessary for high-quality fruit. Native persimmons are usually dioecious; that is, trees produce either male or female flowers. Only rarely are native persimmons self-pollinating. Thus, both female and male trees are usually necessary to produce a full crop. In oriental persimmons, female, male and/or perfect flowers can be produced on the same tree. In addition, many oriental persimmons can produce fruit from unfertilized flowers (parthenocarpic fruit), though such fruit have no seed. The oriental persimmon varieties Ichikikei Jiro, Tamopan, Tanenashi and Hachiya produce quality fruit without pollination. Although fruit can be produced without pollination, heavier and more consistent crops usually result from pollination. Parthenocarpic fruit are much more prone to drop during the growing season. Oriental persimmons can be pollinated by Fuyu or Gailey oriental varieties. Native persimmons will not cross-pollinate with oriental persimmons.

Native

  • Even Golden,
  • John Rick,
  • Woolbright

Oriental

  • Eureka,
  • Hana Fuyu,
  • Ichikikei Jiro

More information

PINEAPPLES Maringal

Should be grown in containers and taken indoors (or at least protected) from cold weather. Pineapples are biennial (take 2 years to grow)

More information

PLUMS – Recommend

Plum trees are susceptible to scale, various funguses, and other insects. Plums are very similar to peaches in regards to management. Semi-rigid pest control is necessary for high-quality fruit. Many plums (unlike peaches) are self sterile. Some plum varieties need to be cross pollinated from another variety of plum for pollination to take place.

  • Methley
  • Ruby Sweet

More information


RASPBERRIES – Do Not Recommend

I have been trying to grow raspberries at home for over 5 years with little and at best poor success. It is basically to hot for the plants even when protected. Diseases and insects are also a problem so pesticides need to be used. I feel some day that there will be a heat tolerant raspberry for the south but for now – don’t waste your time. Do not recommend.

RHUBARB – Do Not Recommend

To hot – don’t even try.

Do not recommend.

STRAWBERRIES – Recommend

Because of diseases, two very different production systems are used in Georgia. In the matted row system, plants are set out one spring and fruit the next. This system works best in north Georgia, and production may continue for several years. In the annual hill system, plants are set out in the fall and fruit the next spring. The planting is usually destroyed after the crop is harvested. This system works best in middle and South Georgia. Root-knot is the most common nematode attacking strawberries in Georgia. Semi-rigid pest control is necessary for high-quality fruit.

Matted row

  • Cardinal,
  • Earliglow

Annual hill system

  • Camarosa,
  • Chandler,
  • Sweet Charlie

More information


I would like to thank Gerard Krewer, George Boyhan, and Richard Wallace for their input.

Frizzle Top in Sago Palms

Source(s): Jacob G Price


Frizzle top is a condition in palm trees as well as Sago palms that causes newly emerged leaves to become yellowed, frizzled and distorted. The condition is caused by a deficiency in Manganese (Mn), a micronutrient needed by Sago’s.

pH and Mn in Sago Palms

The optimal pH for Sago’s is 6.0-6.5.. The optimal tissue analysis for Mn in Sago’s is 50-250 ppm. For every one point increase in pH, the availability of Mn decreases 100 times. In other words, Mn is 100 times more available in a 6.5 pH than a 7.5 pH. The Sago pictured on the left has a 7.5 pH and less than lOppm Mn.

Fertilizer Program to Prevent Frizzle Top in Sago’s

To remedy manganese deficiencies, spray leaves with a solution of 1 tsp/gallon of water monthly for three months. Have a soil analysis performed in the root zone around problem Sago’s to analyze pH. Fertilize Sago’s with 1.0 pound of palm fertilizer in April and September. Soils with a pH higher than 6.5 or with a history of frizzle top problems, should be fertilized with 1 to 5 pounds (depending on size) of Manganese Sulfate in September. Apply 1 pound of Manganese Sulfate each September to prevent problems.

If lower leaves show an unusual amount of yellowing, add 1 pound of Magnesium Sulfate in June. Apply all fertilizers in a 100 square foot area around the plant. Most of the root mass in Sago palms is near the trunk with some roots extending to the edge of the leaves. If the pH was in a normal range the Sago may have problems other than frizzle top. Refer to previous fact sheet for other Sago problems.

Forcing Bulbs to Bloom Inside

Source(s): Willie O Chance


Many Georgia gardeners look forward to the colorful blossoms of spring-flowering bulbs. The yellows, reds and lavenders are a promise of summer’s coming. Although bulbs are usually planted outdoors, you can grow many types indoors. With a little bit of care and patience, spring-flowering bulbs like crocus, hyacinths, narcissus and tulips can easily be forced to bloom inside.

Forcing bulbs simply means manipulating the light, humidity, and temperature conditions such that bulbs believe spring has arrived and it is time to bloom. Most spring-flowering bulbs need a period of cool temperatures before blooming. During this time the bulb grows roots and forms flower shoots inside the bulb. Proper watering and good drainage are also essential for good growth. Not all bulbs are created equally when it comes to force blooming. Narcissus and hyacinths are easiest to force but you can also try tulips, crocus, daffodils, muscari and others.

Selecting Bulbs and Containers

When selecting bulbs for indoor forcing, bigger is better. Larger bulbs have more stored food which means a greater chance of success. Bulbs should be firm, large and healthy looking. Pick bulbs that show no signs of withering, disease, mold or insect damage.

The best containers for bulb forcing are ‘bulb pans’. These are shallow, wide clay pots that provide excellent drainage and lots of room for bulbs. However, any clay or plastic container with drainage holes will work. Wash reused pots with a dilute bleach solution (one part bleach, nine parts water) before planting into them.

The best soil for growing bulbs is a loose, friable, well-drained loam. It is best to use a sterile, artificial soil mix with a high percentage of vermiculite. Avoid using soil from your garden, as it is often full of weeds and diseases. Soak clay pots for 24 hours before using. Place one inch of gravel in the bottom of the pot and add some soil. Arrange bulbs so they are almost touching. Cover bulbs and firm the soil around them.

Most bulbs are covered by ½ inch of soil except for hyacinths which may protrude slightly above the soil line. Water to settle the soil. Keep the soil moist but not wet or soggy as bulbs will rot if kept too wet.

Store containers with bulbs in a dark place at 40o to 50o F for 10 to 12 weeks – a little longer for tulips (15 weeks). The best location is probably an old refrigerator that does not cool well. Bulbs can be chilled in any refrigerator, but must not freeze.

Flowering

Bulbs should be well rooted after the cooling period. Roots may have grown out the drainage holes with shoots appearing above the soil line. Rooted bulbs are kept in a dimly lit, cool (50o – 60oF) room for about 10 – 14 days. Then move pots into a well-lit room of about 50o – 60oF. Water regularly and keep pots from drafts and heaters. Time to bloom will vary with variety but they should bud within 4 to 6 weeks. Flowers will last longer if kept cool. After bloom you may transfer bulbs to the garden or discard since forced bulbs seldom bloom well again.

Various bulbs will respond differently to forcing. You might try planting several types of bulbs and note the results. If at first you do not succeed, try again. Planning, patience and experience will help you succeed at forcing flowering bulbs and bringing spring inside during dreary winter days.


Center Publication Number: 238

Forcing Bulbs Indoors

Source(s):

  • Al Pertuit, Extension Floriculture Specialist, Clemson University.
  • Bob Polomski, Extension Consumer Horticulturist.

Making a plant flower at a predetermined time or under artificially imposed conditions is called forcing. Hardy bulbs are particularly suited for forcing indoors and offer a succession of color throughout the winter and spring months.

The most common hardy bulbs for forcing are crocuses (Crocus species), daffodils (Narcissus species), hyacinths (Hyacinthus species) and tulips (Tulipa species). Others that can easily be forced include Dutch iris (I. x hollandica) and netted iris (Iris reticulata), snowdrop (Galanthus species), grape hyacinth (Muscari species), winter aconite (Eranthis species), star-of-Bethlehem (Ornithogalum species), and Brodiaea species.

Allium, Camassia, Lilium and Scilla species are considered difficult-to-force bulbs; they require special techniques and usually greenhouse conditions (e.g., high light intensities).

Forcing hardy bulbs involves four stages:

  1. selecting appropriate bulbs;
  2. planting;
  3. cooling; and
  4. forcing into flower.

For the best results, purchase only those cultivars that are recommended for forcing, especially if a wide number of cultivars are available, as is the case with tulips, hyacinths and daffodils. Handle the bulbs with care at all times. They are living plants and should not be dropped or subjected to extremely low or high temperatures. If you cannot plant your bulbs immediately, store them in a cool place (35 to 55 °F). Bare bulbs can be stored for several weeks in the refrigerator prior to potting. Store them in a mesh bag or a paper bag with holes to permit ventilation. Vegetable or crisper drawers can be used, but avoid storing bulbs in the same drawer as ripening fruit or vegetables which give off ethylene gas which may harm the bulbs. Also, some bulbs are poisonous, so this storage method is not recommended for households with young children.

Planting

Bulbs should be potted up anytime from mid-September to December, depending on the desired date of flowering and the length of storage. In general, plant in mid-September for flowering in late December, around mid-October for flowers in February and in mid-November for March and April flowers.

The potting medium must be well-drained, retain adequate moisture and be able to anchor the bulbs. Commercial potting soil is adequate, but a better choice is a mix composed of equal volumes of potting soil, sphagnum peat moss and perlite. Since the bulbs already contain enough food for the developing flowers and roots, they do not have to be fertilized. Use clean pots that have drainage holes in the bottom. If you use clay pots, soak them overnight so they won’t draw moisture from the planting medium.

Fill each pot loosely with soil. Ideally, bulbs should be planted at the same depth as bulbs grown outdoors; however, this is often not possible with larger bulbs which need a pot that is deep enough to allow at least 1 to 2 inches of soil beneath the bulb. Tulips and daffodils may be left with the tips of the bulbs showing; smaller bulbs such as crocus, snowdrop and grape hyacinth should be covered completely. Do not press the bulbs into the soil; the soil should be loose so roots can grow through it easily. A 6-inch pot will accommodate six tulips, three hyacinths, six daffodils, or 15 crocuses. When planting tulips, face the flat side of the bulb toward the outside of the pot. Since the first (lowest) leaf produced by the flowering shoot is always produced towards the flat side of the bulb, the lowest leaves will arch over the rim and create an attractive, uniform appearance. After setting the bulbs, fill the pot with soil to within ¼- to ½-inch of the rim. Add water until it drips through the drainage hole in the bottom of the pot. Label each pot, noting the name of the cultivar, the planting date and the date to be brought indoors for forcing.

Cooling the Bulbs

All hardy bulbs must be exposed to cool temperatures between 35 and 50 °F to prepare them for subsequent leaf and flower growth. During this cool period, the plant’s roots are forming and the stem is elongating. The optimum cooling period is from 12 to 16 weeks. Although they can be cooled anywhere from 12 to 18 weeks, the stem length will suffer, becoming shorter (flowers may also abort) if the bulbs have been cooled for fewer than 14 weeks and longer if the bulbs have been cooled for more than 15 weeks. If the bulbs were held in the refrigerator for more than three weeks, subtract three weeks from the required cooling time.

Any structure that maintains temperatures between 35 and 50 °F is fine (e.g., an unheated basement, crawl space, or an old refrigerator). For areas that experience sufficiently cold temperatures during the winter months, pots can be stored outdoors in a cold frame. Locate the cold frame in a well-drained, shady location or on the north side of a building where the soil is as uniformly cool as possible. Place the pots in the coldframe and cover them with loose insulating material such as sawdust, straw, leaves, peat moss or shredded styrofoam. Close the frame early in December and open it on mild days to prevent too much heat from building up inside the frame, stimulating top growth before the roots have formed. Check the pots periodically to see that the medium is moist.

Forcing Blooms

At the forcing stage, the pots are taken out of storage at the completion of their cool period and into warmth and light, which triggers the formation of leaves and flowers. Place the pots in a cool location (60 to 65 °F) receiving indirect sunlight. When the shoots turn green, expose the pots to warmer temperatures and more light to stimulate growth and flowering. Rotate the pots regularly so that all the leaves receive an equal amount of light. Flower buds can be expected within three to four weeks. When the buds begin to show their color, move the pots into indirect sunlight to prolong the flowers. Be sure to keep the soil evenly moist throughout the forcing period. Flowers will last longer if the pots are moved into a cool room at night.

Hardy bulbs that have been forced into flower should be planted in the garden once spring arrives, or allowed to mature and go dormant in their pots and then planted in the fall. Daffodils can be transplanted into the garden in the spring. They will not flower the following year, but may the year after. Other bulbs such as tulips and hyacinths are best discarded after forcing.

Forcing Without Cooling

The paper white narcissus (N. tazetta ‘Paper White’), its yellow cultivar Soleil d’Or, and the Chinese sacred lily (N. tazetta var. orientalis) can all be forced without cooling. Successive plantings made about two weeks apart after mid-October can produce indoor flowers from Thanksgiving until late March.

Start by filling an undrained decorative bowl or dish that is at least 2 to 3 inches deep with enough pebbles, pea gravel, coarse sand or pearl chips to reach about 1 inch below the top. Add water until it is barely below the surface of the gravel. Set the bulbs on top and hold in place with enough gravel to cover the bottom quarter of each bulb. Carefully maintain that water level.

Tender Narcissus are best kept in a cool 50 to 60 °F location in low light until they are well-rooted and the shoots appear, usually in about two to three weeks. Then bring them gradually into direct sunlight and warmer temperatures. These bulbs cannot be forced again after blooming; discard them.

Amaryllis (Hippeastrum cultivars) can be forced inside in four to six weeks without cooling, and then planted outside in the spring or allowed to remain in pot culture. To program potted amaryllis for forcing, withhold water in mid-August, then start watering again about six weeks before you want them to flower.


Center Publication Number: 160